lunes, 28 de diciembre de 2020

Refresh Your Echeveria Garden Amazing tips

Eighteen months after I planted it, my multipot echeveria garden was looking ratty. Over time, as new leaves formed from the centers of rosettes, lower leaves had dried and clung to ever-lengthening stems. Bloom spikes I'd left intact for hummingbirds were several feet long and untidy. An 18-inch-diameter, icy blue Echeveria 'Encantada' that had rotted---yes, it was heartbreaking---had left a big gap.

Echeveria pot redo (c) Debra Lee Baldwin

Echeveria pot redo: Before. 

I'm pleased with the results of a recent quick redo. Total cost was under $100 for gorgeous new plants to fill gaps in four large pots. I think you'll agree that my potted echeveria garden looks better than ever. Watch me rejuvenate it in my new video: Refresh Your Echeveria Garden (6:31).

Refresh Your Echeveria Garden video

New video: Refresh Your Echeveria Garden (6:31)

Btw, I grow echeverias in pots not only to protect them, but also because these rose-like succulents are too beautiful to not see and appreciate up close. But the same concept and methods I offer here would work for flower beds, window boxes and other succulent-friendly spaces.

Step-By-Step

As I "fluff" my pots in the how-to video, you'll see me...

  1. Pull off any dry, crispy lower leaves. There's nothing like removing dead stuff to make plants look good again!
  2. Loosen the soil to make it friable, i.e. soft, so roots of new plants and cuttings can easily take hold.
  3. Take cuttings from filler plants. I kept just enough of each cutting's stem to anchor the rosette at the top.
  4. Remove bloom spikes. Cut them close to the rosette. (See what I do with them below.)
  5. Fill gaps with new nursery plants. Makes an instant difference!
  6. Spread soil into low spots. I mainly used soil from the nursery pots, but I also added potting soil to make cuttings easy to tuck in.
Echeveria pot after fluffing (c) Debra Lee Baldwin

Pots after fluffing

Tips and tricks

A few helpful ideas and cautions:

  1. In the video, you'll see that, rather than digging into the soil (which would disturb roots of existing plants), I put the root balls of nursery plants on top of the soil. Elevating the plants adds texture and lushness to the composition, creating a multidimensional look of a flower garden. For more on this technique and why it works practically and aesthetically, see my posts and videos on mounded arrangements.
  2. Check for mealy bugs in leaf axils and in the centers of rosettes. Spray any you find with Isopropyl alcohol (70%).
  3. If you live where echeverias might be damaged by frost, keep old, dry leaves on the plants. They'll protect the trunk and vital core from cold and sunburn. Just know that in addition to being unsightly, dry leaves may harbor mealies and other pests.
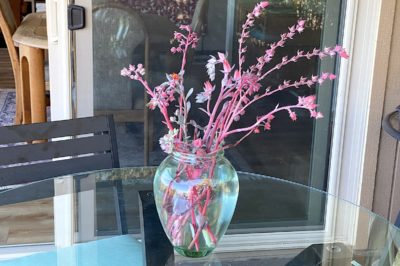
    Bouquet of echeveria blooms (c) Debra Lee Baldwin

    Bouquet of echeveria blooms

  4. Save bloom spikes for a bouquet. I set them in a vase on a patio table, so hummers can find and enjoy the blooms. Echeveria flowers stay fresh and buds continue to open for weeks. Plus they have intriguing Barbie-pink stems.
  5. Related varieties such as graptosedums, sedeverias and graptopetalums blend beautifully with echeverias and serve as filler plants. These intergeneric hybrids offset and trail, but they do lose their lower leaves over time, exposing ever-lengthening stems. I cut naked stems near the soil (or pull up the entire plant), and save top growth (rosettes at the tip) to use as cuttings.

What about beheading?

Several large echeverias in my potted garden could have been beheaded, but I decided not to. I wanted a quick fix, and I thought the leggy specimens still looked OK. I concealed their goosenecks with additional plants, and besides, the rosettes hadn't started to shrink. That's when you really know an echeveria needs its head sliced off, and to be replanted as a cutting: The rosette gets smaller and the diameter and length of the trunk get larger. I figured, if I can get another six to eight months out of them, why not?
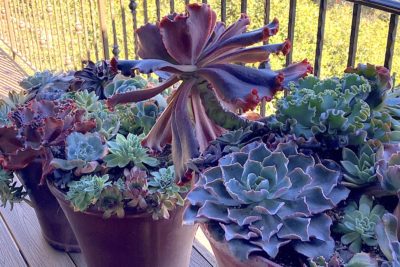
Echeveria garden in pots (c) Debra Lee Baldwin

I like the way this leaning echeveria visually unifies the potted garden. Or at least, that's my excuse, ha.

My new echeverias

Don't hate me. I live near one of the best sources of spectacular, perfectly grown echeveria cultivars: Oasis Water Efficient Gardens. This retail nursery offers succulents from the largest wholesale grower in the US: Altman Plants. It's no exaggeration that every time I go to Oasis, I see something new---which is saying a lot. (When it comes to succulents, I get around.)

Altman's has a tissue culture lab and an echeveria hybridizer on staff, so the company is able to develop tough, beautiful, unusual, commercially-desirable cultivars. As you might imagine, it's an expensive undertaking to bring any new plant to market, so Altman's patents its introductions. The letters "PPA" after a cultivar name mean it's unlawful to propagate and sell it...just as it would be to plagiarize a writer or artist's work.

New echeverias (c) Debra Lee Baldwin

Clockwise from top: Echeveria 'Andromeda' PPA, E. 'Sea Dragon PPA, E. Kaliska, E. 'Autumn Flame' PPA.

If you've been to this site's Echeveria page, you know there are a staggering number of cultivars, each more beautiful than the last. Not all are from Altman Plants, but many outstanding ones are.

Those I brought home from Oasis to plug into my pots include Echeveria 'Andromeda' PPA, E. 'Autumn Flame' PPA, E. 'Elfstone', E. 'Kaliska', and E. 'Sea Dragon' PPA. So, do you need those exact varieties to do what I did in my potted garden? No! Use what's available. Echeverias are pretty much interchangeable. If you're longing for rarities, take heart, more and more are becoming available as supply catches up with demand.

If you're in San Diego area, shop for magnificent echeverias at Waterwise Botanicals as well as Oasis (at present, neither sell mail-order). Online suppliers include Wright Nursery, and to a limited extent Mountain Crest Gardens and Altman Plants' retail site. 

As always, I welcome your comments and questions! 

Floral style succulent arrangement

Echeveria Info, Photos & Varieties

Echeveria Info, Photos & Varieties How to grow echeverias perfectly, plus an extensive gallery, all ID’d About Echeverias Here you’ll find expert advice to help you grow echeverias perfectly, with a gallery of 150+ beautiful, notable species and cultivars. Learn about the plants’ native habitat, optimal care, light and water requirements, flowering, soil, fertilizer, pests,…

Potted echeveria garden

Plant an Echeveria Garden in Pots

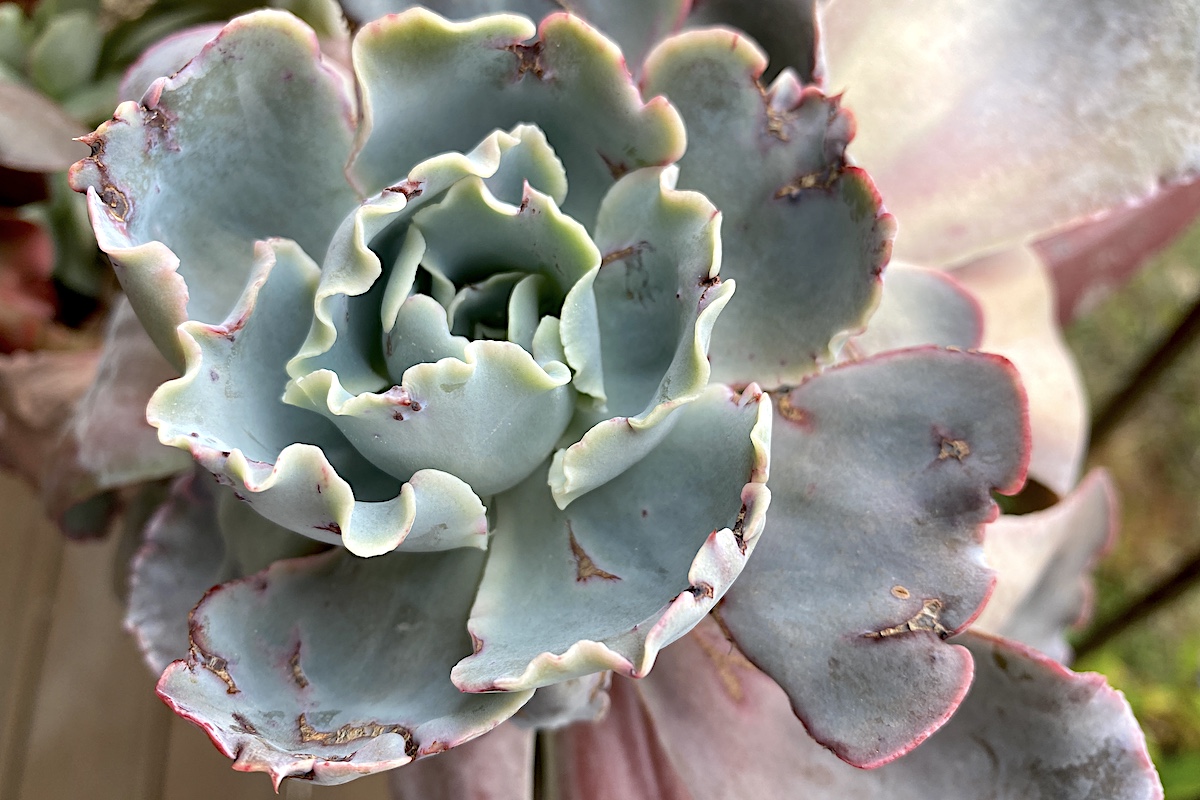
Echeverias do great in containers, so why not plant an echeveria garden all in pots? Because echeverias have great color, symmetry and resemble fleshy flowers, my own potted collection suggests an exotic flower garden.

Fancy ruffled echeveria

How to Behead and Replant Echeverias

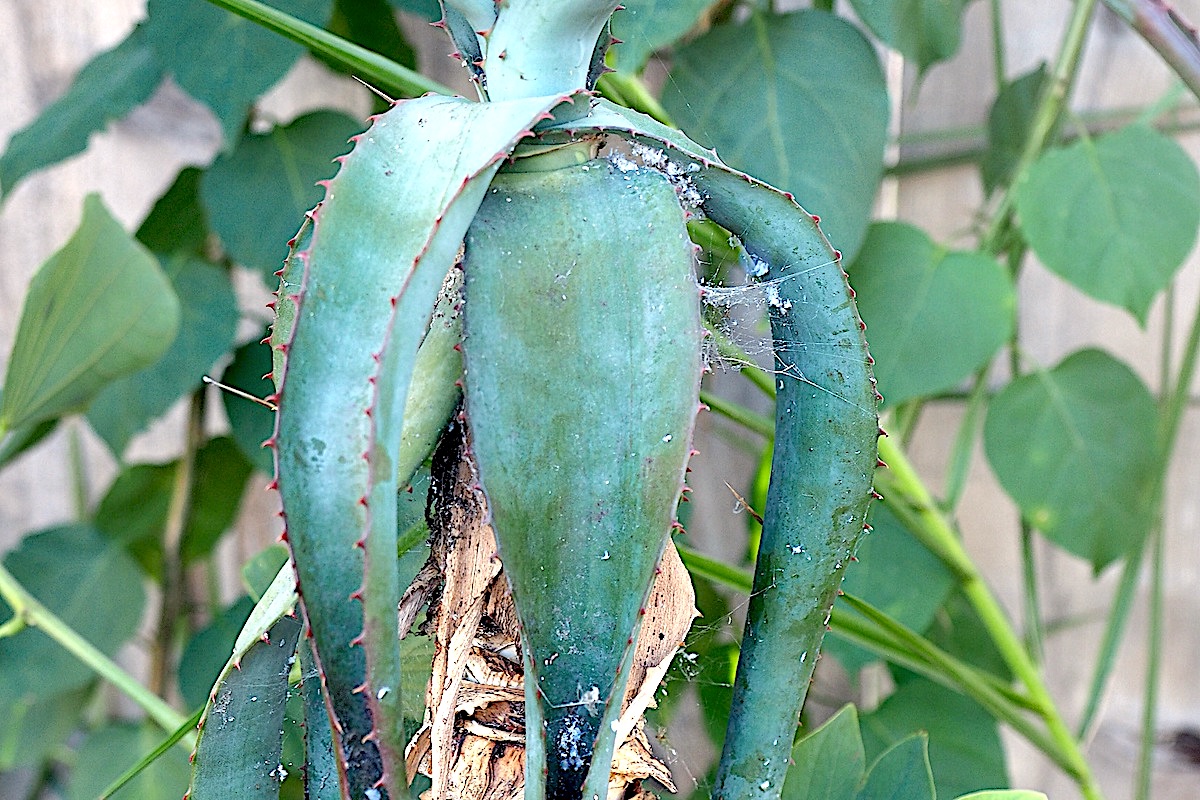
Fancy ruffled echeverias—those large, flowerlike succulents—eventually need to be beheaded and the rosettes replanted. This is a bother, but it comes with a benefit: New clones will form on old, headless stalks. But not always. Here’s how to ensure success.

Full sun summer succulent arrangement

Plant a Pot with Colorful Rosette Succulents

It’s easy to plant a pot with colorful rosette succulents that makes people gasp when they see it. A sure-fire way to make one appealing is to combine succulents that are similar yet different

The post Refresh Your Echeveria Garden appeared first on Debra Lee Baldwin. Copyright © Debra Lee Baldwin.


from Debra Lee Baldwin https://ift.tt/2WSzxII
via IFTTT

miércoles, 9 de diciembre de 2020

How to Deal with Mealy Bugs on Succulents Amazing tips

If you grow succulents, sooner or later you'll deal with mealy bugs. For newbies, they may come as a surprise. Suddenly the plants are dotted and webbed with what looks like lint. Veterans are more vigilant. We check for mealies routinely and halt the spread early, before it's severe.

Here's how to deal with early and advanced infestations.

Echeveria six months later

An echeveria's scarred leaves date to a mealy infestation six months prior.

Inspection and Treatment

Check for mealies in the centers of rosette succulents, in crevices, and in leaf axils (where leaves join stems). Unlike aphids and thrips, mealy bugs usually don't colonize flower buds. In my garden, mealies tend to be more prevalent in summer and fall. Ants transport and "farm" the pests for their sweet secretions.

Treat by spraying with 70% Isopropyl alcohol (use 70%; 90% is too harsh). I buy a  32-oz bottle at a supermarket or drug store and add a spray attachment from an empty bottle of, say, Windex. (Btw, some growers use Windex to control mealies and other pests.) If you're treating a delicate succulent, play it safe and dilute the alcohol half-strength with water.

Drenching the bugs with alcohol kills them on contact and their eggs as well. Although it may temporarily dissolve the leaves' powdery coating, I've yet to see alcohol have a lasting impact on the plant.

Isolate affected plants to keep pests from spreading.

Severe mealy bug infestation

Severe mealy bug infestation on an aloe

When an Infestation is Severe

From my site's Pest Forum: An exchange with Kristi, a newsletter subscriber in Denver. She writes:

Q: Help! I'm at my wits end with an infestation of mealy bugs on my beloved Jade plant. I’ve sprayed with 70% Isopropyl alcohol repeatedly and still have a problem. Not too mention hard to spray in the shower with the smell! There is damage/scarring where the leaves meet the stem and in the middle of some of the leaves. The plant is very big and dense so its difficult to spray into the middle and hit all the leaves and underneath. The plant is very heavy but we do have some warmer weather this week that I can take it outside to spray the plant with alcohol heavily. Short of cutting off every leaf, is there anything else I can try? Is there a safe systemic insecticide to try?

A: Once a mealy bug infestation gets that bad, conventional wisdom is to get rid of the plant. But this one is important to you, so here are some things to try:

  • Take it outside on a warm day (above 40 degrees) and hose it down. It’s OK if some leaves fall off. If they’re that loose, they probably will anyway.
  • Repot it. Mealies can get in the soil.
  • If that’s not possible, fill a bucket with water and add systemic insecticide “for sucking insects” per label directions. Wear gloves. Brands available on Amazon include BioAdvanced and Monterey Systemic Soil Drench.* (Both are used for food crops, so they're relatively "safe.") Let the pot sit in the bucket until the soil is soaked—an hour or so.
  • After the plant is hosed and/or soaked, drench its leaves and stems with dilute insecticide. Let dry before bringing it back inside.

Prevent a Recurrence

  • Do NOT put the plant back where it was. Regardless, DO clean the area thoroughly, because mealies can hide in, and lay eggs in, the tiniest crevices.
  • Indoor plants can be breeding grounds. Get rid of or isolate any that have the problem. Treat with alcohol. If plants are severely infested but worth saving, follow steps above.
  • Good air circulation is key to keeping mealies and other pests from settling in. To help it recover over the winter, you might put your jade under full-spectrum lights and use a fan (both on a 12-hour timer).
  • Consider thinning it out so air circulates through the plant. Jade cuttings are as good as having new plants, they’re that easy to start.
  • Keep me posted on the patient’s progress!

*Affiliate links. 

Related info on this site

Mycoplasma on echeveria

Succulent Pests and Problems Q&A Forum

Are pests or mysterious maladies causing problems with your succulents? This page is a forum for you to ask questions, leave comments and share what works for you. Others can see and benefit from the answers. Your own tried-and-true solutions are welcome, too! 

Uh-oh, Is My Succulent Sick?

Succulent Pests, Diseases and Problems Keep your succulents looking their best When a succulent isn’t looking quite right, you may wonder if you’ve done something wrong. Here’s what to look for: symptoms, causes, severity, prevention, and treatments for common succulent pests and problems. ‘Sunburst’ aeonium showing abrasion bruises Abrasion Not Serious but unsightly. Plants eventually outgrow…

The post How to Deal with Mealy Bugs on Succulents appeared first on Debra Lee Baldwin. Copyright © Debra Lee Baldwin.


from Debra Lee Baldwin https://ift.tt/3gsENf4
via IFTTT
lunes, 30 de noviembre de 2020

Make a Mounded Succulent Arrangement Amazing tips

Many eye-catching succulent arrangements are mounded, meaning plants are massed atop the container. Mounded arrangements look established right away and are quick and easy to assemble. The secret is stack root balls on top of each other and angle rosettes outward. They don't tumble out because they're recessed a little, and are supported by those below them.

Materials

Sempervivum and sedum

Sempervivum and sedum

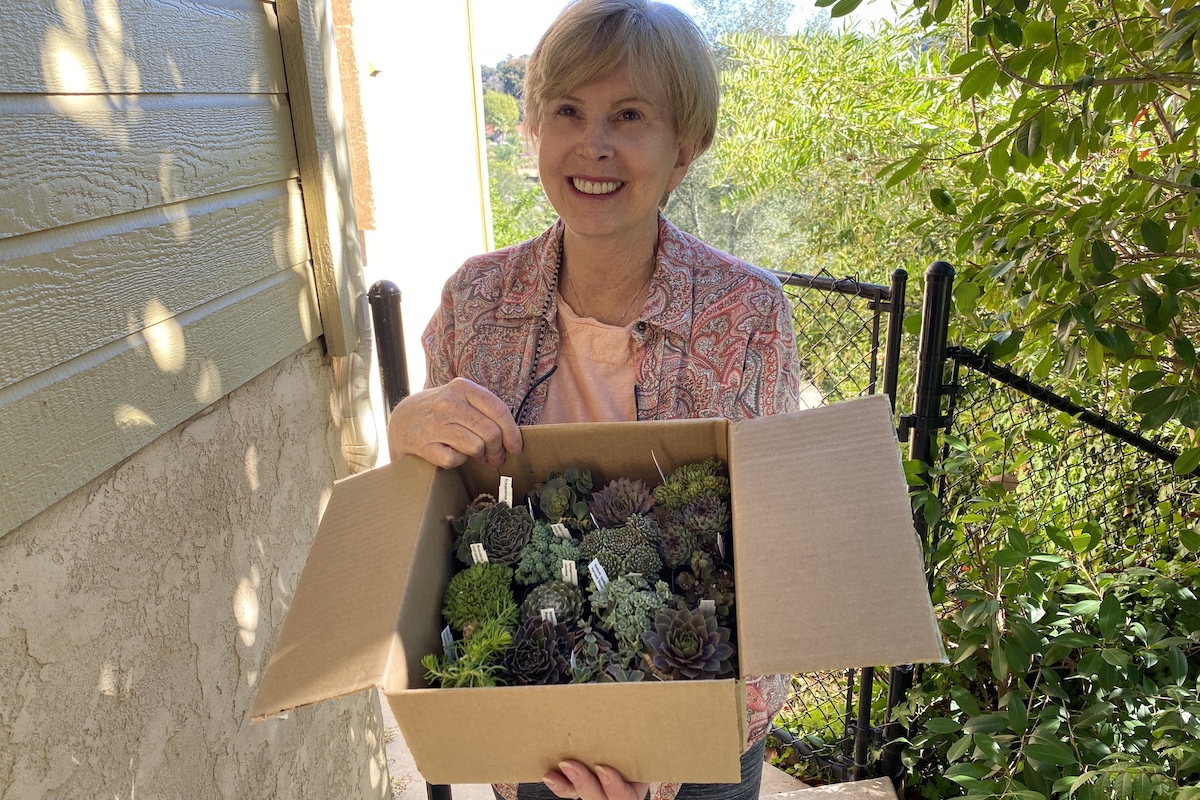
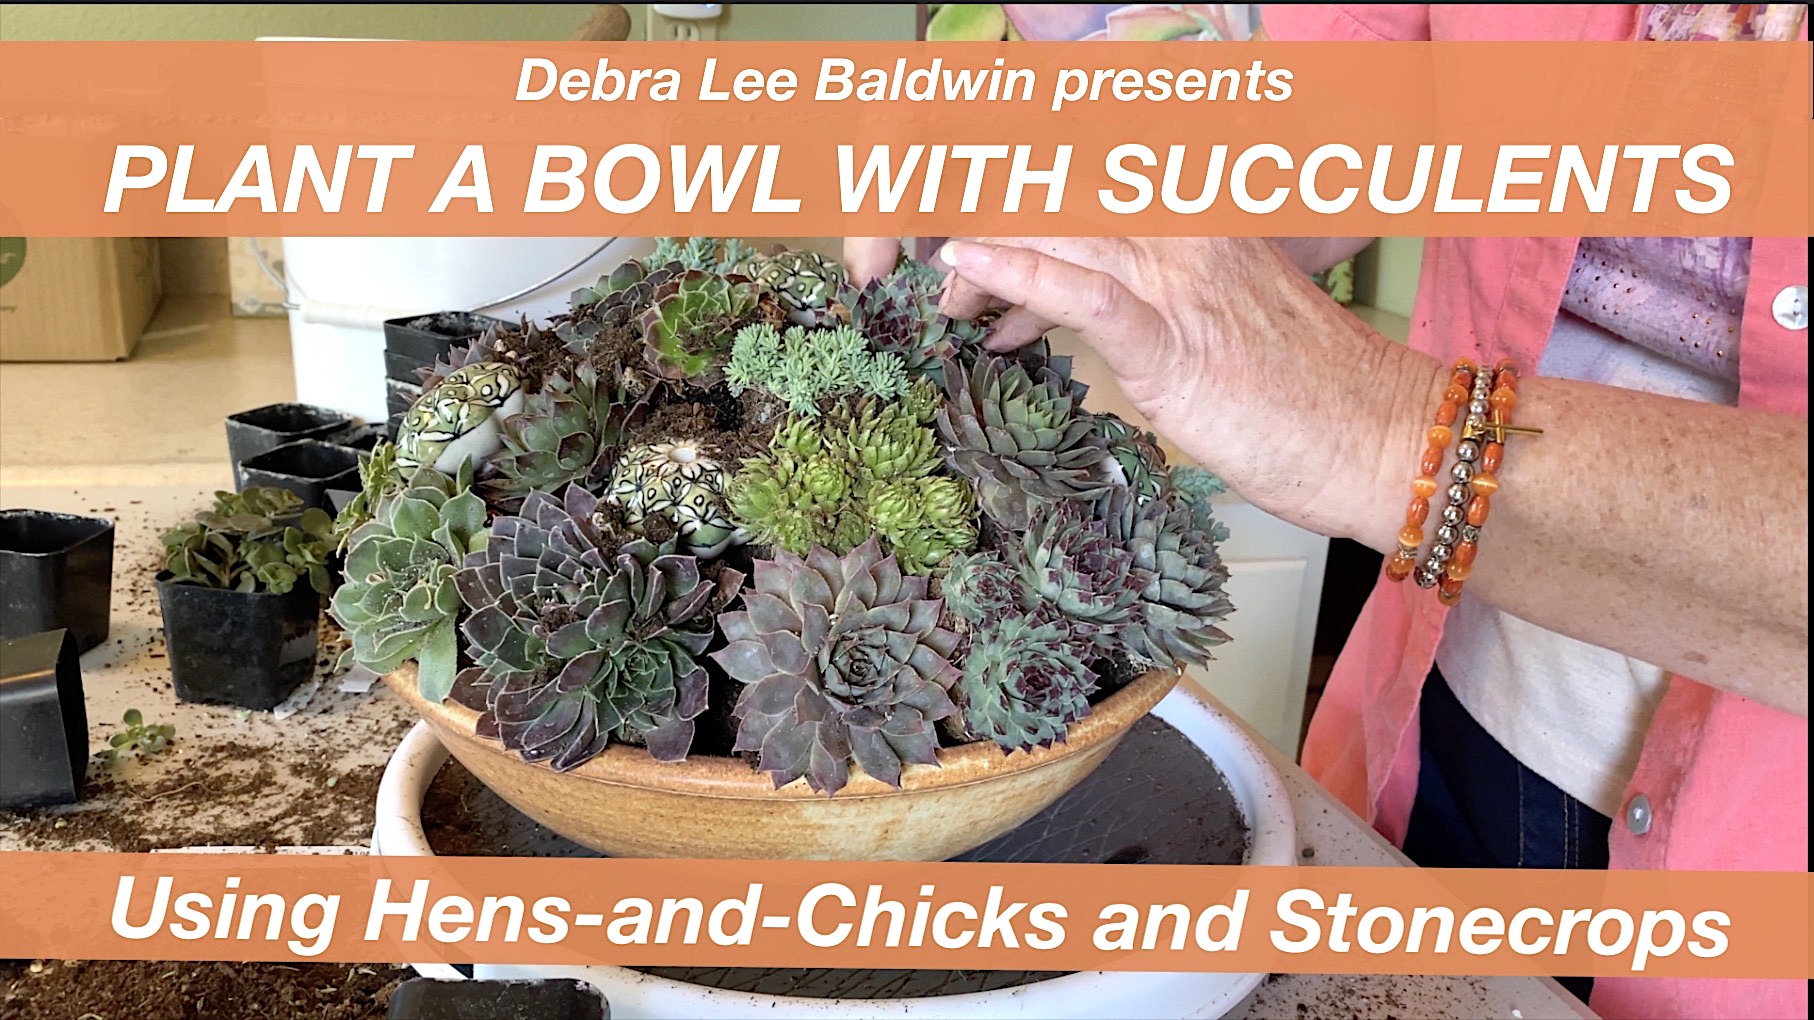
For a 12-inch-diameter container 3 inches deep, I used 22 sempervivums (hens-and-chicks) and six sedums (stonecrops), all in 2-inch pots. Find species and cultivar names below. All are from Mountain Crest Gardens and are cold-hardy to at least zero (some to -30F). Other rosette succulents, like echeverias, would work as well.

Learn more about cold-hardy succulents.

Step-by-Step DIY

Materials for succulent bowl arrangement

I drilled a hole in this stoneware serving bowl so I could use it as a pot for succulents.

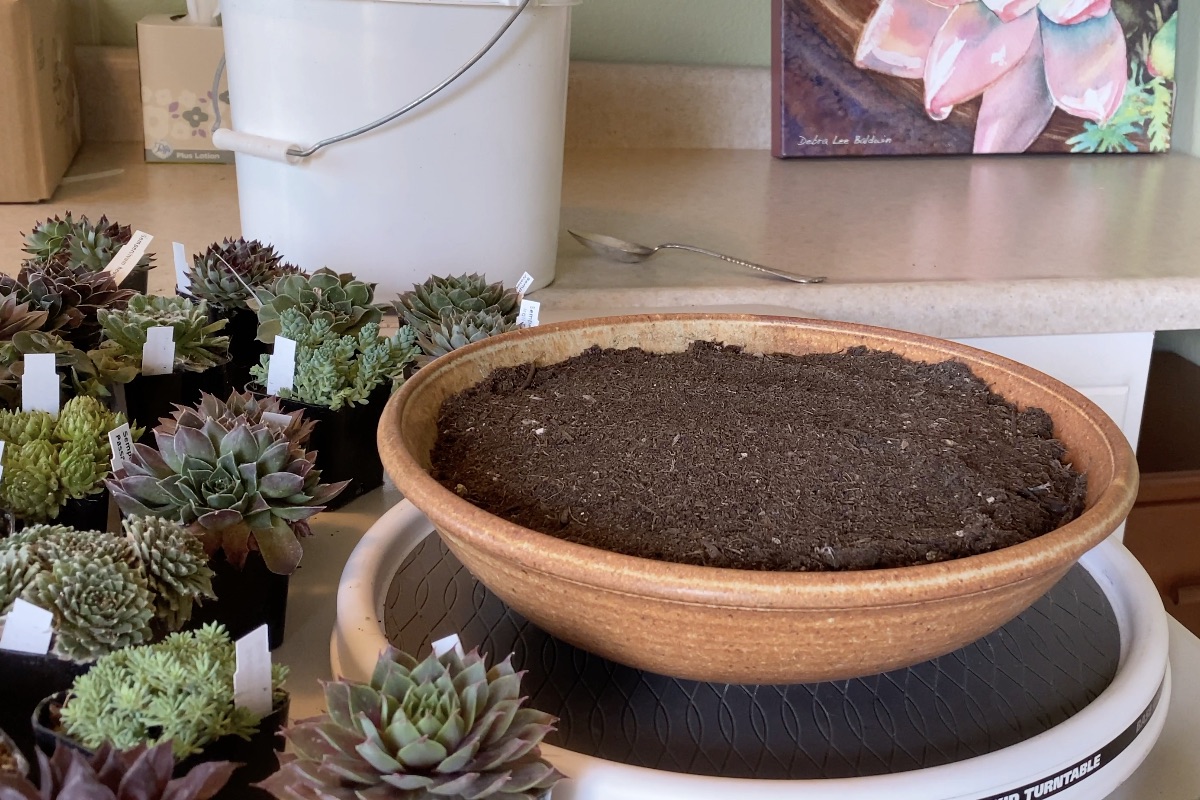
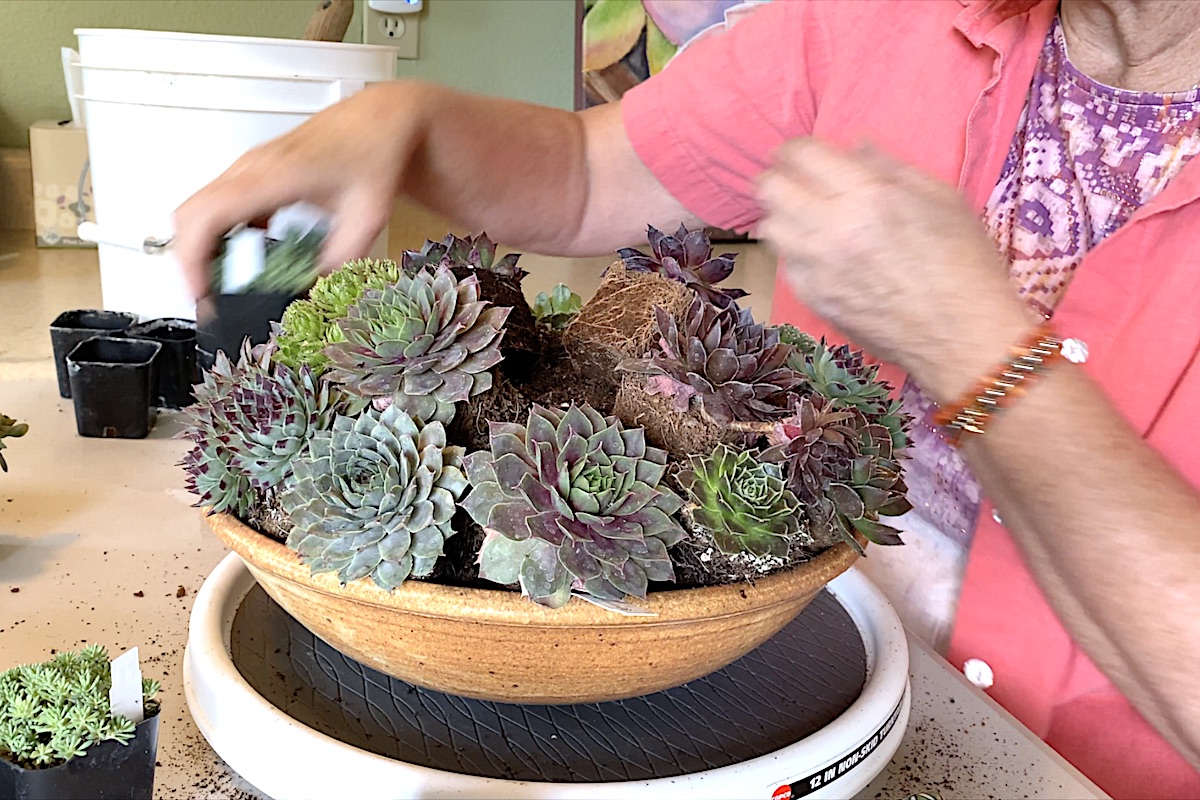
  1. (Above) Fill the container to about an inch below the rim with potting soil.
First layer

First layer

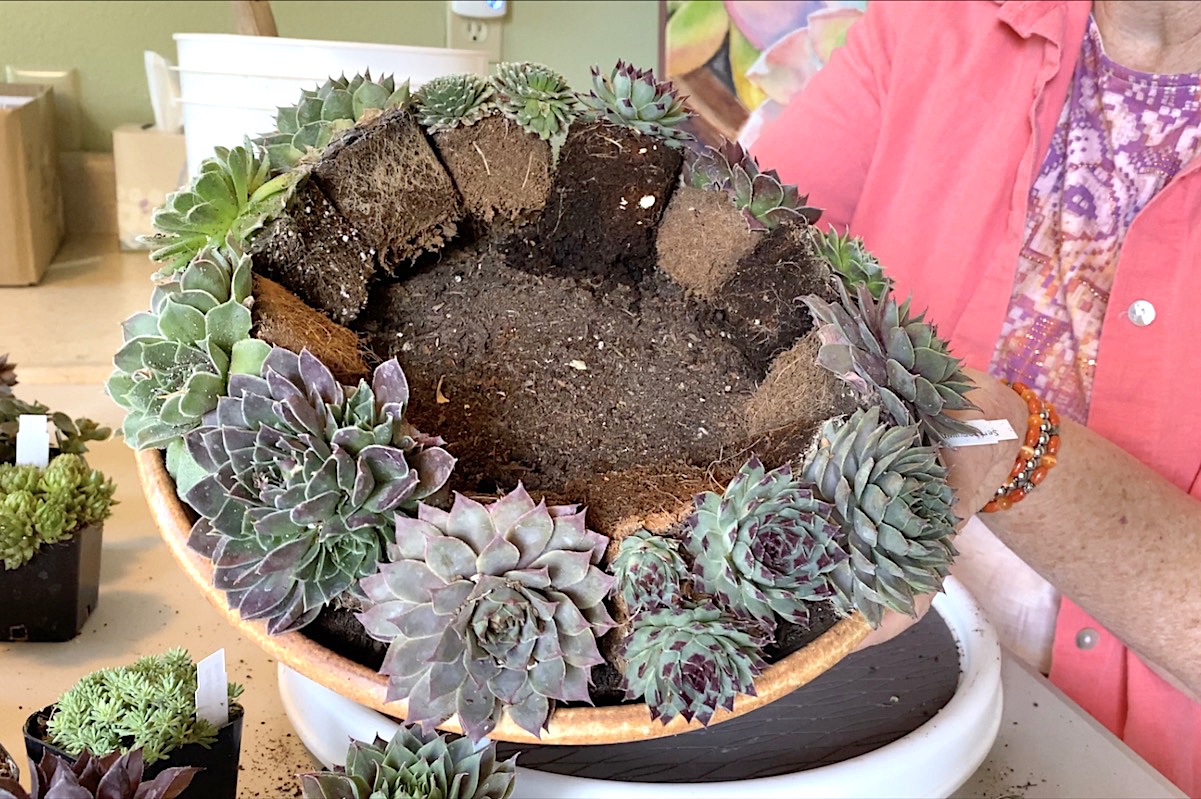
2. (Above) Slide plants out of their pots and lean them along the rim with their root balls atop the soil, and the base of each rosette resting on the edge of the pot.

Sedum & doorknobs

Note: You'll see in the video I replaced several bottom-row semps with sedums. They add texture and trail.

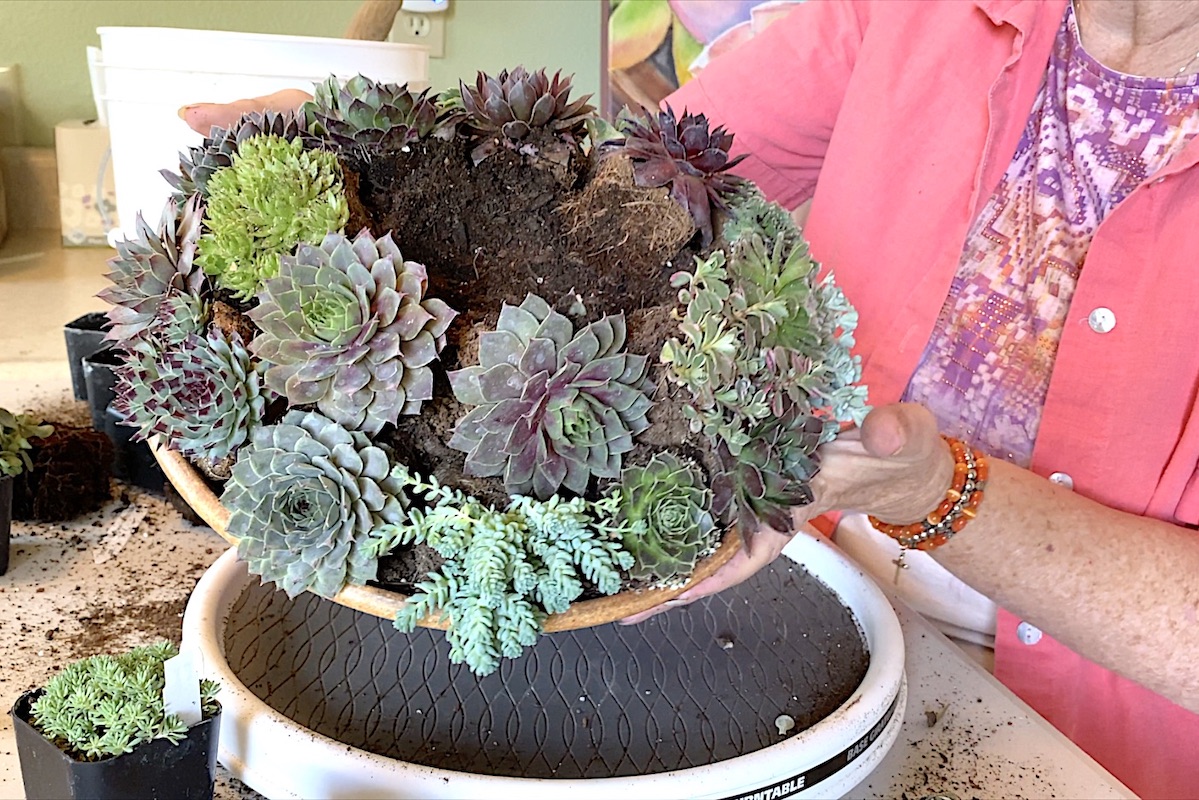
3. (Below) Add soil to fill the open area shown in the first step, then add more plants to create a similar second layer. These should be recessed, angle upward at about 45 degrees, with bottom leaves resting against the top leaves of the first layer.

Second layer

Second layer

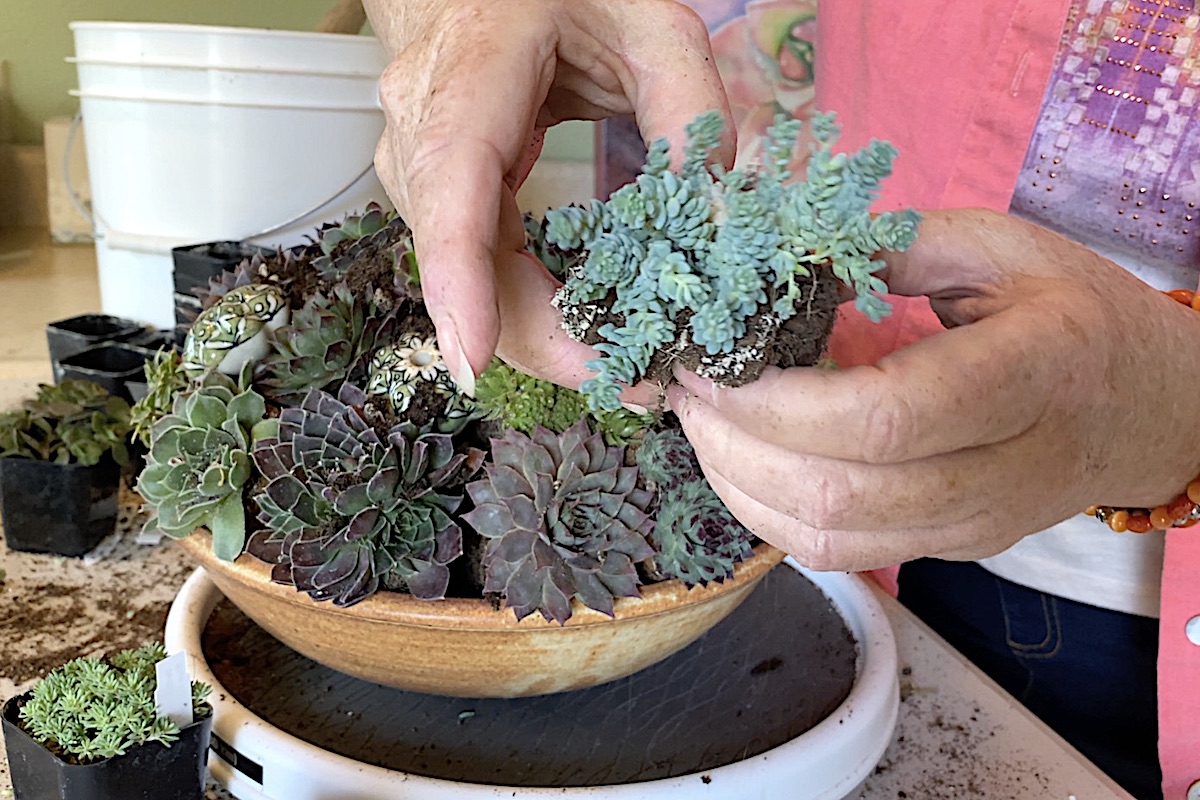
4. (Below) Add more plants to create the third (top) layer. Add soil to elevate them, if need be, so the overall shape of the arrangement is a dome. Tuck sedum into gaps. (Gently pull root balls apart to make the sedums easier to plant.)

Top layer

Top layer

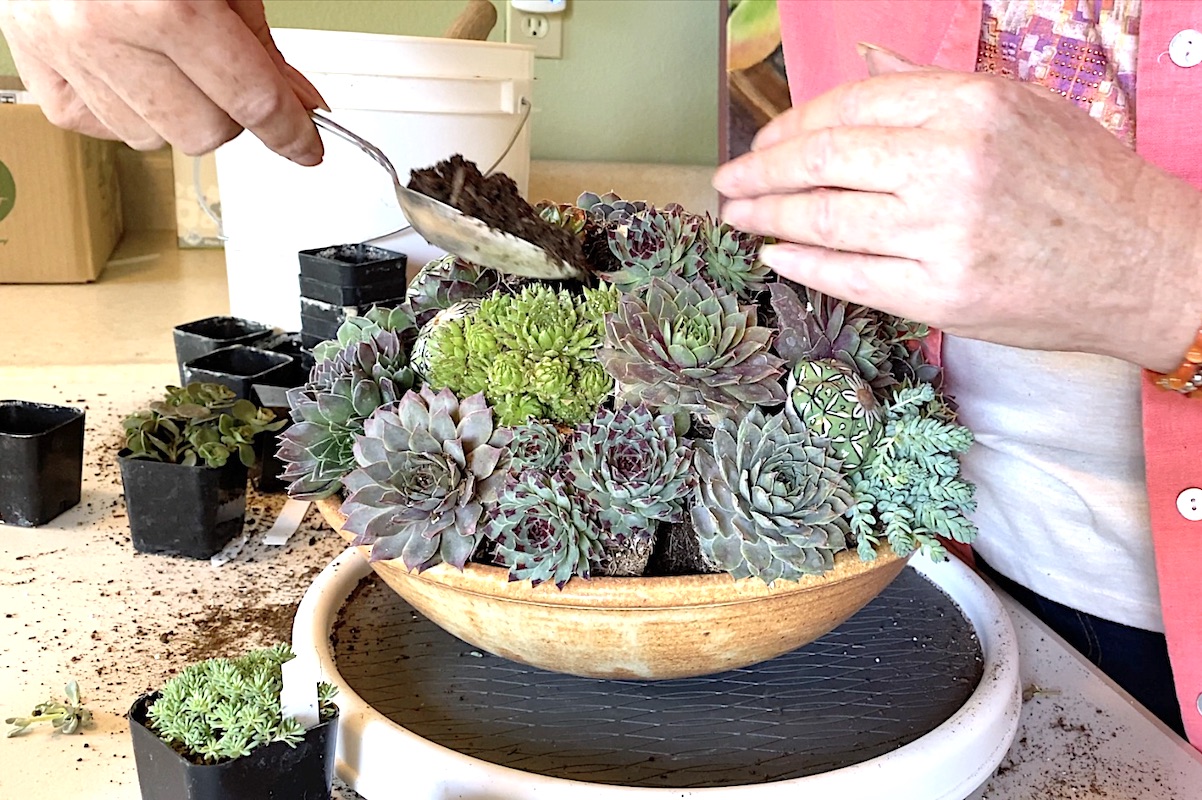
5. (Below) Fill remaining openings with soil. (I used a spoon.) To add interest, I embellished the arrangement with ceramic drawer knobs that resemble semps. 

Add soil to fill gaps

Add soil to openings

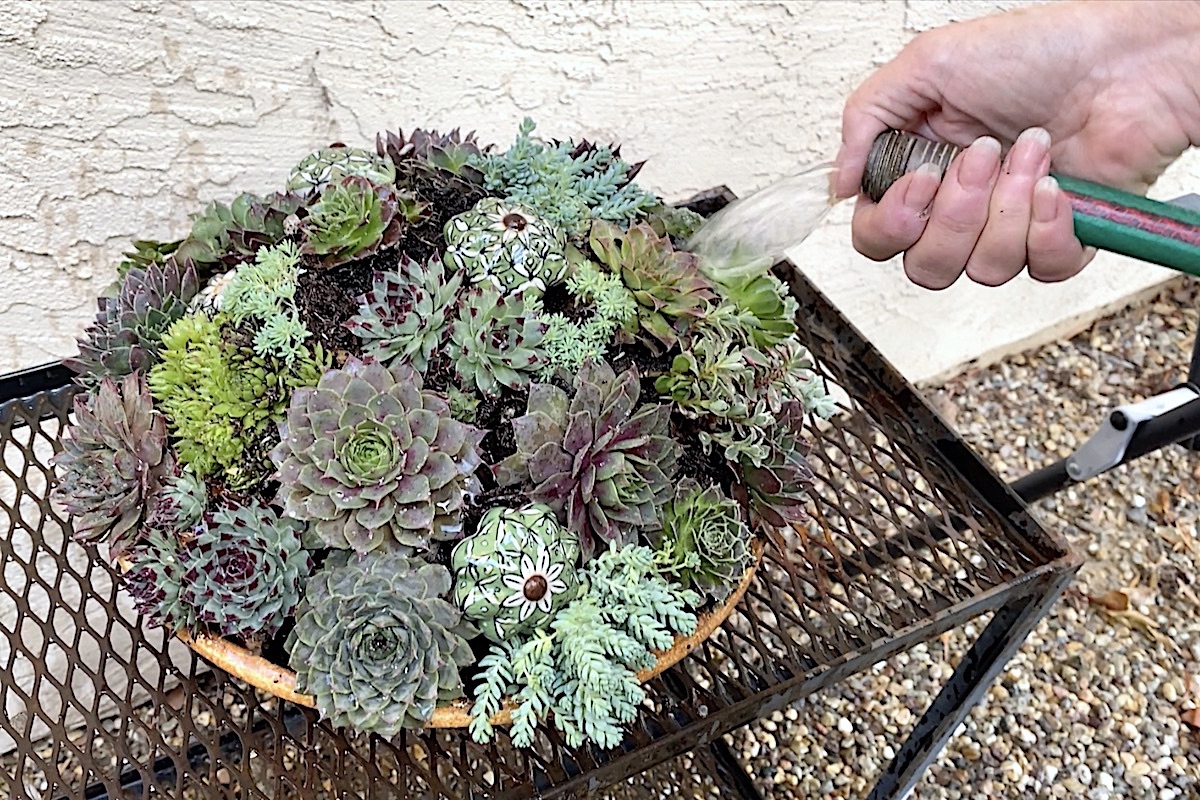
6. (Below) Hose off the arrangement to remove soil clinging to the leaves and help secure the root balls. When mine was done dripping, I used it for a patio table centerpiece.

Hose it off

Varieties I used (but just about any semps and fine-leaved sedums will work):

Sempervivum heuffelii (various), S. calcareum, S. 'Watermelon Rind', S. globiferum, S. arachnoideum, S. 'El Greco', S. 'Zulu', S. 'Chocolate Kiss', S. 'Strawberry Kiwi', S. 'Mint Marvel'; Sedum spathulifolium 'Harvest Moon', S.  hispanicum 'Blue Carpet', S. spurium 'Tri-Color', S. dasyphyllum 'Himalayan Skies', S. tetractinum.

Sempervivum bowl

Related Info on this site

Designing with Cold-Climate Succulents

How to select, grow and design with cold climate succulents—sedums, sempervivums and more. Tips from Becky Sell of Sedum Chicks at the Northwest Flower and Garden Show

Succulent Container Garden (c) Debra Lee Baldwin

Succulent Container Design

Succulent Container Design Design ideas and must-dos for beautiful, easy-care potted succulents Here you’ll find info on succulent container design in articles and videos. Scroll down to see what interests you and meets your needs. Also enjoy and find inspiration in my gallery of 150+ floral-style arrangements! Succulent Container Gardens, How-To Discover My Online Design…

Cold Hardy Succulents: Details, Photos and Varieties

Cold-Hardy Succulents: Details, Photos & Varieties Looking for succulents that go below freezing? You’re in the right place! About cold-hardy succulents The common cold-hardy succulents shown here can handle northern winters, snow, rainstorms (if given excellent drainage) and summer dry spells. Most cold-hardy succulents are in the genera Sedum and Sempervivum. Sedum (stonecrop) Trailing varieties are lovely as…

The post Make a Mounded Succulent Arrangement appeared first on Debra Lee Baldwin. Copyright © Debra Lee Baldwin.


from Debra Lee Baldwin https://ift.tt/37lkRGF
via IFTTT
martes, 24 de noviembre de 2020

Brody’s Lovely, Low-Cost Succulent Garden Amazing tips

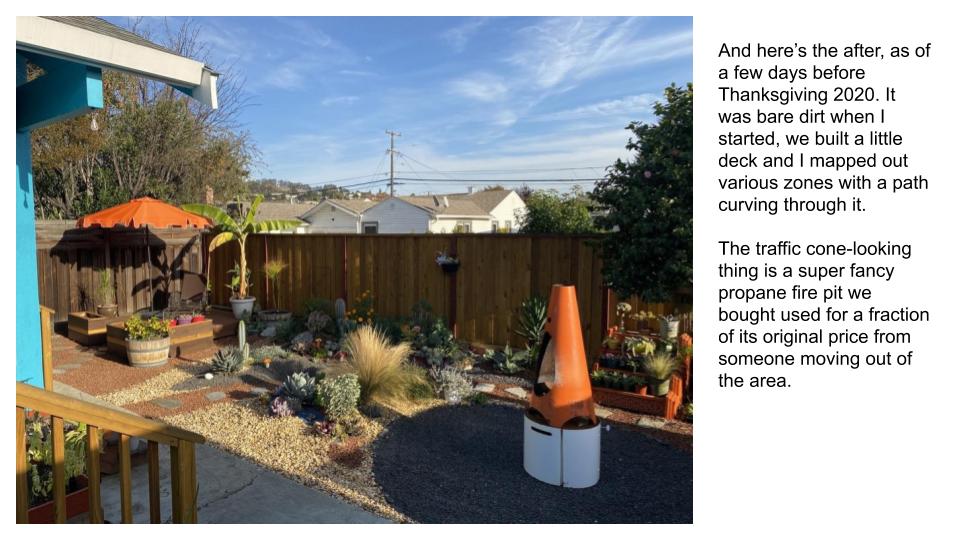
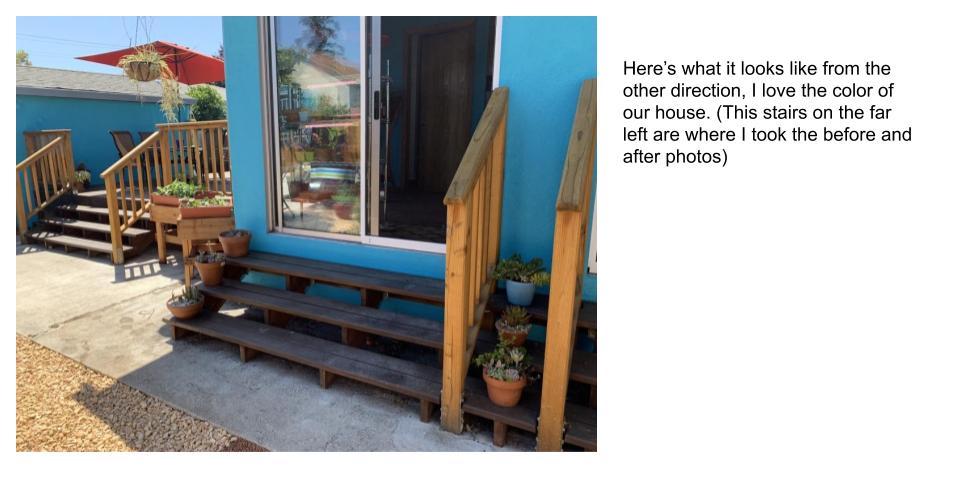
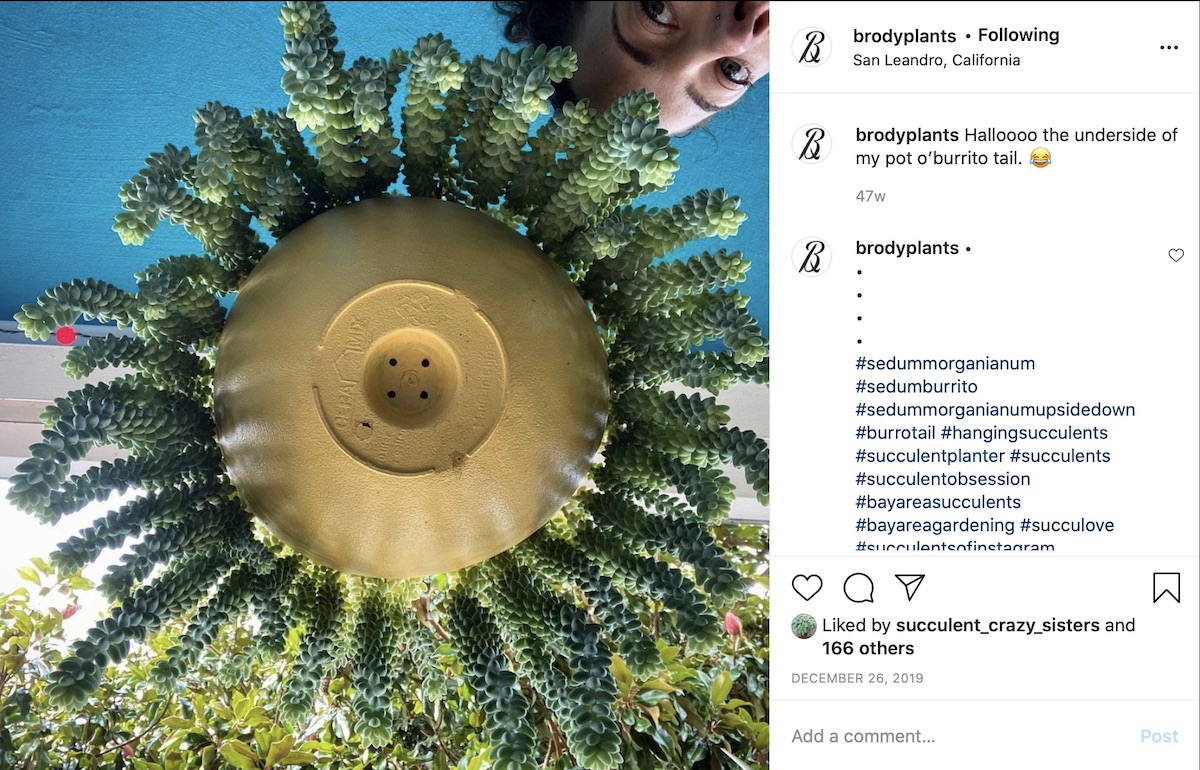
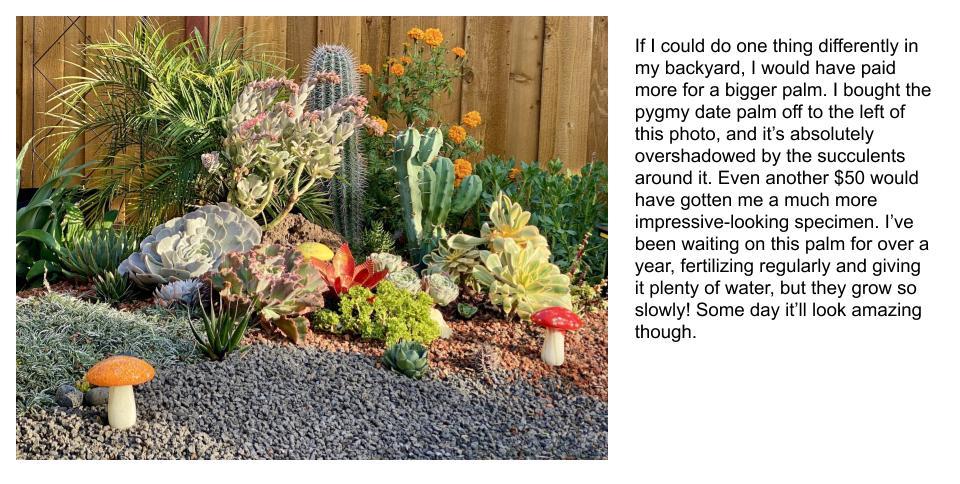
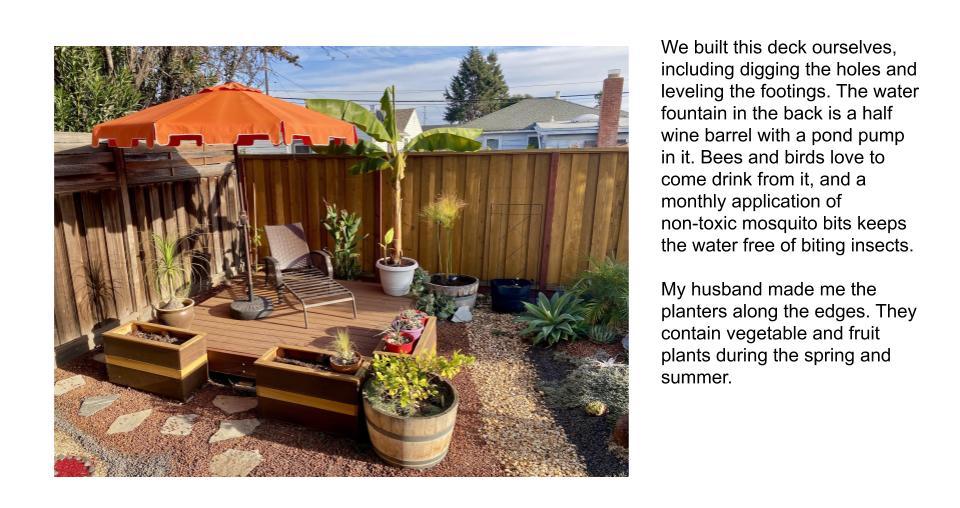
Celebrating the Joy of Succulents subscriber Brody Scotland says her lovely, low-cost succulent garden "was a three-year project, since we couldn’t throw a pile of money at it all at once." She describes herself and husband Ben as "artists and weirdos" who love bright colors and outdoor woodworking projects. Their vivid blue house "looks amazing as a backdrop for succulents," Brody says. The location is San Leandro (Zone 10b), across the Bay from San Francisco.

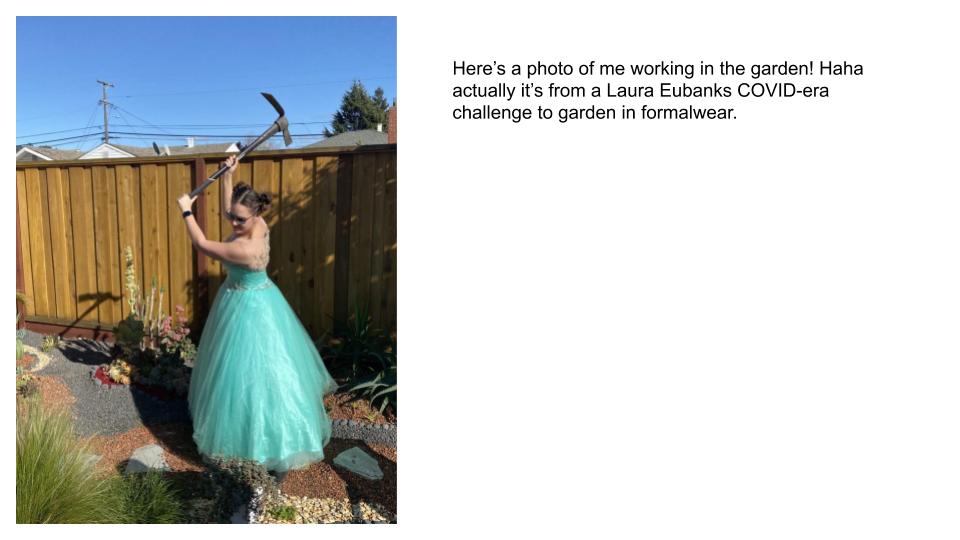
Brody works full-time in the art department of Burning Man, a famed annual arts event. "And when I’m not doing that, I’m a photographer, a linocut artist, and whatever other crafts strike my fancy." Inspired by succulent garden designer Laura Eubanks, Brody "cut down a few small trees, wheelbarrowed in the soil, made the mounds, planted the plants, placed the bigger rocks, and top-dressed everything with smaller rock. I didn’t even let my husband help, so I could say I did it all myself."

Why Share Her Garden?

"I want other folks to see it’s possible to have a small suburban backyard garden on a budget," Brody says. "We have enough disposable income to have a garden, mind you---it’s a huge privilege to have a home, much less the money and free time to have a garden. But relatively speaking, I did this project on pretty much the bare minimum that one could do a project like this. It took way longer and was probably more of a pain in the behind. It’s fun though, to see where you can get creative without throwing money at problems."

It's also fun, she says, to talk about her garden and "invite people in digitally, now that I can’t have everybody over due to the pandemic."

Why did she contact yours truly? "I appreciate you so much and all the effort you take to educate those of us out here." (Aw.)

Come On In!

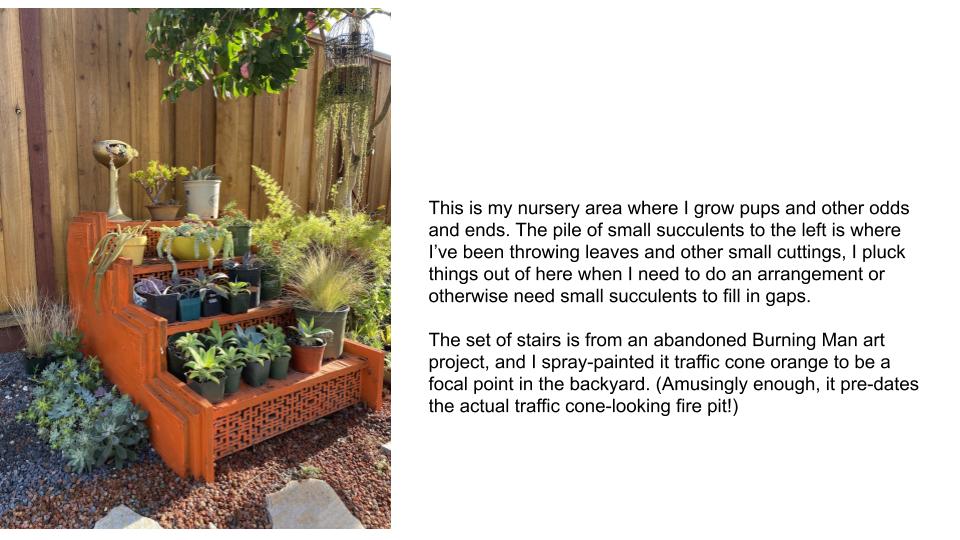
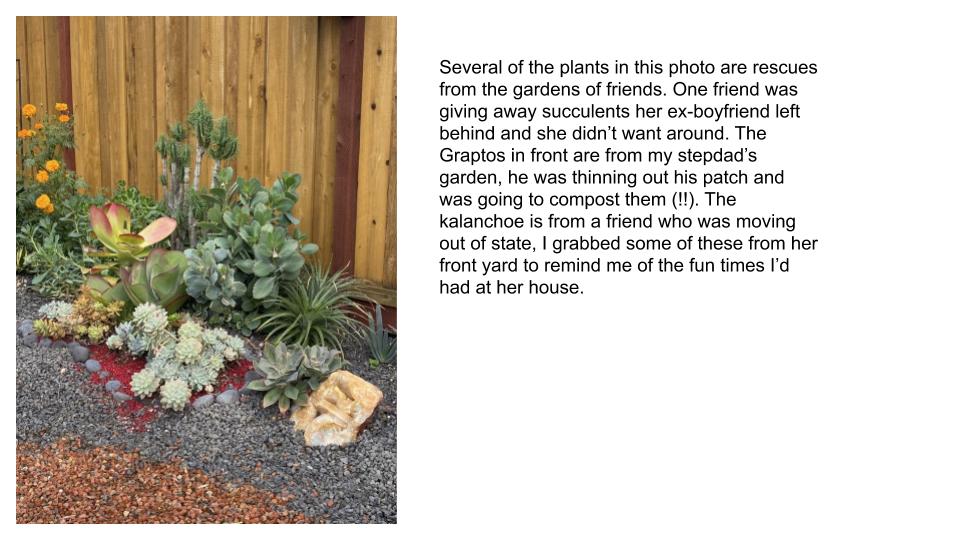
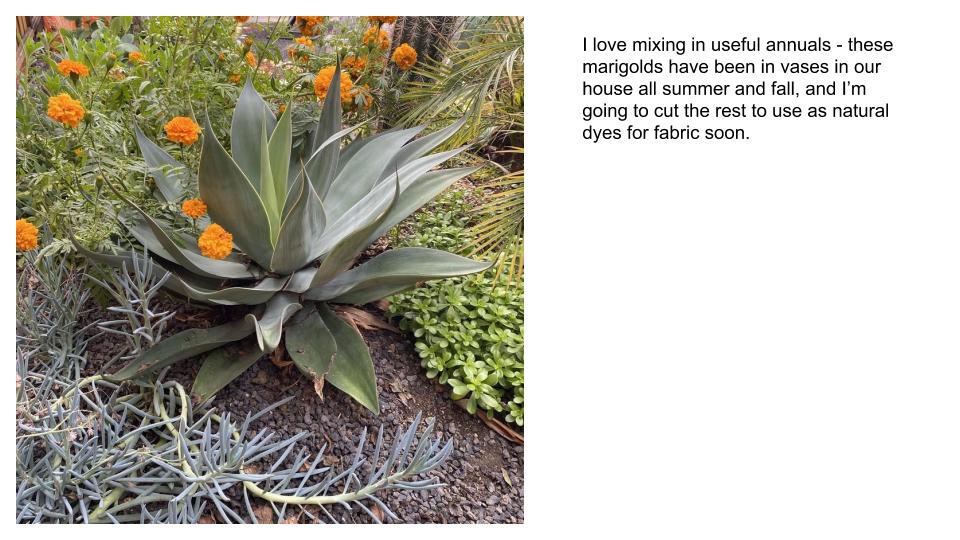
These photos and captions (all by Brody herself) take you on a virtual tour of her 900-square-foot back yard. Later on, you'll learn more of her money-saving tips for a lovely, low-cost succulent garden.


A Rock Named Hannah

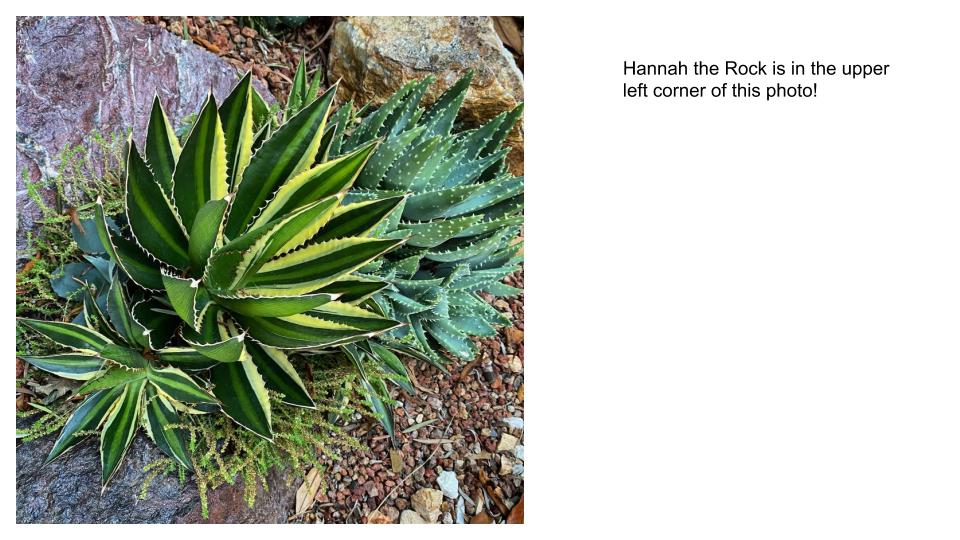
Brody learned about succulent garden design, preparation and planting here on my website and in Laura Eubanks' videos. "She’s always been so kind and engaging," Brody says of Laura. "I went up to one of her classes at Mountain Crest Gardens and met her and daughter Hannah. I actually have a rock in my front yard named Hannah, because she gave it to me. It was an extra from the installation they did up there. It’s purple. Hannah knows she has a rock named after her, ha-ha."

Succulent Garden on a Budget

Brody offers these additional budget-minded ideas:

-- "I had sandy loam soil delivered in bulk from the rock yard and then moved it to the backyard. I bought a wheelbarrow, moved the soil to the backyard over the course of a weekend, and then sold the wheelbarrow on Craigslist for $25 less than I bought it for. Cheaper than renting and the new owner came and picked it up."

-- "The red and black 3/8” lava rock I brought home in 50 pound bags, little by little, as I was completing sections of the backyard. It was such a small area that, even though it was twice as much to buy it in bags, I saved the $80 delivery fee and having a giant pile of rock in my driveway. Since I was going to have to move it to the backyard anyway, and I was doing this in my spare time, I just got it in bags and hauled them back one by one and spread them out. I also add a handful of pumice into each planting hole, to increase drainage."

-- "I found succulents at plant exchanges, on street corners, by asking neighbors for cuttings, in the Free section of Craigslist and Facebook Marketplace, from friends moving out of town, fellow succulent enthusiasts online, and at the farmer’s market. I collected them over the course of many months before putting them all into the ground."

--"I also propagate plants from leaves and grow my own succulents from seeds, though this is more a hobby pursuit and a long game than an actual, useful, succulent-increase strategy."

--"My garden is hand-watered, no irrigation. I couldn’t afford irrigation, and it’s soothing to be out there in the warm months with a garden hose first thing in the morning. On a good year we get enough rain in the winter to avoid having to water much."

Find and Follow Brody Scotland

Debra: I screen-captured a dozen photos from Brody's Instagram page to show you, then realized this article was already too long. Besides, I know you'll enjoy going there and seeing her posts yourself. When you do, be sure to thank Brody for the virtual tour and great tips.

Want to share your garden with us? Please go to the Contact Debra page.


The post Brody’s Lovely, Low-Cost Succulent Garden appeared first on Debra Lee Baldwin. Copyright © Debra Lee Baldwin.


from Debra Lee Baldwin https://ift.tt/3q6SwwD
via IFTTT
lunes, 16 de noviembre de 2020

Succulent Lovers’ Favorite Tools Amazing tips

Do you own the favorite tools of your fellow succulent lovers? Consider: We differ from other gardeners in that our prized plants can turn on us. Cacti, agaves, euphorbias and even aloes can act like dogs who resent having their nails trimmed. (I don't know about yours, but my Chihuahua is a two-person job.)

Being shredded is unpleasant, so I asked my "Celebrating the Joy of Succulents" newsletter subscribers to suggest tools they wouldn't be without. Dale's (below) is new to me, and I'll order it. Most are under $10. All make great gifts for us prickly-plant aficionados. Links are affiliate. 

Don't see your own favorite tool? Tell us about it in the Comments!

To join (and enjoy) the "Celebrating the Joys of Succulents" community,  subscribe to my newsletter.

I asked, you kindly answered

"What garden tools would you not be without?"

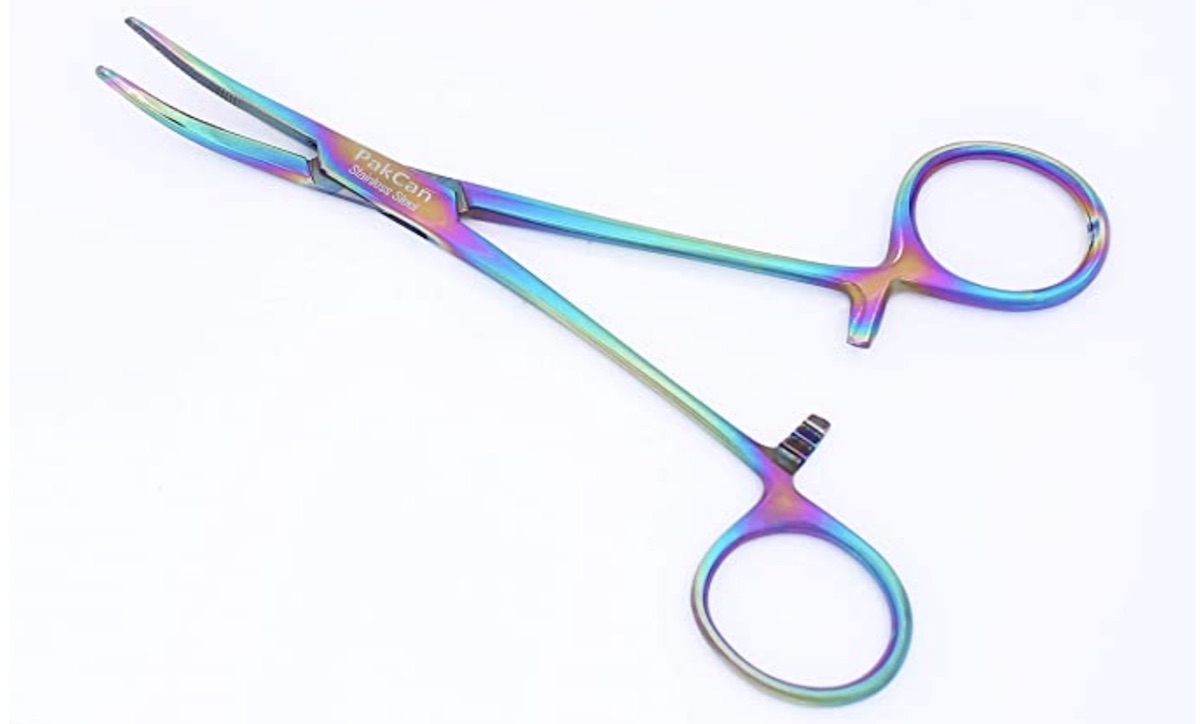
Forceps (hemostats)

Hemostats

Hemostats (forceps)

Jean Sadler: "I would be lost without my hemostats. I have a small and large pair. They are great for picking out leaves and debris from prickly succulents and cactus without getting those pesky thorns in my hands. I found mine at a home show at our fairgrounds. It was a booth that sells all kinds of medical tools, scissors, magnifiers, and such."
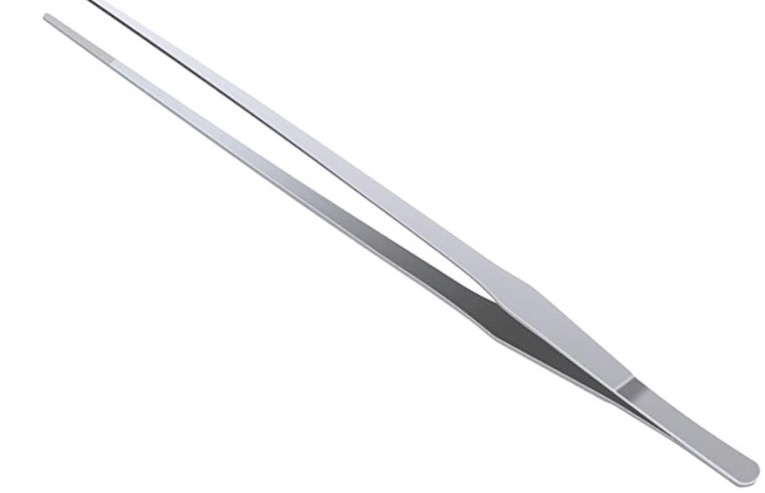
15-inch tweezers

15-inch tweezers

15-inch tweezers

Tom Karwin: "The first tool I bring to a succulent grooming project is my 15-inch tweezers. I've been using mine recently to remove debris from small agaves and desiccated leaves from aloes. I also have a shorter tweezer but the longer one is more versatile and easy to use."

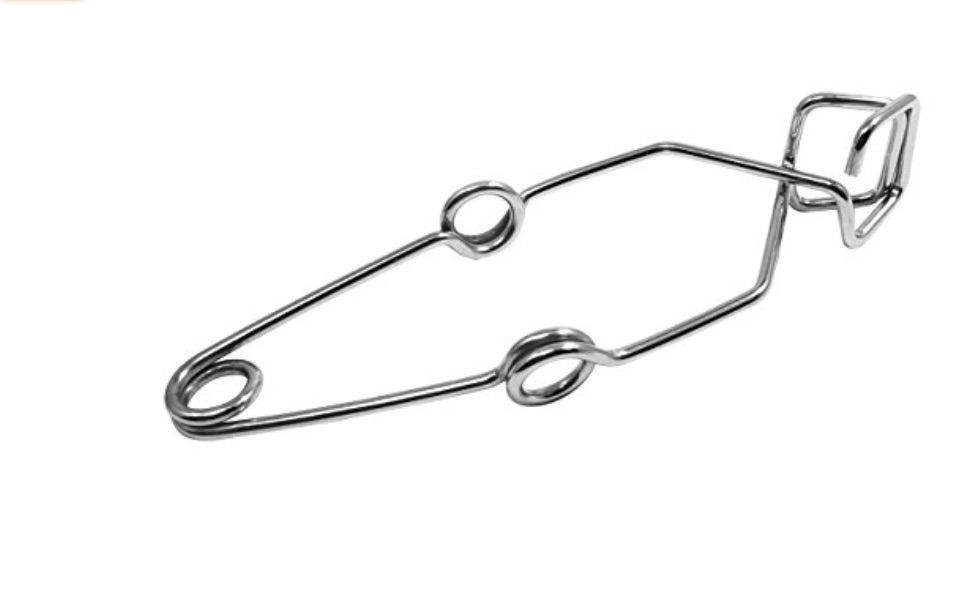
Test tube tongs

Dale Rekus: "I use test tube tongs for handling prickly pieces or plants and cacti. Tongs grasp the object when you release the pressure, the opposite of usual kitchen tongs. Very nice, no cramps from squeezing the handles the whole time you're holding an item in the tongs.

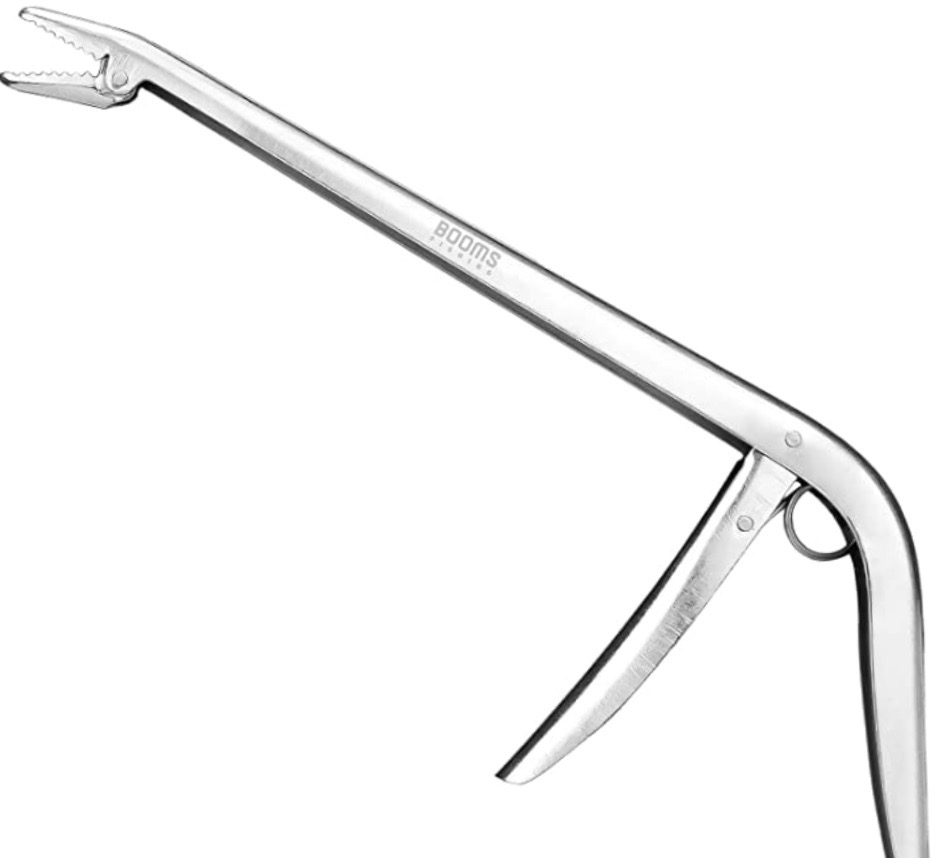
Fish hook extractor

Fish hook extractor

Fish hook remover

Diane Bonner: "My favorite cactus tool is a fish hook remover for pulling out weeds from under stickery cactus."

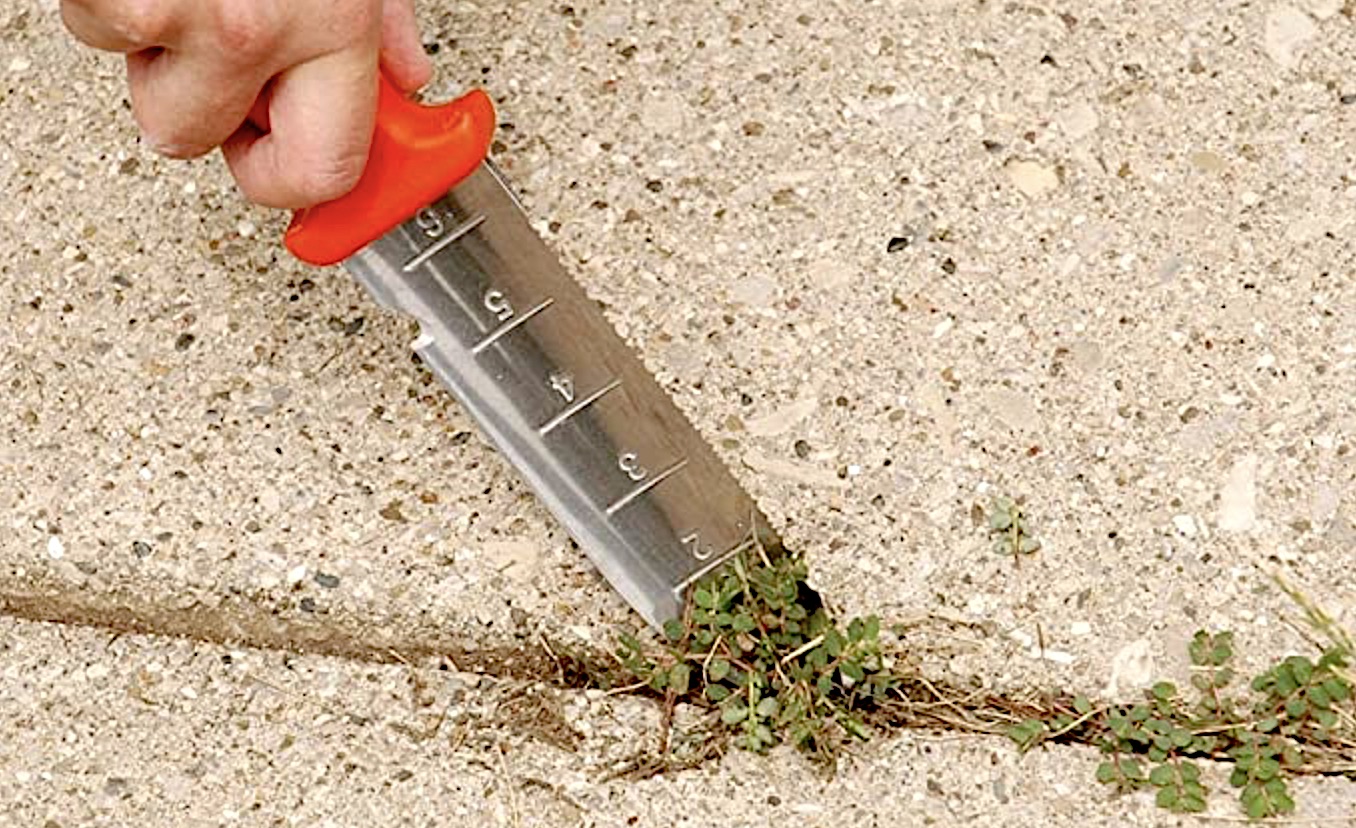
Soil knife

Soil knife

Soil knife ("hori-hori")

Sarah Lee Norman: "My favorite garden tool was a gift from Laura Balaoro...a soil knife."

Barb Graue: “My hori hori Japanese gardening knife.”

Chopsticks

Cassie Smith: "I have a set of smooth wooden chop sticks that I use with almost every planting endeavor. I would be lost without 'em."

Which reminds me: During a potting demo at Roger’s Gardens, I asked my helper to get my chopsticks. I watched her dig around in my tote bag and thought I'd forgotten to bring them. Then she said, “Debra, I’m so sorry, there’s no Chapstick.” 

My own favorites


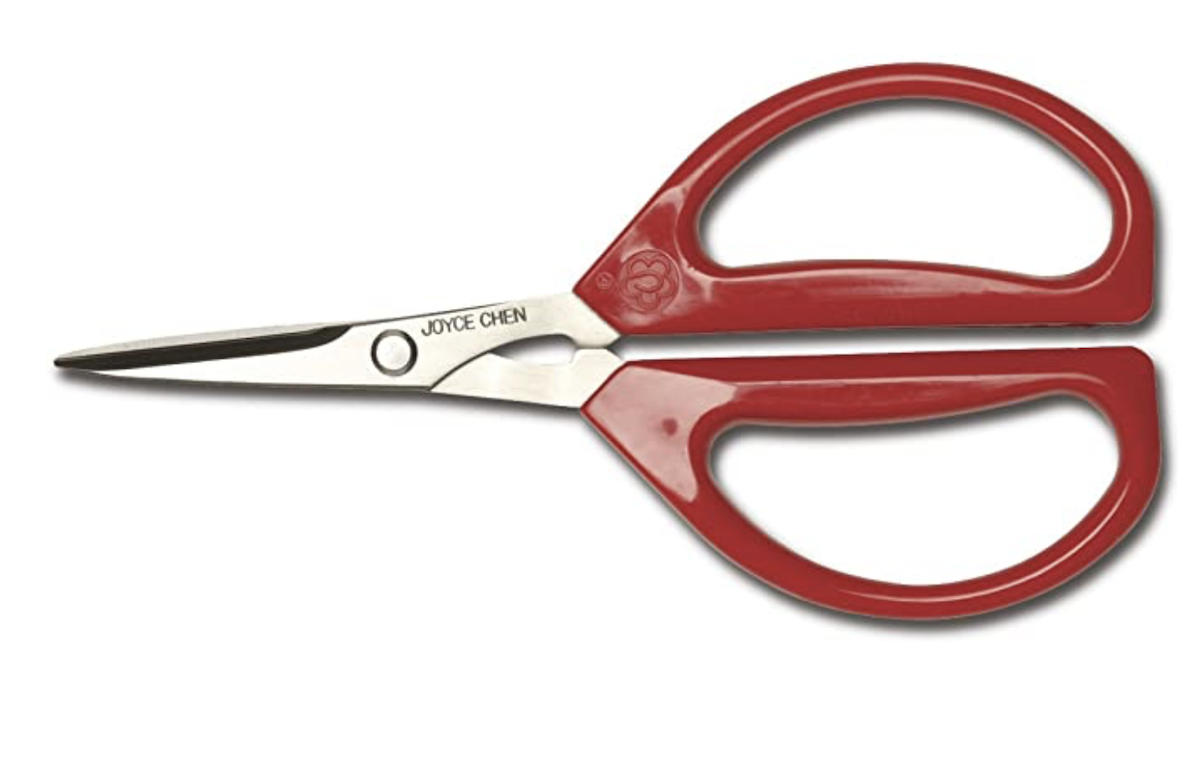
Joyce Chen scissors. Although designed for kitchen use (like cutting through bones), my Joyce Chens are my favorite garden tool. They're perfect for light pruning and taking cuttings, yet are strong and sharp enough to tackle small branches.

See More on My Tools Page

Find more useful items, books, weed and pest preventers, fertilizers, and must-haves that I use for my own garden at Tools & Must-Haves for Succulent Gardeners.

Tools, Books and Products for Succulent Gardeners

Tools & Must-Haves for Succulent Gardeners My personal favorites Click on the links below to jump directly to that section, or scroll down to take a look at everything. Pest & Weed Prevention and Treatment Garden Tools Fertilizer Power Tools (Drill) Sun and Frost Protection Books Other Useful Items Pest & Weed Prevention and Treatment…

The post Succulent Lovers’ Favorite Tools appeared first on Debra Lee Baldwin. Copyright © Debra Lee Baldwin.


from Debra Lee Baldwin https://ift.tt/38Quq30
via IFTTT