martes, 23 de noviembre de 2021

Create a Wall Christmas Card Tree Amazing tips

A wall Christmas card tree takes up no floor space and is as engaging as any 3-D tree.

For my family, creating a Christmas card tree is an annual event. It's a tradition I started decades ago. Guests express surprise that we receive so many cards. We don't, really. Some date to the '70s!

Not enough Christmas cards?

Well! You might combine succulents and the holidays by making a tree of cards from my "Succulent Chic" Zazzle store. (Send me a photo if you do!) Here's one example:

Succulent sleigh greeting card (c) Debra Lee Baldwin

Additional ideas:

  • Use rectangles and circles cut from wrapping paper. Glue onto heavy paper so they don't curl.
  • Buy several assortments of inexpensive holiday cards (affiliate link). For about $40 you'll have plenty.
  • Do a tree-shaped photo collage that celebrates the year's memorable occasions.
  • Ask Mom and Grandma if you can put holiday cards they've been saving to good use.

What about ornaments?

I gave most of my keepsake ornaments to my DIL, who does a traditional tree. Even so, I sometimes can't resist a bespangled ball. I display such lovelies in a large glass apothecary jar or in a wide, shallow bowl.
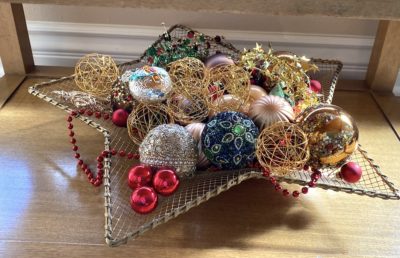
Ornaments in a star bowl

Ornaments in a star-shaped mesh bowl

Card Tree Tools and Materials

You'll need...

  • String to outline the card tree's triangle
  • Masking tape. Use heavy-duty if the wall surface isn't smooth.
  • Scissors to cut cards at the fold. You'll only need the front, and if uncut they're too heavy and hang open.
  • Stepladder (optional). Depends how high you have to reach.
  • Cards. It's hard to estimate the quanitity, but FYI our tree measures 70 inches on each side and takes 80-90 cards.

Card Tree Assembly
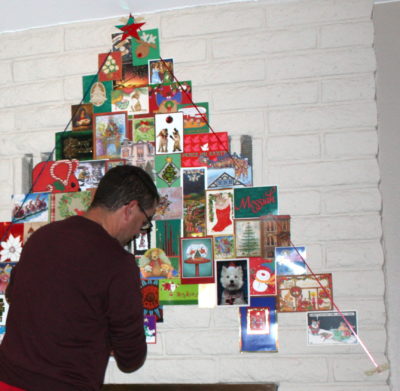
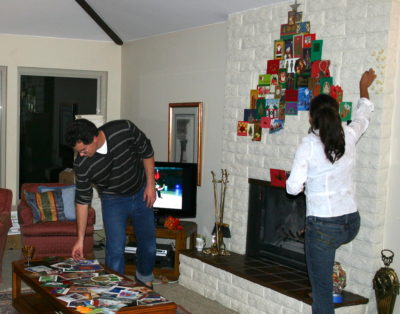
Christmas card tree on wall (c) Debra Lee Baldwin)

Begin by outlining an equilateral triangle with ribbon or string tacked or taped in place.

  • Lay out previous years' cards for approval. "I need a vertical," my son will say, glancing at us lazy spectators over his shoulder.
  • No star for the top? Cut one from a card.
  • Extend upper corners of outermost cards beyond the string to give the tree a stair-step edge. How far? Figure half the width of the card or simply eyeball it.
  • Cards can---and should---slightly overlap.
  • Small cards mostly (but not necessarily) go at the top; larger ones, farther down.
  • Help whomever's doing the assembly by rolling one- to two-inch pieces of masking tape. Each card needs three or four rolled bits of tape to secure it.
  • Tape cards to the wall, not to each other.
  • Place cards parallel to walls and ceiling.
  • Remove the string when you're done.
Wall Christmas card tree assembly (c) Debra Lee Baldwin

Note rolled pieces of masking tape at upper right.

Enhance the experience

We light a fire in the fireplace, put a holiday video on the TV or listen to Christmas music, have hot cocoa or mulled cider, light pine-scented candles, and set out snacks.

Much of the fun is evaluating cards that come in the mail for "card tree potential." We also read friends' holiday letters and give priority to cards with sentimental value. But the best part is looking at photos of past card trees that show kids growing up.

How long does a card tree take?

Figure about a minute per card. This year's card tree, at top, took about 1-1/2 hours.

When it's finished

Pose people with it. I sometimes turn card tree photos into personal greeting cards or tuck copies into holiday cards.
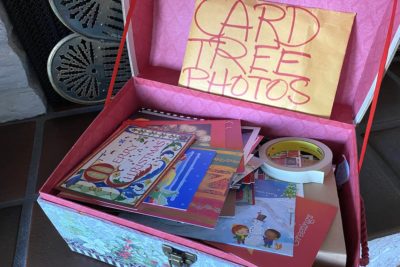
Card tree storage chest

Our card tree storage chest takes up a lot less room than a fake tree.

Be sure to put one in an envelope big enough to hold additional photos. Write the year on the photo and keep the envelope with cards you'll use next year.
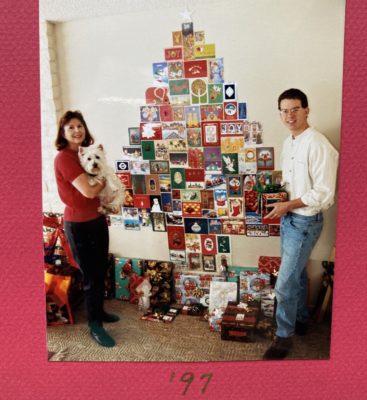
Wall Christmas Card tree (c) Debra Lee Baldwin

Trust me, you don't want to try to figure out the year a decade later.

Shop holiday sales. Gorgeous Christmas cards often go for 50% off. The more bling the better. I personally like those with rhinestones.

If you're not already doing so, save colorful greeting cards that come in the mail.

I'd love to know what you think. I welcome your comments and questions below. Happy holidays!

The post Create a Wall Christmas Card Tree appeared first on Debra Lee Baldwin. Copyright © Debra Lee Baldwin.


from Debra Lee Baldwin https://ift.tt/32hSmuC
via IFTTT

jueves, 11 de noviembre de 2021

Plant a Succulent Grid in a Shallow Circular Pot Amazing tips

When I saw succulents planted in grid patterns in shallow, circular pots, I just had to show them to you. Here and in my new video, you'll discover how to make similar planters for your own garden.

I spotted them at The Well, a high-end boutique specializing in outdoor furniture and accessories. It's in Summerland, CA near Montecito where Oprah and the royals have large estates.

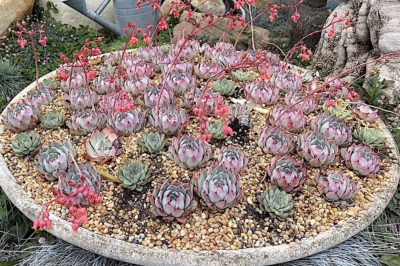
Willy Guhl pot w echeverias

Willy Guhl pot with echeverias at The Well

I envisioned lavish poolside patios graced with The Well's understated, sophisticated and functional outdoor art...especially these large shallow cement pots planted criss-cross with succulents.

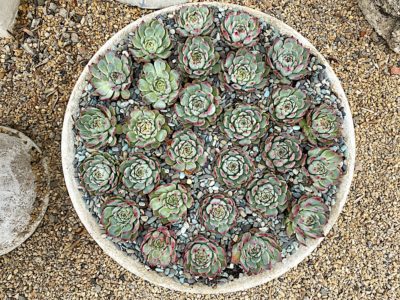
Echeverias in a Willy Guhl cement pot

Echeverias in a Willy Guhl cement pot

Eek! They cost $2,500!

It seems that such hefty Midcentury pots by Swiss designer and artist, the late Willy Guhl, are prized collector’s items. Those two feet or more in diameter can go for upwards of $2,500---and that's unplanted! I didn't love the price, but I did love the look.

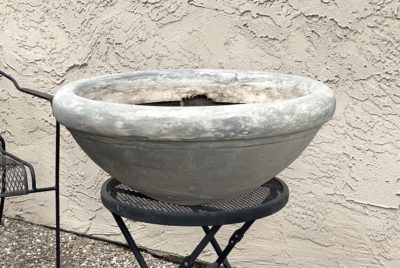
After I got home, I realized I had a similar-sized pot from a garage sale. It was free because they were happy to get rid of it. It’s lightweight, probably fiberglas. I did some checking, and comparable ones average around $100 online.

Concrete-look resin planter (c) Debra Lee Baldwin

I dabbed my resin pot with gray paint to make it look like concrete

Well then! We simply have to make a similar succulent planter, don't we? My goal was to create one that resembled those at The Well yet cost less than ten percent.

Here's how...

Materials

  • Large (2-foot diameter) shallow synthetic pot. Give it a drain hole if it doesn't have one. On Ebay, search "large outdoor resin bowl planter." At Amazon (affiliate links):  https://amzn.to/3C31xLA
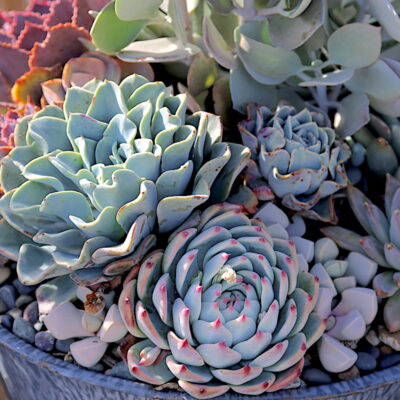
  • Succulents: Echeverias or sempervivums are good choices because they're symmetrical and keep their circular shape as they grow. Go with echeverias if you live in a mild climate; semps if you get below-freezing temps in winter.

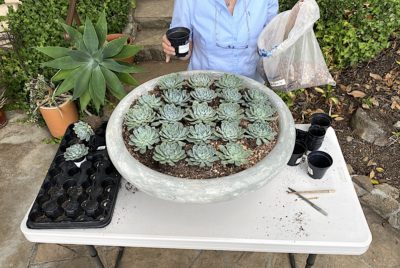
I chose blue Echeveria 'Alegra' from Oasis Water Efficient Gardens nursery near me in Escondido, CA. Pot size: 3.5 inches. Plant diameter: 4 to 5 inches. I estimated I'd need 21 but got 24 just in case. Order online.

Wide shallow resin pot

I used Echeveria 'Allegra' in 3.5-inch pots for my 21-in diameter pot

  • Gray paint (optional). After cleaning my weathered white pot, I dabbed the outside with gray acrylic paint to make it look like cement.
  • Potting soil: Any will do. I used Bonsai Jack, a coarse mix that doubles as a topdressing.
  • Lazy susan (optional). I like being able to rotate a large pot while planting it.

Method (in video)

  • Fill the pot with soil to one inch below the rim.
  • At the midpoint, plant a rosette so its crown is about even with the rim of the pot. (A plant's crown is just above the soil, where stem and roots meet.)
  • Create a plus sign with plants that extends to the rim of the pot. Mine consists of two echeverias on four sides, for a total of 9.
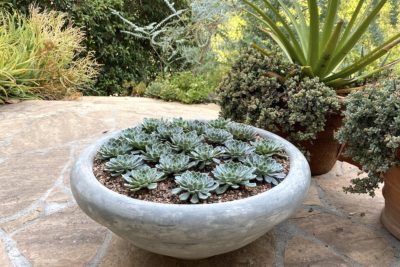
Faux-concrete succulent grid planter (c) Debra Lee Baldwin

Here's my finished faux-concrete succulent grid planter. I love that I can slide it (concrete would be way too heavy).

  • Fill in the corners, adjusting plants as needed to make a grid.
  • Add topdressing: more Bonsai Jack potting mix, pebbles or crushed rock to conceal bare dirt and give the composition a finished look.
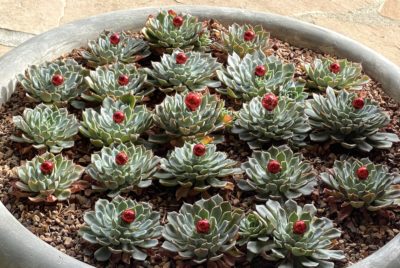
Succulents in a grid w holiday balls (c) Debra Lee Baldwin

Little red holiday balls make mine look like a big dessert

How many plants do you need?

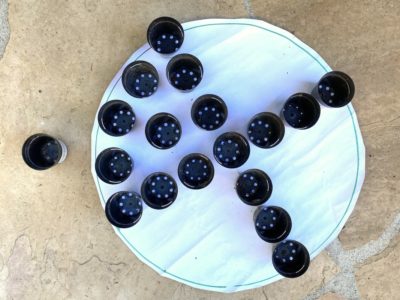
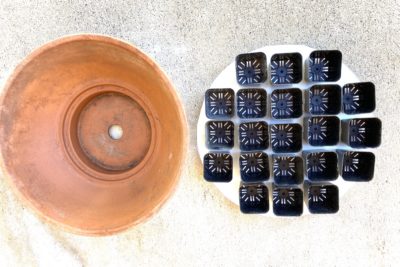
Cut a paper circle the size of your pot’s inside top diameter. Fold the circle in quarters to pinpoint its center. At the nursery, put the paper on the ground and place small potted succulents on top, as you'll plant them: from the center outward.

How many succulents do you need

20" diameter pot = 37 plants in 2" pots

What if you’re ordering plants online? Cut paper circles or squares the size of the nursery pots, and set those on the paper circle.

How many succulents for a circular pot

12” diameter pot = 21 plants in 2” pots

Find a similar terra-cotta pot on Amazon.

Tell me what you think!

Do you love these designs? Aren't sure? Have I inspired you to make something similar? I welcome your questions and comments below!


Related info on this site

Floral style succulent arrangement (c) Debra Lee Baldwin

Echeveria Info, Photos & Varieties

Echeveria Info, Photos & Varieties How to grow echeverias perfectly, plus an extensive gallery, all ID’d See All Succulent Types Aeonium Agaves Aloes Cactus Crassula Echeveria Euphorbias Ice Plants Kalanchoe Portulacaria Senecio About Echeverias Here you’ll find expert advice to help you grow echeverias perfectly, with a gallery of 150+ beautiful, notable species and cultivars.…

Succulent Container Garden (c) Debra Lee Baldwin

Succulent Container Design

Succulent Container Design Design ideas and must-dos for beautiful, easy-care potted succulents Succulent Container Gardens, How-To Discover My Online Design Class! New! How to Group and Display Potted Succulents (9:48) DIY Floral-Style Succulent Centerpiece Learn About My Online Class! This lush and colorful succulent combo in a pedestal pot looks difficult, but it’s simple once…

The post Plant a Succulent Grid in a Shallow Circular Pot appeared first on Debra Lee Baldwin. Copyright © Debra Lee Baldwin.


from Debra Lee Baldwin https://ift.tt/3C1n3AA
via IFTTT

martes, 2 de noviembre de 2021

Water pH for Succulents Amazing tips

Giving succulents water with the wrong pH can inhibit the plants' ability to take up nutrients, leading to less vigorous growth and yellowing. Urban and residential water tends to be alkaline, meaning it has a pH higher than 7, which is neutral.

Minerals optimally accessed in slightly acidic soil include nitrogen, phosphorus, potassium, sulfur, calcium, magnesium, iron, and manganese.

Rainwater is slightly acidic, which is why a few days after a storm, your succulents (all your plants for that matter) look amazing.

Aim for 5.5 to 6.5

During a recent Cactus & Succulent Society webinar, Ernesto Sandoval advised that the proper pH for watering succulents is approximately 5.5 to 6.5 (slightly acidic). Ernesto, manager of UC Davis' Botanical Conservatory, is renowned for his knowledge about growing succulents, their root development, ideal soil mixes and more.

Acidify the water

The pH of residential water and its mineral content varies by region. If yours has a high mineral content (typical of San Diego), add 2 tablespoons of vinegar per gallon of water. If your water is low in minerals (typical of Davis west of Sacramento), add one T per gallon.

Test to be sure

pH meter

pH meter

Check your water with a pH meter. At about $13, a pH meter provides inexpensive peace of mind. Plus you can use it to test other liquids, including your drinking water, pool or aquarium.

Even better: Citric Acid

Citric acid

Citric acid

Also, for a gentler alternative to vinegar, use citric acid (about $15 for a 2-pound bag). Affiliate links.

Related Info on this site

How to Water Succulents

How to Water Succulents For succulents in the garden, in containers, and if there’s no drainage It really is this simple ~ Aim to keep soil about as moist as a wrung-out sponge. Watering about once a week in summer and once a month in winter should do it. Water thoroughly to soak the roots and…

Rain on agave (c) Debra Lee Baldwin

How Rain Benefits Succulents

Here’s how rain benefits succulents: It provides dissolved minerals and washes away dust that inhibits photosynthesis; it dilutes and flushes salts and harmful chemicals that have built up in the soil from tap water; and it provides nitrogen essential to growth,

The post Water pH for Succulents appeared first on Debra Lee Baldwin. Copyright © Debra Lee Baldwin.


from Debra Lee Baldwin https://ift.tt/3EIGzDN
via IFTTT