martes, 11 de enero de 2022

Discover 40 Kinds of Kalanchoe Amazing tips

I'm pleased to announce my new 15-minute YouTube video: "Kalanchoe Species and Cultivars: 40 Varieties for Your Garden and Pots."

Fuzzy kalanchoe, from Debra Lee Baldwin video

One category shown in the video

To organize this highly diverse genus, I've divided it into six categories: fuzzy, floriferous, mother of thousands (bryophyllums), paddles, tropicals and rarities.

Note: On this site's Kalanchoe page you'll find a gallery of all 40 labeled, plus additional info.

Kalanchoe gallery (c) Debra Lee Baldwin

Kalanchoe gallery, excerpt

In-Depth Overview

Whenever I give an in-depth overview of a particular type of succulent, I draw from decades of photos, books,  online research, and personal expertise. My goal is to present accurate, well illustrated info, which (have you noticed?) is not always found online.

Learning---It's ongoing!

While fact-checking, I realized that a tropical variety growing in a protected area of my garden for a decade---which I'd assumed was Kalanchoe carnea---is actually similar Kalanchoe gastonis-bonnieri.

Kalanchoe gastonis-bonnieri (c) Debra Lee Baldwin

Kalanchoe gastonis-bonnieri

Providing this tender kalanchoe the sun- and cold-protection it needs in my garden had caused its leaves to lengthen (seeking more light for photosynthesis), its stems to become floppy (trying to root in a better spot), and it refuses to bloom (not enough sun). All this makes a plant challenging to ID. Faint purple dashes on the leaves---which I'd yet to notice---were the ah-ha! factor.

Kalanchoe Cultivation

So how many of these Fab 40 Kalanchoes can YOU grow?  Given that kalanchoes are frost-tender and finicky (though so gorgeous you gotta have them), good news: I've successfully grown nearly half of them. I'm NE of San Diego at 1,500 feet, Zone 9b. I get frost in winter and triple-digit heat in summer. Humidity is low.

Kalanchoe 'Pink Butterflies' (c) Debra Lee Baldwin

Kalanchoe 'Pink Butterflies'

To be honest, some varieties---like 'Pink Butterflies'---don't last no matter what I do. (If you've managed to keep 'Pink Butterflies' going year after year, we need to talk.)

Kalanchoe rotundifolia (c) Debra Lee Baldwin

Kalanchoe rotundifolia, a rarity

Those I almost never see in Southern CA gardens (but should be able to grow here), I've defined as Rarities---a category that also includes "heartbreakers."

Find out more in my the video, my books and this site's newly updated Kalanchoe page. I welcome your comments and questions! 

Related Info on This site

Succulent Kalanchoe mother of thousands (c) Debra Lee Baldwin

Kalanchoe Details, Photos and Varieties

Kalanchoe: Details, Photos and Varieties Native to Madagascar, kalanchoes thrive outdoors in zone 9 (and higher if in dappled shade). Protect from frost. See All Succulent Types Aeonium Agaves Aloes Cactus Crassula Echeveria Euphorbias Ice Plants Kalanchoe Portulacaria Senecio >> Jump Down to the Gallery About Kalanchoes Kalanchoes are beautiful soft succulents, easy to propagate, usually…

Types of Succulents from Aeonium to Zebra Plant, Photos & IDs

Debra’s Dozen Easy-Grow Succulent Plants for Beginners
Trying to make sense out of succulents? There are numerous varieties, but these are the most common succulents and those you’ll likely run across. Enjoy growing and discovering these fascinating “plants that drink responsibly!”

The post Discover 40 Kinds of Kalanchoe appeared first on Debra Lee Baldwin. Copyright © Debra Lee Baldwin.


from Debra Lee Baldwin https://ift.tt/33aENOy
via IFTTT

lunes, 3 de enero de 2022

My Easy, Inexpensive In-Ground Compost Method Amazing tips

No bins needed!

The new CA law that requires recycling of kitchen scraps makes sense, but sure sounds messy and inconvenient. My inexpensive, in-ground compost pile is efficient, rewarding and more fun---certainly easier---than recycling dripping bags of garbage.

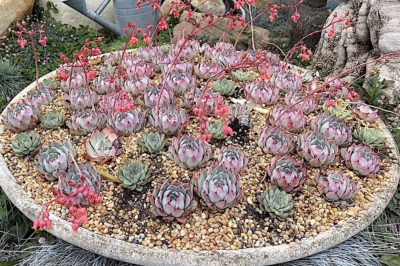
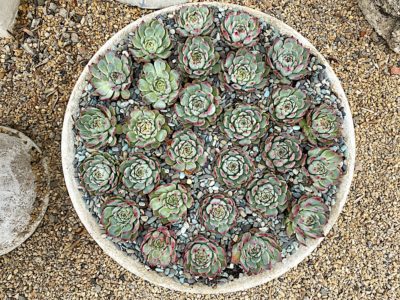
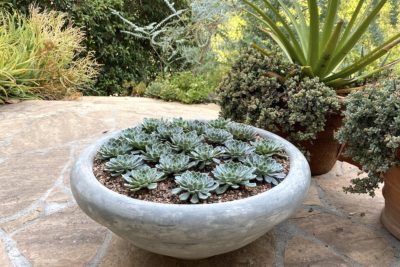
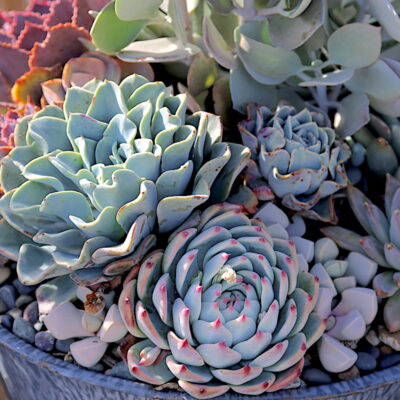
I've routinely done the compost method below for decades. The best part: When you top-dress garden beds with finished compost, you're providing perfect food for your succulents and other ornamental plants.

For in-ground composting, you'll need:

  • Leakproof pail that fits under your kitchen sink. Mine is 8" and plastic.
  • Small shovel. I use a "Spearhead" to slice through tree roots.
  • Bathtub-sized hole for the compost pile.
  • Alfalfa pellets. Provide absorbency, aeration and keep compost crumbly.
  • Potting mix. One bag, 1 cubic foot. Any brand.
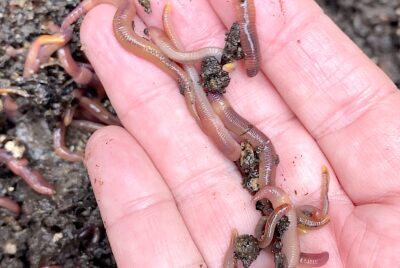
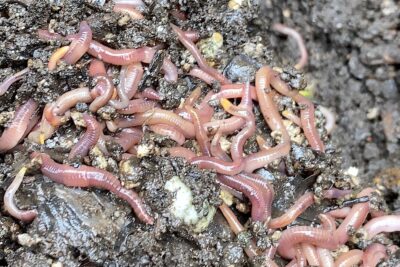
  • Red wigglers (Eisenia fetida). These wee garbage-eaters are different from earthworms.
Note: Amazon links are affiliate and should not imply an endorsement. To save on product costs and shipping, by all means buy local. 

It starts under the Sink

In our house, kitchen scraps (peels, vegetables, rinds, coffee grounds, tea bags) go under the sink. Bones and animal protein---whatever might attract vermin---go into the garbage disposal.

Compost pail under sink

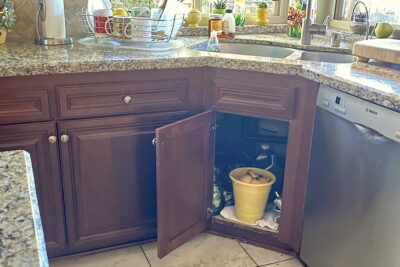
Compost pail under the sink

Here's how I trained my family: Whenever someone tossed a banana peel or, say, burnt toast into the trash, I'd say, "Hey! Remember Mr. Compost!" I then retrieved the item and dropped it into the pail. Even our guests "feed Mr. Compost." It's like having a pet under the sink. Burp.

Next go outdoors

Every few days or whenever the pail is full, I escort it to the compost pile. I dig a hole about 12-inches in diameter, dump the contents, and cover with crumbly brown compost. I set the shovel upright in that spot as a marker.

Compost pile with shovel and pail

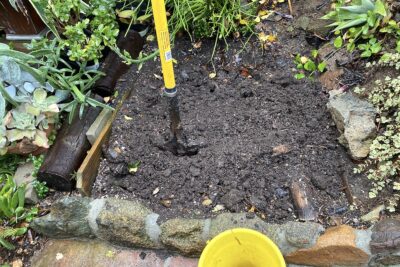
The shovel indicates where new scraps are buried. The entire area is roughly square and dug into a slope.

I dig successive holes for scraps in a clockwise fashion, so I'll know which part of the pile is older (i.e. finished compost) and which is newer (still in process).

Create a dedicated area

The best time to dig a bathtub-sized hole for a compost pile is winter, when the ground is rain-soaked and soft. Make it about 12 inches deep.

Ideally position it near a hose or irrigation riser to help keep compost moist in hot, dry seasons. Also it should be conveniently near the kitchen---mine is 30 steps away.

If the compost area is rectangular, you might bury new garbage from, say, left to right.

Make worms comfy

To get your freshly-dug area off to a good start, dump in 5 gallons or so of alfalfa pellets. It's horse chow, available at any tack-and-feed store as well as online.

Alfalfa for compost

Alfalfa pellets

Soak the pellets so they'll expand (this takes several hours). Then mix in a large bag of inexpensive potting soil. Add a welcome meal of kitchen scraps. Turn the pile to mix everything, then add worms.

It's not compost yet, because it hasn't been through the intestinal tract of a worm. At first the pile will seem small, but remember, you'll continually add to it. Worms increase in number based on the amount of food available, so they're dependent on you. Don't disappoint them!

Won't the hole fill up? Eventually, but those busy little wigglers keep it from getting too big. Composting is condensing. In any case, you can always remove some finished compost (which looks like soil and doesn't have chunks) and spread it throughout the garden.

What could go wrong?

I've read entire books on composting, worried something might go horribly wrong. I honestly don't think it can. Over the years, our hole has flooded, and I've accidentally let it dry out. One summer I neglected to feed "my" worms for weeks. Everything has survived and thrived.

Btw, if garbage under the sink attracts fruit gnats, empty and wash the pail more often, and keep the area around it clean and dry.

Debra's garden, compost pile

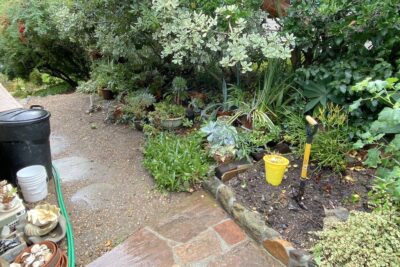
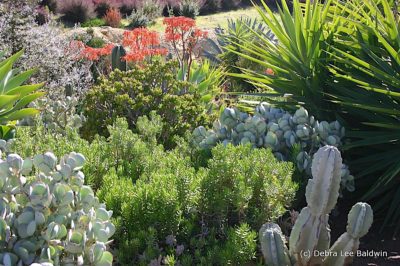
My compost pile is in my garden's potting, utility and nursery area

Like chocolate cake for plants

A major bonus is how compost will benefit the rest of your garden. My back yard once was nutrient-poor dirt consisting of decomposed granite and clay. Over the years, it has turned into soft, crumbly soil that's rich, dark and root-friendly. [See a video of my half-acre garden.]

Alfalfa alone is a great source of nitrogen, potassium and trace minerals.

For years I added chipped and shredded yard waste to the pile, but the advent of green-waste bins has made that unnecessary. I do occasionally add sawdust, dry leaves or soil left over from nursery pots, but they don't seem to make much difference.

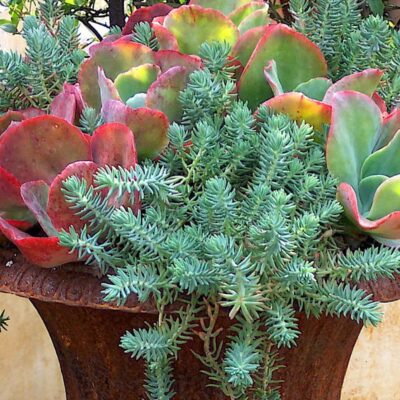
Btw, don't bother trying to compost succulents---they take forever to decompose!

Success tips

If you live in a winter-wet, summer-dry climate like mine (inland Southern CA, Zone 9b)...

  • Create your compost area in a mostly shady location, so it won't dry out quickly in summer.
  • Keep compost moist but not soupy, just wet enough so worms can slip and slide.
  • If your pile functions fine but you don't see worms, they may be in its cool, moist bottom layer.
  • When harvesting finished compost, shovel it into plastic nursery pots and set them atop the pile overnight. Worms will descend back into the pile through holes in the bottom of the pots.
  • If storms, a broken pipe, a hose-wielding child (or an absent-minded owner) accidentally floods the hole, add alfalfa to absorb excess water. Start with a few handfuls; pellets expand so much, they may overflow the hole. Scatter excess into the garden.
  • Turning the pile helps aerate it, which is especially important if you add yard waste. Keep in mind a mixed-waste pile is more work to harvest because it needs sifting.
  • Before composting whole fruits or vegs, hack them up. The more surface area a large, dense item has, the quicker worms can process it.
  • Don't add weeds that have gone to seed.
  • If a seed from a tomato, squash or melon sprouts in the pile, consider it a gift and transplant it into your vegetable garden.

What about odors? And doesn't garbage attract vermin?

There's no smell and no problem with critters unless you add pet waste; or animal fat, bones or protein. I no longer compost eggshells, because a nocturnal visitor---possibly a possum---was digging them out of the pile.

If the pile does smell, it's probably too wet, causing anaerobic decomposition. Aerate it with alfalfa and/or dry, chopped yard waste.

Isn't a compost pile unsightly?

No. In fact, I make a point of showing it to visitors. If they're interested, I dig up a knot of worms, and ask if they've ever held any. (Worms tickle.) A fond memory is of two teen-age boys who backed away in horror. (Clearly they weren't raised right.)

Red worms for composting (c) Debra Lee Baldwin

It's not necessary to pet your worms, but it is nice to name them.

My grown son enjoys discussing compost methods. His system is more sophisticated---two bins---because he composts chicken manure and grass clippings along with kitchen waste. He uses screens for sifting and to stop chickens hunting worms.

When he started composting, I presented my son with a prettily wrapped box. After glancing at my DIL, I said, "Uh, maybe you want to open that outside?" (It contained 100 red wigglers.)

Compost pile worms

Now don't go dissing Walter, Wilma and the rest. They're my cleanest, hardest-working garden helpers. 

Must you buy worms?

Not if you have a friend willing to share hers. Even a handful will do. They quickly reproduce.

Which reminds me, decades ago, red worms found my pile all on their own. Maybe angels dropped them.

Anything else to watch for?

Trees and shrubs love being near a compost pile. When a mat of fine white roots encroaches, chop them off...and, well, compost them.

Mr. Compost, your garden, and the taxpayers of California thank you.

Related Info on this site

Succulents benefit from pumice

Soil and Amendments for Succulents

Soil & Amendments for Succulents Why pumice is the ideal soil amendment for succulents Debra’s Simple Soil Formula for Succulents Please don’t stress over soil. I’ve seen succulents thriving in pots filled with garden soil so hard a ball would bounce on it, and at a nursery in soil so rich in peat that moss…

Debra Lee Baldwin garden (c) Debra Lee Baldwin

See Debra’s Idea-Filled Garden

Welcome to my site’s “Debra’s Garden” page. This is where you’ll find photos of plants in my half-acre succulent garden, as shown in my recently released, 15-min. video:” See My Idea-Filled Succulent Spring Garden.” The video came about as a result of my garden looking amazingly beautiful after a rainy April here

The post My Easy, Inexpensive In-Ground Compost Method appeared first on Debra Lee Baldwin. Copyright © Debra Lee Baldwin.


from Debra Lee Baldwin https://ift.tt/32P3UWR
via IFTTT

miércoles, 29 de diciembre de 2021

Want to Make Tequila or Mezcal from Your Agaves? Amazing tips

My tequila/mezcal journey started with my Ask Me Anything challenge. Mark Dorfman of Orange, CA emailed: "How many piñas does it take to make a bottle of Tequila or Mezcal?" Of the 100+ questions from my newsletter subscribers, I kept coming back to Mark's.

As a journalist, I'm all about being timely, and New Year's Eve---second only to Cinco de Mayo for tequila consumption---is coming up. Plus I shared Mark's curiosity. A piña (Spanish for pineapple) is what's left of an agave once its leaves are sheared off.

Jose Cuervo photo

Harvesting agaves for tequila in Mexico. Photo: Jose Cuervo.

Mark's question led me to a romp through the Internet that gave fresh perspective on agaves.

Before long, a little knowledge---being a dangerous thing---made me want to make the moonshine of Mexico: mezcal. You can use nearly any kind of agave, wild or farmed. (Tequila is trickier. It's a type of mezcal made solely from Agave tequilana and it has production standards beyond the abilities of most craft distillers.) Btw, the average proof of tequila is 80; of mezcal, 38 to 55.

Agave tequilana (c) Debra Lee Baldwin

Agave tequilana (Weber's blue agave) in a garden

I figured making mezcal was about as complicated as making beer, the hobby of a friend of my son's. (If he can do it...) Granted, commercial mezcal producers say it has to come from a particular region and be certified. But  artisanal mezcaleros are everywhere. Why not mezcaleras? (!)

A lost opportunity

Just think: Over the years, we've chopped apart and disposed of three large Agave americana (century plants) that bloomed and died in the garden. See: Big Blue's Life and Demise. Had I known about Mexican moonshine, I'd have roasted them.

Agave removal (c) Debra Lee Baldwin

See my YouTube video: Agave americana Bloom and Removal

I figured I'll need a core (piña) about the size of a five-gallon bucket, from an agave in bud.  Gearing up for flowering creates a high sugar content in the core. So to make alcohol, you can't use an agave that's unripe or post-bloom (gone to seed).

What does a flowering agave look like? See my article: "Your Agave's Blooming -- Now What?".

Professional jimadores in Mexico---where tequila and mescal are billion-dollar industries---know precisely when an agave is ready. And so do I: The center leaves come together, hugging the growing stalk. Cool. I'm already an expert.

Agave angustifolia 'Marginata' (c) Debra Lee Baldwin

Agave angustifolia 'Marginata' in a garden

One popular agave for mezcal is A. angustifolia, which blooms around age 10. On labels it's "espadín." Others you may recognize are A. shawii, A. potatorum, A. macroacantha and A. americana. See them in the Agave Gallery.

Mezcal made from Agave americana (century plant)

Yes, you can make mezcal from century plants. Look closely: "100% A. americana" is on the label, at upper right.

As with most vegetables, roasting an agave enhances its flavor and sweetness. Cottage distilleries in Mexico roast piñas in pits dug into the ground, sort of like a luau. If I aimed for two bottles -- one for Mark and one for me -- I'd hack chunks off a piña, pile them in my turkey pan, and slow-cook them---turning occasionally with tongs---until browned, soft, sticky and sweet.

Not too difficult, right? Well...there's a bitter juice that needs to be drained off or it'll ruin the flavor. Also, cooking a piña in a home oven would likely negate the flame-roasted flavor mezcal is known for.

The next step is to pound the cooked agave, which is quite fibrous, into a mash. I confess reading about that caused my interest to wane. Serious mezcaleros use a big stone wheel turned by a horse, or at the very least, a large wood mallet.

Equally daunting is the final step: distillation. Seems I'd need a still.

Copper still for mezcal

This 3-gallon still on Amazon would likely do the trick, but $270 is a lot of money to pay for a few bottles of---let's be real---mediocre mezcal.

Tequila Fortaleza with agave pina stopper

Never mind what the tequila tastes like, I want the bottle. That piña cork!

It's sounding a lot better to simply buy a bottle of mezcal to toast the New Year. Or tequila. Hm. What a great excuse to visit El Agave Restaurant and Tequileria in Old Town San Diego, 45 minutes from my home. Bottles of tequila---every brand imaginable---line shelves. There are thousands, some collector's items. All are a delight to view. The food's fantastic too.

What About The Worm?

Long ago, on a trip to Mexico, I learned that the worm in a bottle of mezcal (never, ever in a bottle of tequila) is to show that the alcohol content is high enough to preserve a chubby larva. You know, like formaldehyde. Yum.

But nowhere did I find this info online, rather, I read that the so-called worm is "a marketing gimmick" (now why would that be?) or to add flavor (oh, come on!).

Con gusano, Agave salmiana

If a bottle of mezcal has "Con Gusano" on the label, that means "with worm." I.e. "with larva." This one is made from Agave salmiana.

Of vastly more interest---at least to yours truly---is that The Worm is either the larva of a moth that feeds on agaves, or of my old nemesis, the agave snout-nose weevil.

"Worms" are optional, btw, either when making an artisanal mezcal, or to munch like a gherkin. As far as I can tell, most mezcal brands don't bother.


Agave montana mezcal

This mezcal boasts that it's made from Agave montana. Evidently because it's rare and unusual, the price is over $400.


Agave worm salt

Maybe there IS something to that fabled worm. Worm salt is sold as a gourmet seasoning.

Clearly there's a lot about the culinary aspects of agaves to learn. Leaping to conclusions is lousy journalism, so I'll refer you to a great book I ran across: "Mezcal: The History, Craft & Cocktails of the World's Ultimate Artisinal Spirit." Author Emma Jansen is a journalist, editor and photographer who reports on global drinking cultures. Her writing is as clear and bright as double-distilled tequila.

To Answer Mark's question

Agave tequilana piñas average 110 lbs, and it takes 11 lbs. to make a bottle of tequila, so one piña = 11 bottles.

Hey Mark, you're the winner! Please LMK your address and which one of my books or calendars you would like. As for others who responded, rest assured I've read every one of them, and it's a real eye-opener to discover what interests and concerns you. The result is a list of topics I'll investigate and share with you in 2022.

And speaking of the New Year: Doesn't a shot of mezcal sound good right now? CLINK!

¡Feliz año nuevo, mis queridos! ¡Que sean bendecidos con salud y felicidad!

Note: Links to Amazon are affiliate.


Agaves: Uses, Photos, IDs and Varieties

With the exception of a few soft-leaved and variegated varieties, agaves want sun—the more the better in all but desert climates. Most are hardy to the mid- to high-20s F, and some go a lot lower. Sharp points at leaf tips and along leaf edges can make agaves treacherous. I snip about a quarter inch from leaves’ needlelike tips with garden shears.

Agave parryi 'Truncata' bloom (c) Debra Lee Baldwin

Your Agave’s Blooming–Now What?

Your agave is blooming! Now what? In my new video, Q&A and photo gallery you’ll find expert advice, agave IDs and how to start the plants from seeds and bulbils.

miércoles, 1 de diciembre de 2021

Grow Versatile Mini Pine Tree Crassula Amazing tips

Mini pine tree crassula, related to jade, is a carefree succulent I've grown for 20+ years. The botanical name, Crassula tetragona, refers to the three-sided shape of the leaves.

Crassula tetragona with aeoniums (c) Debra Lee Baldwin

Crassula tetragona at left, with blue Senecio mandraliscae and aeoniums in bloom.

What I enjoy about this stem succulent is its resemblance to a fir tree. Along upright stalks grow slender, pointed green leaves that curve slightly up and are smaller toward the top. Over time, cuttings branch, forming a shrub.

Mini pine tree succulent Crassula tetragona (c) Debra Lee Baldwin

I glued little beads to leaf tips for a holiday tabletop display.

Cuttings root easily.  As with most stem succulents, cut off the top few inches and stick cuttings upright in soil. Make sure the bands on the trunks (where old leaves were attached) are buried. From those bands, new roots will form.

Mini pine tree succulent Crassula tetragona (c) Debra Lee Baldwin

Like many crassulas, mini pine tree blooms in midwinter.

Less frost tender than jades (Crassula ovata and cultivars), mini pine tree is undamaged in my garden into the high 20s F. It forms a polite green bush, not too large, with a textural silhouette. Like jade, it's a great filler plant, but perhaps more interesting to look at. Certainly it's not as common.

Mini pine tree succulent Crassula tetragona (c) Debra Lee Baldwin

Crassula tetragona, foreground, in a Southern CA garden that includes aloes (in bloom), yuccas and jade (behind it).

However, I'm most fond of Crassula tetragona because individual stems do indeed look like mini pine trees. This makes it an good addition to a miniature succulent garden, like my Guatemalan mountain scene, shown here and in my book, Designing with Succulents (2nd ed).

Mini pine tree succulent Crassula tetragona (c) Debra Lee Baldwin

Cuttings of Crassula tetragona make little buildings look huge.

Crassula tetragona (mini pine tree) (c) Debra Lee Baldwin

I used Crassula tetragona in my Succulent Sleigh greeting card, available from Succulent Chic, my Zazzle store. 

Like many succulents, new leaves form at the tops of the stems and old leaves wither and fall off. This is normal, but eventually you're left with tall, denuded stems topped with clusters of leaves. If you don't like the look, prune the shrubs once a year so stems branch. Or if you're a lazy gardener like me, simply stick a metal fish in their midst.

A fish made from repurposed materials looks right at home amid my overgrown Crassula tetragona.


Related info on this site

Crassula 'Tricolor' (c) Debra Lee Baldwin

Crassula (Jade and More): Details, Photos and Varieties

Crassulas are among the easiest, most trouble-free succulents to grow, with one caveat: With few exceptions, they’re frost-tender (tend to be damaged when temperatures drop below 32 degrees F). Shrub varieties are very easy to start from cuttings, and stacked jades will send forth whiskery roots from between their tight leaves—simply snip off the stem and bury in potting soil so that roots are covered (it’s OK to bury a few leaves too). Crassulas, like aloes, also stress beautifully to shades of red, yellow and orange. Give variegated varieties adequate sun or they’ll revert to solid green.

The post Grow Versatile Mini Pine Tree Crassula appeared first on Debra Lee Baldwin. Copyright © Debra Lee Baldwin.


from Debra Lee Baldwin https://ift.tt/3Ee6a7N
via IFTTT

martes, 23 de noviembre de 2021

Create a Wall Christmas Card Tree Amazing tips

A wall Christmas card tree takes up no floor space and is as engaging as any 3-D tree.

For my family, creating a Christmas card tree is an annual event. It's a tradition I started decades ago. Guests express surprise that we receive so many cards. We don't, really. Some date to the '70s!

Not enough Christmas cards?

Well! You might combine succulents and the holidays by making a tree of cards from my "Succulent Chic" Zazzle store. (Send me a photo if you do!) Here's one example:

Succulent sleigh greeting card (c) Debra Lee Baldwin

Additional ideas:

  • Use rectangles and circles cut from wrapping paper. Glue onto heavy paper so they don't curl.
  • Buy several assortments of inexpensive holiday cards (affiliate link). For about $40 you'll have plenty.
  • Do a tree-shaped photo collage that celebrates the year's memorable occasions.
  • Ask Mom and Grandma if you can put holiday cards they've been saving to good use.

What about ornaments?

I gave most of my keepsake ornaments to my DIL, who does a traditional tree. Even so, I sometimes can't resist a bespangled ball. I display such lovelies in a large glass apothecary jar or in a wide, shallow bowl.

Ornaments in a star bowl

Ornaments in a star-shaped mesh bowl

Card Tree Tools and Materials

You'll need...

  • String to outline the card tree's triangle
  • Masking tape. Use heavy-duty if the wall surface isn't smooth.
  • Scissors to cut cards at the fold. You'll only need the front, and if uncut they're too heavy and hang open.
  • Stepladder (optional). Depends how high you have to reach.
  • Cards. It's hard to estimate the quanitity, but FYI our tree measures 70 inches on each side and takes 80-90 cards.

Card Tree Assembly

Christmas card tree on wall (c) Debra Lee Baldwin)

Begin by outlining an equilateral triangle with ribbon or string tacked or taped in place.

  • Lay out previous years' cards for approval. "I need a vertical," my son will say, glancing at us lazy spectators over his shoulder.
  • No star for the top? Cut one from a card.
  • Extend upper corners of outermost cards beyond the string to give the tree a stair-step edge. How far? Figure half the width of the card or simply eyeball it.
  • Cards can---and should---slightly overlap.
  • Small cards mostly (but not necessarily) go at the top; larger ones, farther down.
  • Help whomever's doing the assembly by rolling one- to two-inch pieces of masking tape. Each card needs three or four rolled bits of tape to secure it.
  • Tape cards to the wall, not to each other.
  • Place cards parallel to walls and ceiling.
  • Remove the string when you're done.
Wall Christmas card tree assembly (c) Debra Lee Baldwin

Note rolled pieces of masking tape at upper right.

Enhance the experience

We light a fire in the fireplace, put a holiday video on the TV or listen to Christmas music, have hot cocoa or mulled cider, light pine-scented candles, and set out snacks.

Much of the fun is evaluating cards that come in the mail for "card tree potential." We also read friends' holiday letters and give priority to cards with sentimental value. But the best part is looking at photos of past card trees that show kids growing up.

How long does a card tree take?

Figure about a minute per card. This year's card tree, at top, took about 1-1/2 hours.

When it's finished

Pose people with it. I sometimes turn card tree photos into personal greeting cards or tuck copies into holiday cards.

Card tree storage chest

Our card tree storage chest takes up a lot less room than a fake tree.

Be sure to put one in an envelope big enough to hold additional photos. Write the year on the photo and keep the envelope with cards you'll use next year.

Wall Christmas Card tree (c) Debra Lee Baldwin

Trust me, you don't want to try to figure out the year a decade later.

Shop holiday sales. Gorgeous Christmas cards often go for 50% off. The more bling the better. I personally like those with rhinestones.

If you're not already doing so, save colorful greeting cards that come in the mail.

I'd love to know what you think. I welcome your comments and questions below. Happy holidays!

The post Create a Wall Christmas Card Tree appeared first on Debra Lee Baldwin. Copyright © Debra Lee Baldwin.


from Debra Lee Baldwin https://ift.tt/32hSmuC
via IFTTT

jueves, 11 de noviembre de 2021

Plant a Succulent Grid in a Shallow Circular Pot Amazing tips

When I saw succulents planted in grid patterns in shallow, circular pots, I just had to show them to you. Here and in my new video, you'll discover how to make similar planters for your own garden.

I spotted them at The Well, a high-end boutique specializing in outdoor furniture and accessories. It's in Summerland, CA near Montecito where Oprah and the royals have large estates.

Willy Guhl pot w echeverias

Willy Guhl pot with echeverias at The Well

I envisioned lavish poolside patios graced with The Well's understated, sophisticated and functional outdoor art...especially these large shallow cement pots planted criss-cross with succulents.

Echeverias in a Willy Guhl cement pot

Echeverias in a Willy Guhl cement pot

Eek! They cost $2,500!

It seems that such hefty Midcentury pots by Swiss designer and artist, the late Willy Guhl, are prized collector’s items. Those two feet or more in diameter can go for upwards of $2,500---and that's unplanted! I didn't love the price, but I did love the look.

After I got home, I realized I had a similar-sized pot from a garage sale. It was free because they were happy to get rid of it. It’s lightweight, probably fiberglas. I did some checking, and comparable ones average around $100 online.

Concrete-look resin planter (c) Debra Lee Baldwin

I dabbed my resin pot with gray paint to make it look like concrete

Well then! We simply have to make a similar succulent planter, don't we? My goal was to create one that resembled those at The Well yet cost less than ten percent.

Here's how...

Materials

  • Large (2-foot diameter) shallow synthetic pot. Give it a drain hole if it doesn't have one. On Ebay, search "large outdoor resin bowl planter." At Amazon (affiliate links):  https://amzn.to/3C31xLA
  • Succulents: Echeverias or sempervivums are good choices because they're symmetrical and keep their circular shape as they grow. Go with echeverias if you live in a mild climate; semps if you get below-freezing temps in winter.

I chose blue Echeveria 'Alegra' from Oasis Water Efficient Gardens nursery near me in Escondido, CA. Pot size: 3.5 inches. Plant diameter: 4 to 5 inches. I estimated I'd need 21 but got 24 just in case. Order online.

Wide shallow resin pot

I used Echeveria 'Allegra' in 3.5-inch pots for my 21-in diameter pot

  • Gray paint (optional). After cleaning my weathered white pot, I dabbed the outside with gray acrylic paint to make it look like cement.
  • Potting soil: Any will do. I used Bonsai Jack, a coarse mix that doubles as a topdressing.
  • Lazy susan (optional). I like being able to rotate a large pot while planting it.

Method (in video)

  • Fill the pot with soil to one inch below the rim.
  • At the midpoint, plant a rosette so its crown is about even with the rim of the pot. (A plant's crown is just above the soil, where stem and roots meet.)
  • Create a plus sign with plants that extends to the rim of the pot. Mine consists of two echeverias on four sides, for a total of 9.
Faux-concrete succulent grid planter (c) Debra Lee Baldwin

Here's my finished faux-concrete succulent grid planter. I love that I can slide it (concrete would be way too heavy).

  • Fill in the corners, adjusting plants as needed to make a grid.
  • Add topdressing: more Bonsai Jack potting mix, pebbles or crushed rock to conceal bare dirt and give the composition a finished look.
Succulents in a grid w holiday balls (c) Debra Lee Baldwin

Little red holiday balls make mine look like a big dessert

How many plants do you need?

Cut a paper circle the size of your pot’s inside top diameter. Fold the circle in quarters to pinpoint its center. At the nursery, put the paper on the ground and place small potted succulents on top, as you'll plant them: from the center outward.

How many succulents do you need

20" diameter pot = 37 plants in 2" pots

What if you’re ordering plants online? Cut paper circles or squares the size of the nursery pots, and set those on the paper circle.

How many succulents for a circular pot

12” diameter pot = 21 plants in 2” pots

Find a similar terra-cotta pot on Amazon.

Tell me what you think!

Do you love these designs? Aren't sure? Have I inspired you to make something similar? I welcome your questions and comments below!


Related info on this site

Floral style succulent arrangement (c) Debra Lee Baldwin

Echeveria Info, Photos & Varieties

Echeveria Info, Photos & Varieties How to grow echeverias perfectly, plus an extensive gallery, all ID’d See All Succulent Types Aeonium Agaves Aloes Cactus Crassula Echeveria Euphorbias Ice Plants Kalanchoe Portulacaria Senecio About Echeverias Here you’ll find expert advice to help you grow echeverias perfectly, with a gallery of 150+ beautiful, notable species and cultivars.…

Succulent Container Garden (c) Debra Lee Baldwin

Succulent Container Design

Succulent Container Design Design ideas and must-dos for beautiful, easy-care potted succulents Succulent Container Gardens, How-To Discover My Online Design Class! New! How to Group and Display Potted Succulents (9:48) DIY Floral-Style Succulent Centerpiece Learn About My Online Class! This lush and colorful succulent combo in a pedestal pot looks difficult, but it’s simple once…

The post Plant a Succulent Grid in a Shallow Circular Pot appeared first on Debra Lee Baldwin. Copyright © Debra Lee Baldwin.


from Debra Lee Baldwin https://ift.tt/3C1n3AA
via IFTTT

martes, 2 de noviembre de 2021

Water pH for Succulents Amazing tips

Giving succulents water with the wrong pH can inhibit the plants' ability to take up nutrients, leading to less vigorous growth and yellowing. Urban and residential water tends to be alkaline, meaning it has a pH higher than 7, which is neutral.

Minerals optimally accessed in slightly acidic soil include nitrogen, phosphorus, potassium, sulfur, calcium, magnesium, iron, and manganese.

Rainwater is slightly acidic, which is why a few days after a storm, your succulents (all your plants for that matter) look amazing.

Aim for 5.5 to 6.5

During a recent Cactus & Succulent Society webinar, Ernesto Sandoval advised that the proper pH for watering succulents is approximately 5.5 to 6.5 (slightly acidic). Ernesto, manager of UC Davis' Botanical Conservatory, is renowned for his knowledge about growing succulents, their root development, ideal soil mixes and more.

Acidify the water

The pH of residential water and its mineral content varies by region. If yours has a high mineral content (typical of San Diego), add 2 tablespoons of vinegar per gallon of water. If your water is low in minerals (typical of Davis west of Sacramento), add one T per gallon.

Test to be sure

pH meter

pH meter

Check your water with a pH meter. At about $13, a pH meter provides inexpensive peace of mind. Plus you can use it to test other liquids, including your drinking water, pool or aquarium.

Even better: Citric Acid

Citric acid

Citric acid

Also, for a gentler alternative to vinegar, use citric acid (about $15 for a 2-pound bag). Affiliate links.

Related Info on this site

How to Water Succulents

How to Water Succulents For succulents in the garden, in containers, and if there’s no drainage It really is this simple ~ Aim to keep soil about as moist as a wrung-out sponge. Watering about once a week in summer and once a month in winter should do it. Water thoroughly to soak the roots and…

Rain on agave (c) Debra Lee Baldwin

How Rain Benefits Succulents

Here’s how rain benefits succulents: It provides dissolved minerals and washes away dust that inhibits photosynthesis; it dilutes and flushes salts and harmful chemicals that have built up in the soil from tap water; and it provides nitrogen essential to growth,

The post Water pH for Succulents appeared first on Debra Lee Baldwin. Copyright © Debra Lee Baldwin.


from Debra Lee Baldwin https://ift.tt/3EIGzDN
via IFTTT