sábado, 4 de agosto de 2018

Ten Succulent Front Yard Essentials Amazing tips

The ten essentials for a succulent front yard aren’t difficult to achieve yet make a big difference. They’re illustrated below by designer Deana Rae McMillion‘s own makeover-to-maturity story. When she transformed her bland lawn into a dazzling succulent garden a few years ago, it looked great immediately after installation, earned a city beautification award, and continues to look better and better. The location is Carpinteria, CA, south of Santa Barbara, a mile inland from the ocean.
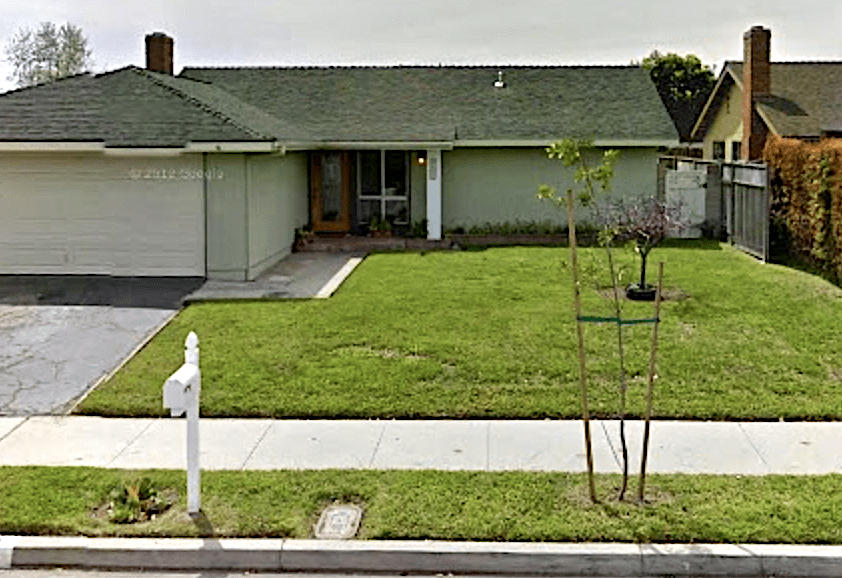
BEFORE As viewed from the street, the McMillions’ 1970s house was all straight lines and rectangles defined by a nondescript driveway, garage, concrete walkway, parkway strip, sidewalk, fence, and lawn.

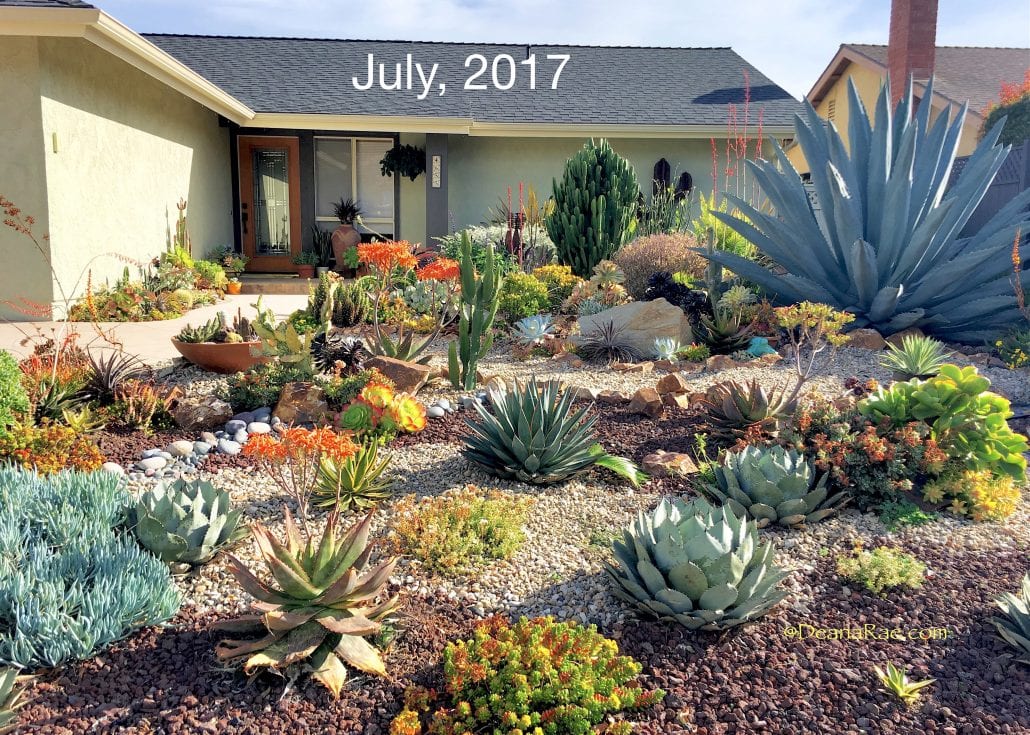
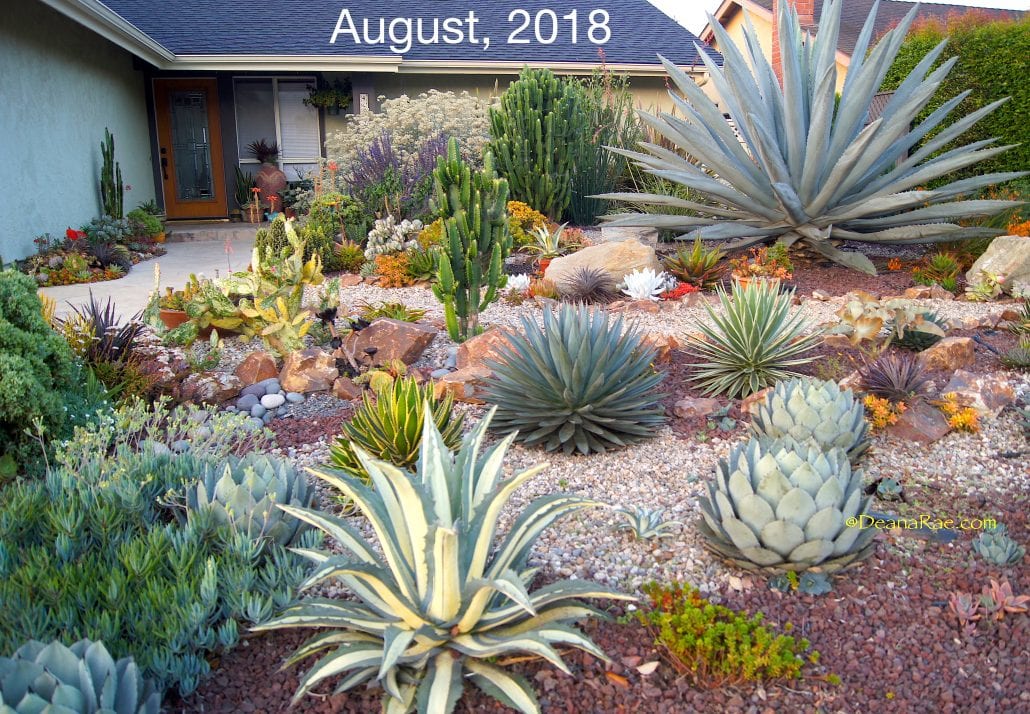
AFTER: The garden newly installed (Aug., 2015) and at yearly intervals: July 2016, July 2017 and August, 2018.
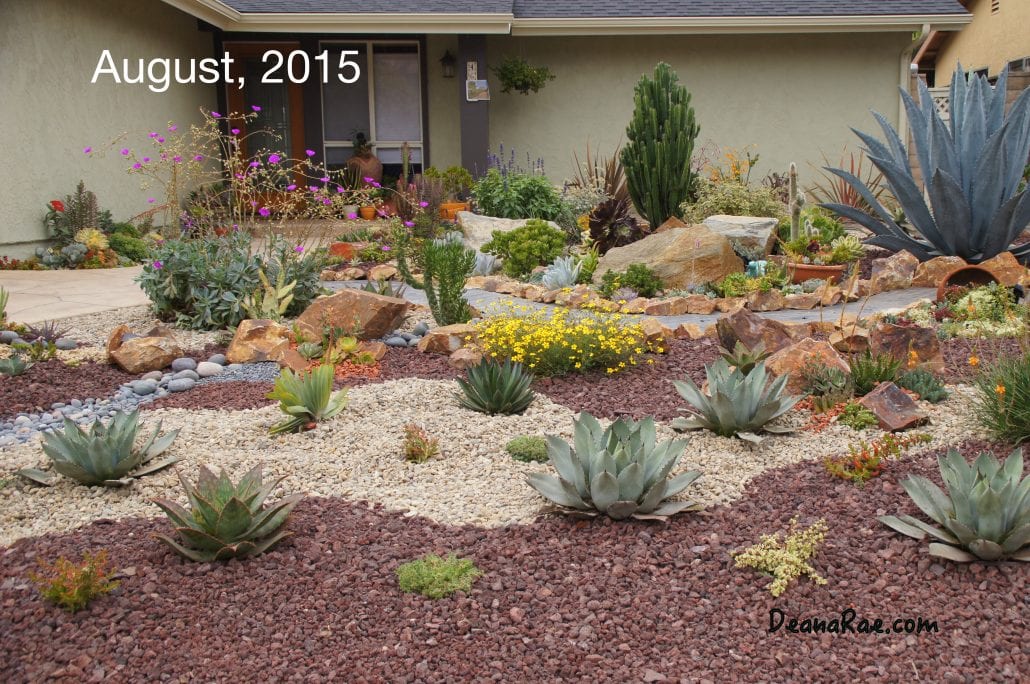
In 2012, a year after she and her husband moved in, Deana Rae cut out a small area of the lawn and experimented with succulents. They did well, and an Agave americana quickly attained several feet in height and diameter. Notice how it (the big blue century plant at upper right) has enlarged over time and become a dramatic focal point that visually balances the “weight” of the house (i.e. the prominent garage).

Succulent Essential #1: Know how large plants will get. For example, Agave americana, though easy to grow and often free for the asking, isn’t for every garden. (See my video, “What You MUST Know About Century Plants.”)
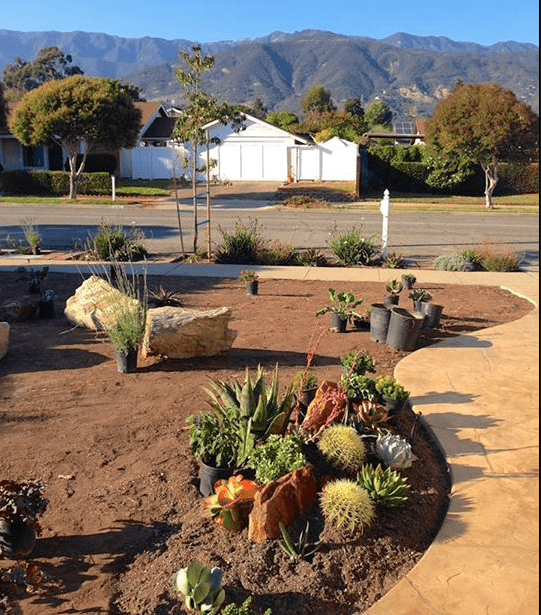
After the sod was cut out and removed, Deana Rae installed pocket gardens (inspired by San Diego succulent landscape designer Laura Eubanks) along the new front walkway.

#2: Collect succulent cuttings from friends, neighbors and fellow garden club members. If cuttings are not going in the ground right away, get them started in pots. Free plants!

#3: If soil is compacted and difficult to dig, give succulent roots a fighting chance by spading and amending prior to planting.

#4: Bring in large boulders to lend interest and definition to the overall design. They weigh tons, so have them delivered and positioned BEFORE you plant.

#5: Don’t skip pre-installation steps like adding irrigation, evaluating runoff, repairing drains and walls, and improving hardscape.

#6: Design with curved lines for a natural look. Straight lines and rows are more formal, seldom found in nature, and tend to emphasize a home’s linear architecture.

#7: Position complex plantings where they’ll be seen and enjoyed up close. Viewpoints that are broader and farther away need less detail and larger plants.
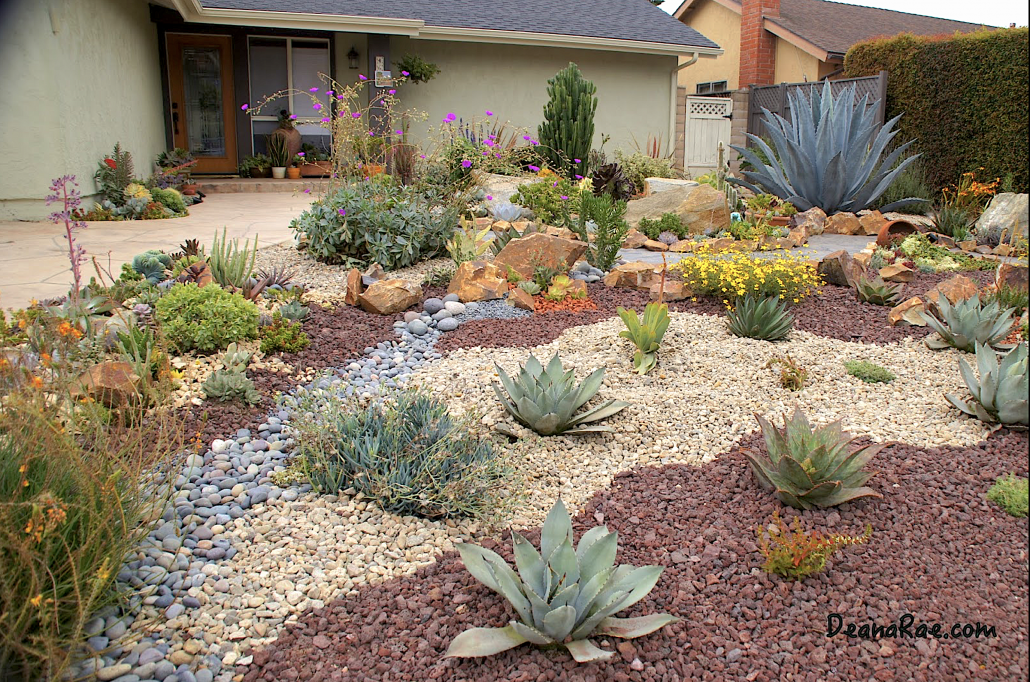
Deana Rae’s plant choices include medium-sized agaves, aloes, calandrinia (with purple flowers), bulbine (orange flowers), blue Senecio mandraliscae, and drought-tolerant perennials such as yellow sundrops (Calylophus sp.). A dry creek bed of river cobbles funnels rainwater into the garden. Small succulents such as jades, aeoniums, echeverias and sedums—all started from cuttings—nestle around boulders.

#8: Rock topdressings make a BIG difference. Imagine this garden with only bare dirt between plants. Topdressing finishes a garden aesthetically; adds interest, color and texture; makes weeds easy to pull; moderates soil temperature; and slows moisture evaporation. “I had so much fun shopping for rocks and gravel,” Deana Rae says. “I think I love rocks as much as I do succulents.”
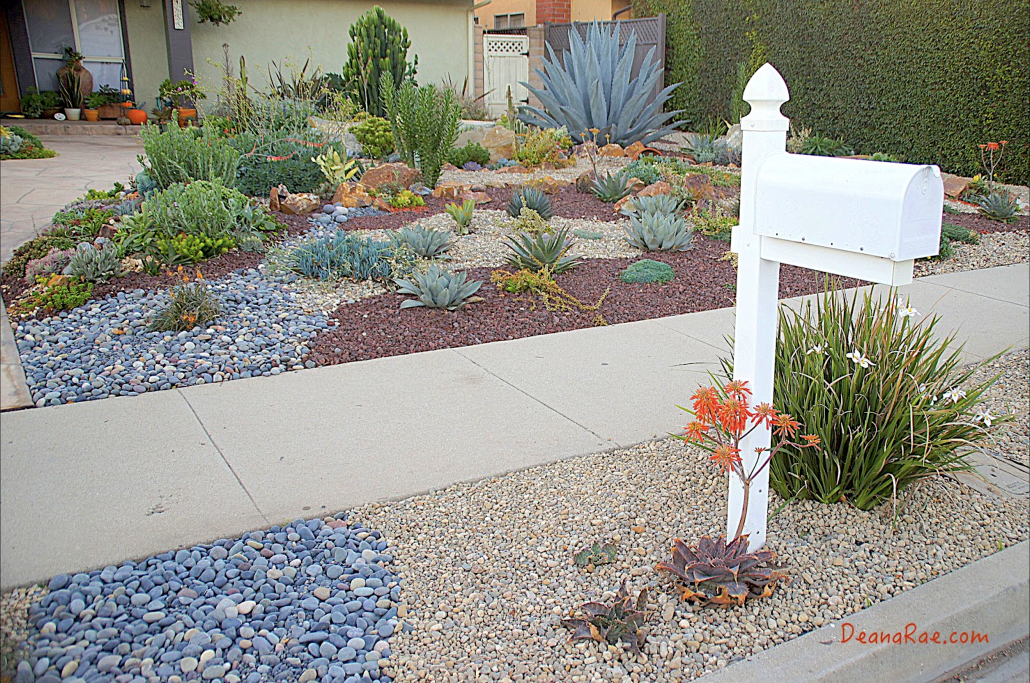
Aloe maculata (in bloom) is tough as nails and its offsets are often free for the asking. It’s one of the few succulents that’s invasive in friable soil, but in a parkway strip like this, it can’t get into trouble. In fact, as it spreads, it’ll make the the area look even better. The fortnight lily at right was well established, so it stayed.

#9: Continue rocks into the parkway strip. This enhances the overall design, makes the front yard larger, and provides a “hell strip” that’s easy to maintain.

#10: Include vignettes: Intriguing plant-and-rock combos within a larger setting. This is optional, but it’s a great way to express your creativity, enjoy the garden hands-on, and provide delightful discoveries for visitors. Some examples:
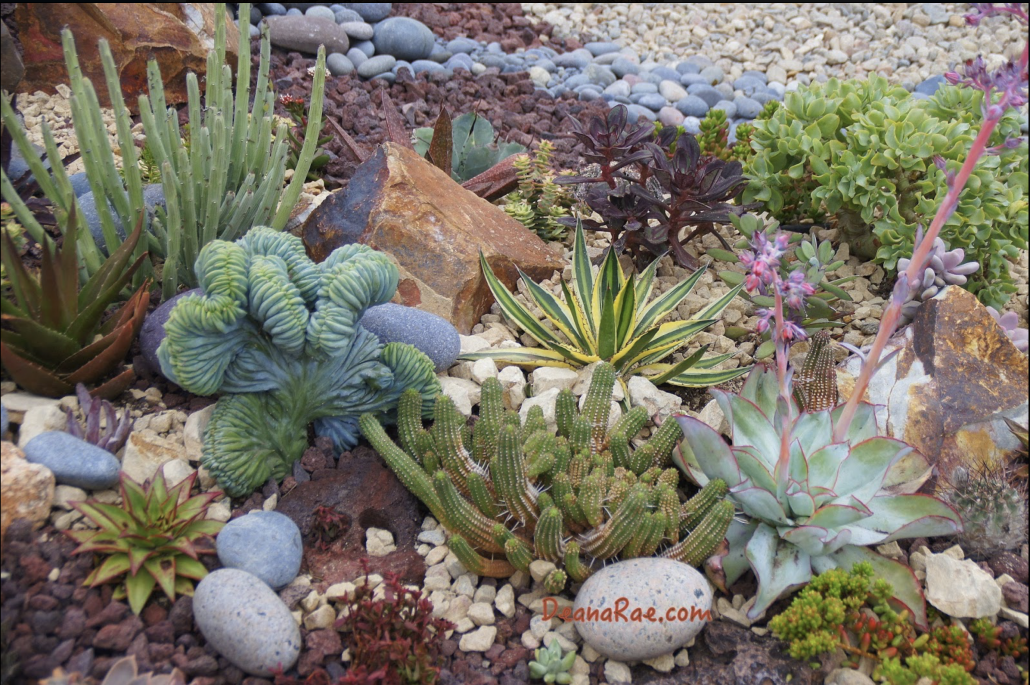
Dagger-leaved Agave lophantha ‘Quadricolor’ (center) contrasts with curvy ripple jade (upper right), Euphorbia mammilaris (lower middle) and a crested myrtillocactus (center left). Echoing the agave’s pointed, upthrusting lines are Echeveria subrigida ‘Fire and Ice’ (lower right, in bloom), Echeveria agavoides ‘Lipstick’ at lower left, and aloes.
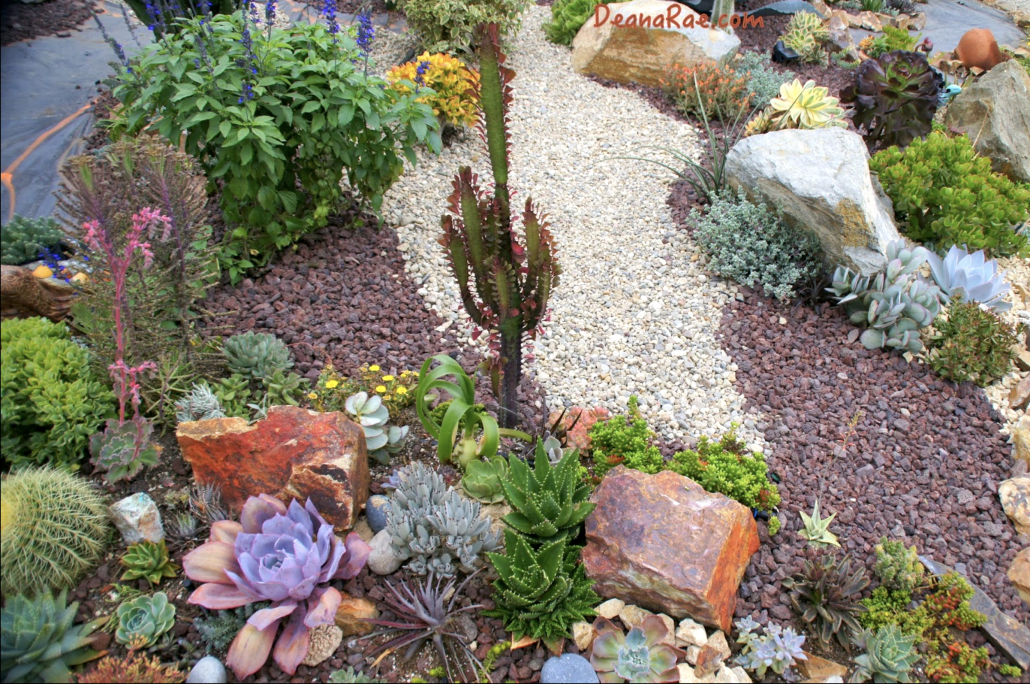
Gravels that flow through the garden suggest movement, contrast and repeat colors of succulents, and provide access to planted areas. Statuesque Euphorbia trigona ‘Rubra’ serves as a focal point that will grow much larger over time. An eclectic mix of small succulents includes echeverias, aloes, kalanchoes, sedums, crassulas and barrel cactus. A low-water salvia in bloom (upper left) lends floral color and a mounding, soft-textured backdrop.
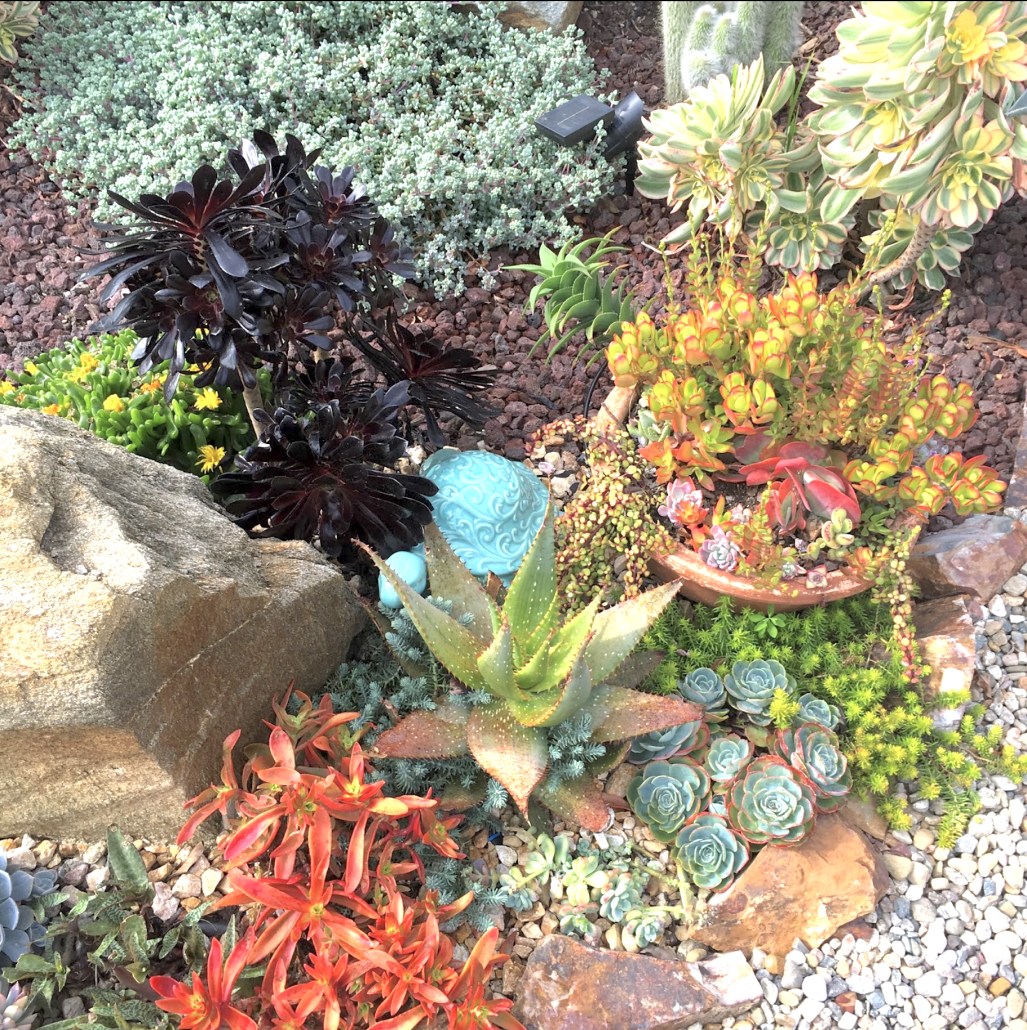
 

A ceramic turtle adds whimsy and repeats the color and shape of a cluster of turquoise echeverias. It’s fine to add a planted pot to a garden, like the wide terracotta bowl at left (with Crassula ‘Mini Jade’, Kalanchoe luciae and Portulacaria afra ‘Variegata’). Lampranthus deltoides at upper left extends the blue and lends frothy texture. Aeoniums, sedums and aloes complete the composition.
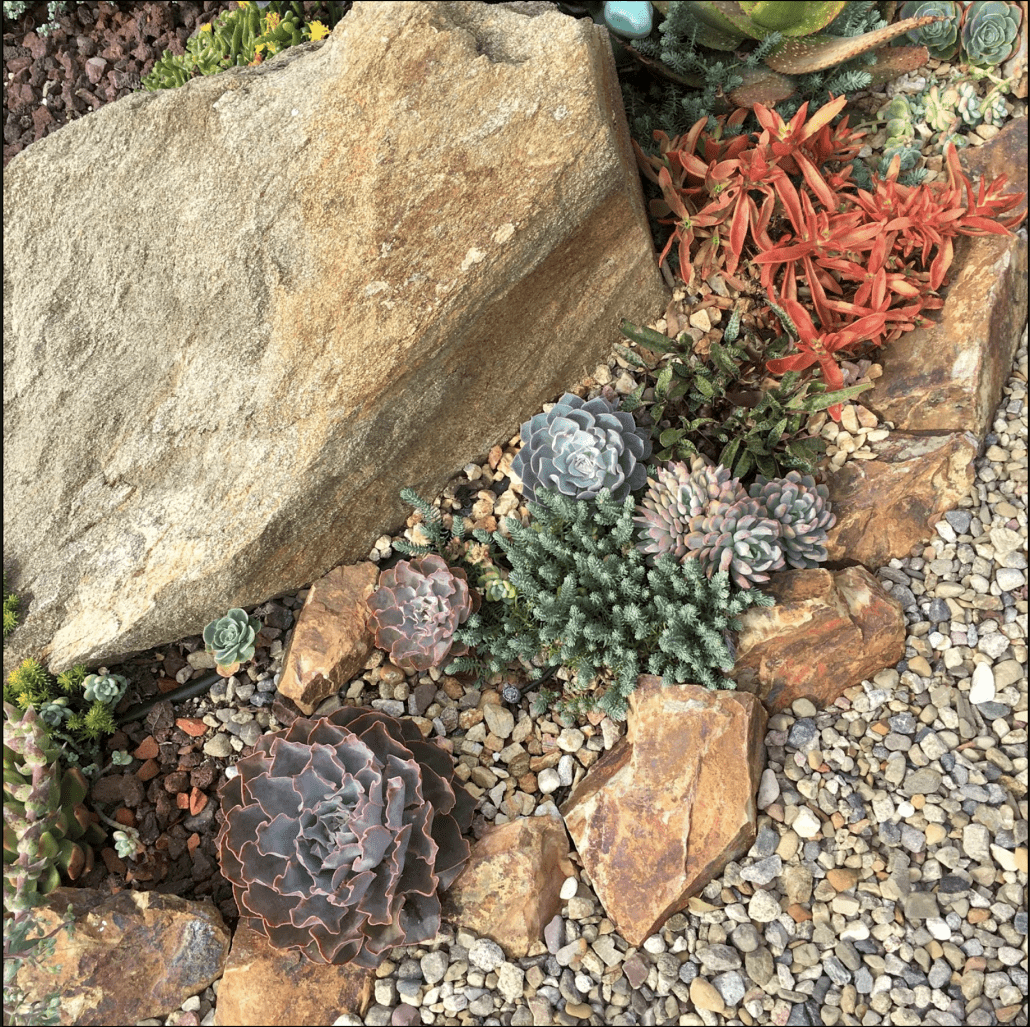
 

A sheltered niche amid rocks is a great spot for echeverias, which can be tricky to grow in the open garden and normally do best in  pots. Amid them are Sedum ‘Blue Spruce’, silver squill (Ledebouria socialis), and orangy-red Crassula ‘Campfire’.


Related info on this site:

The post Ten Succulent Front Yard Essentials appeared first on Succulents and Succulent Garden Design | Debra Lee Baldwin.


from Succulents and Succulent Garden Design | Debra Lee Baldwin https://ift.tt/2LWVF1C
via IFTTT

martes, 31 de julio de 2018

Creative Bird Feeder Materials & How-To  Amazing tips

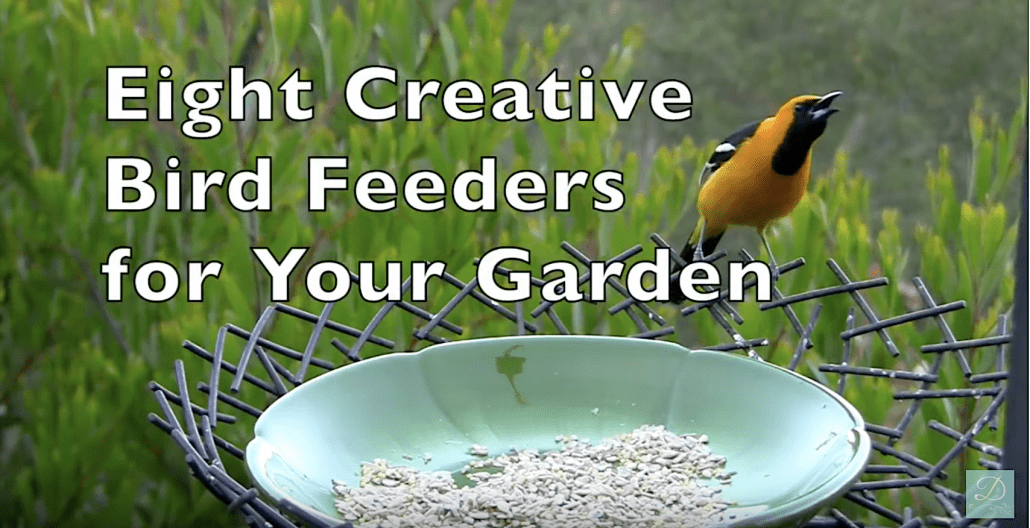
If you’d like to make lovely bird feeders similar to those in my video, Eight Creative Bird Feeders for Your Garden, you’ll find materials, suggestions and how-to here.

Depending on the time of year, I’ll have as many as 20 birds of a dozen different species at feeders I’ve positioned outside my office, kitchen and dining room windows. I’m in the foothills northeast of San Diego where native plants such as oaks and fan palms provide nesting sites. The second-floor deck where most of my feeders are located is adjacent to trees with limbs for perching and hiding, is high enough to be safe from cats, and isn’t easy for squirrels or nocturnal varmints to access.

It’s helpful to have:
— A dozen rustproof heavy-duty steel S-hooks, each about 3 inches long
— About 15 feet of soft, flexible, rustproof wire. 
— A 6-foot-tall wrought-iron free-standing plant stand designed for hanging baskets.

If you’ll be hanging feeders from your home’s eaves, you’ll also need a hammer and nails, several feet of chain, and a stepladder.

Optional: Spray-paint for metal. I paint my repurposed metal and wire feeders with Rust-Oleum so they’re all the same color (to match my home’s trim).

Essential: Keep them clean! It’s better to not put food out than to let feeders get dirty. Feeding birds is messy. Every evening, I hose the area, bring in the feeders, and clean them with hot water and dish soap. I don’t let food come into contact with bird droppings, which can spread diseases. And if I see a sick bird at a feeder, I stop putting out food for several days.

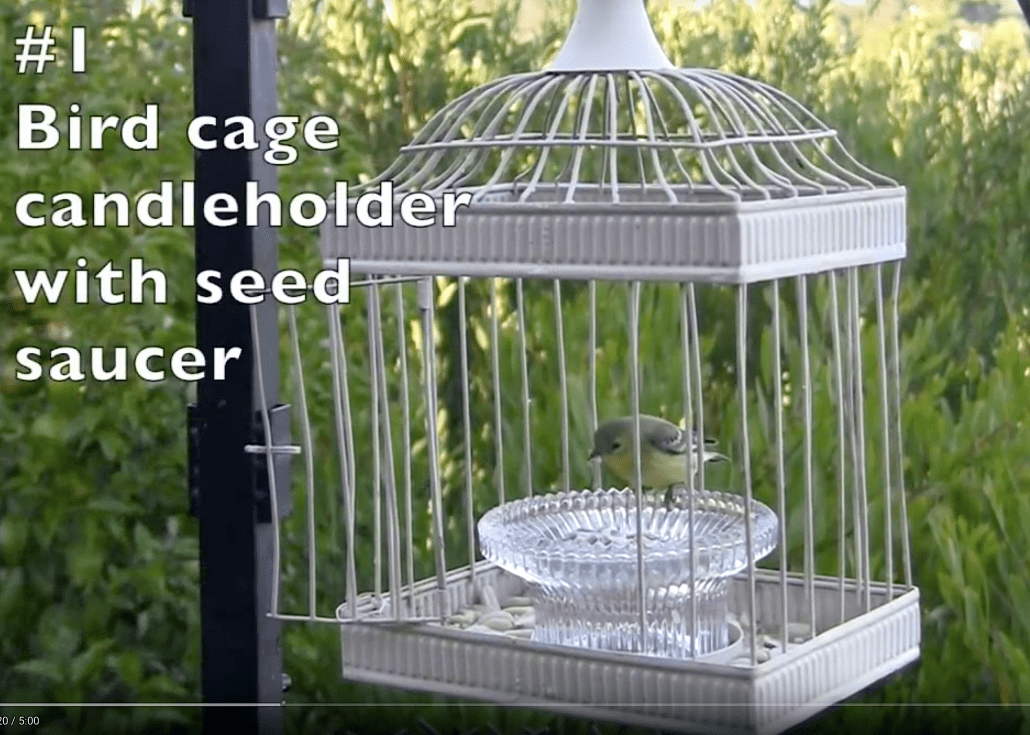
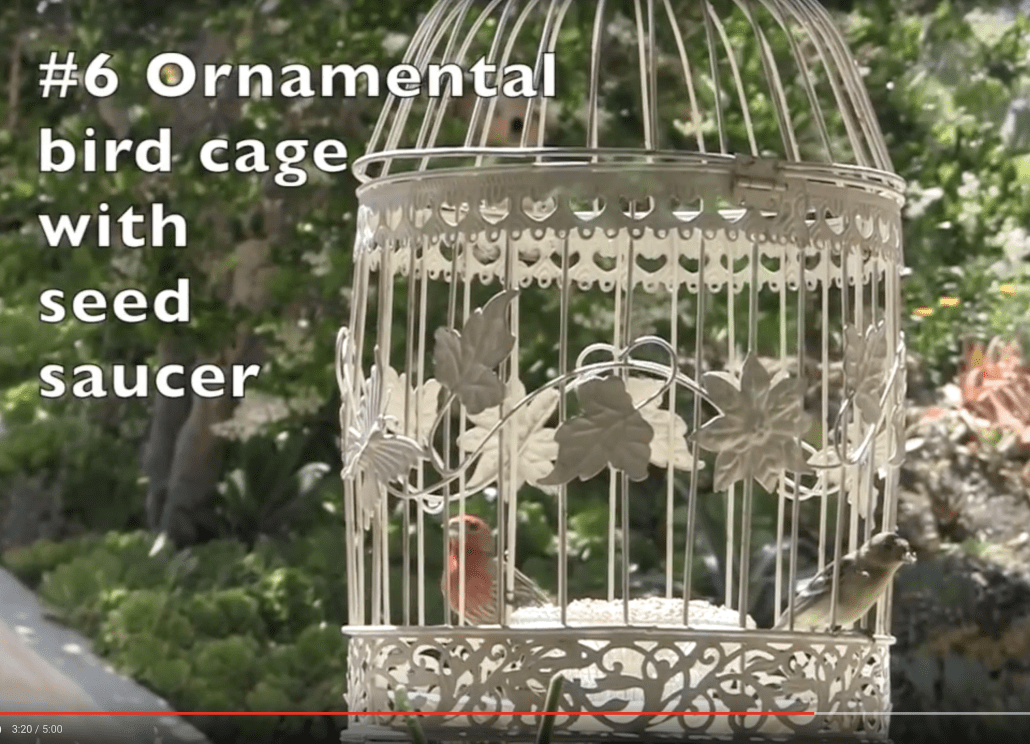
I found this ornamental bird cage and glass dish—both candleholders—at a thrift store. About $6 total. The goldfinch was gratis.

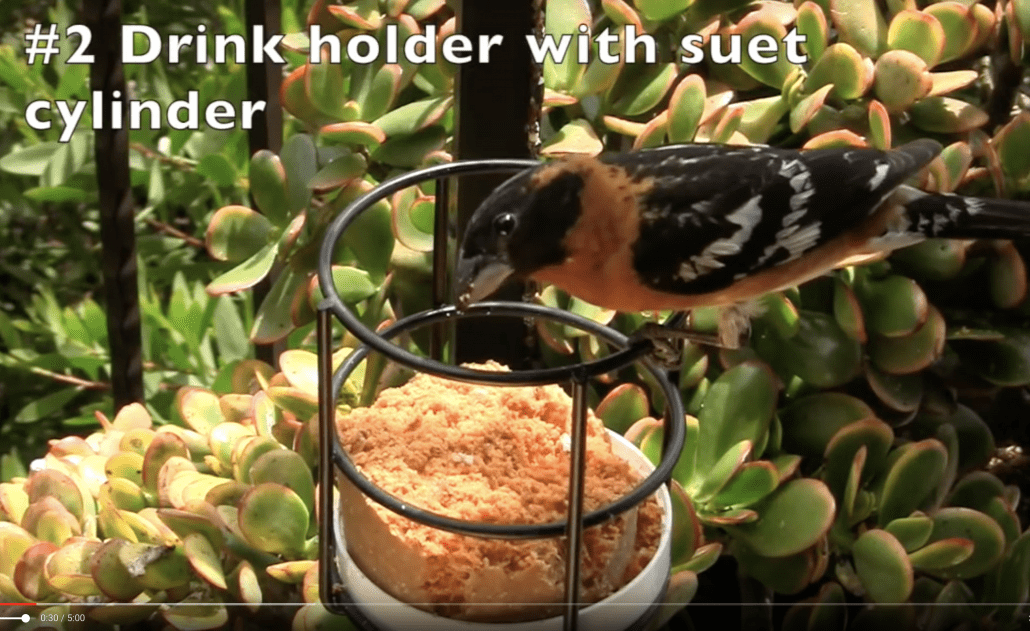
Metal drink holders (aka “beverage stakes”) are designed to go next to lawn chairs to hold bottles or soda cans. They’re perfect for suet cylinders, providing you set each in a plastic lid that keeps the suet from crumbling away. (I give my birds suet year-round, even though I live in a mild climate, because the extra fat and protein encourages brood production. It also attracts woodpeckers, grosbeaks and jays.) Each holder has a long vertical bar for staking into the ground. I placed this one, being enjoyed by a male grosbeak, in the same 5-gallon plant container shown below.

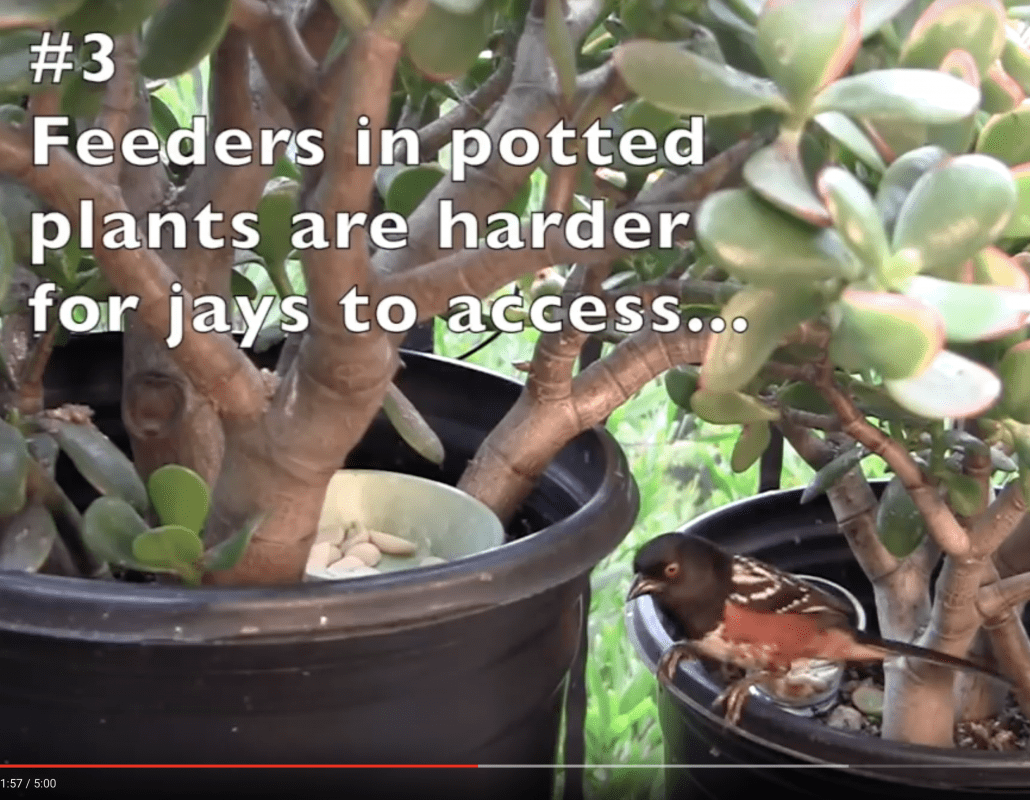
Small dishes and votive cups are handy for peanuts and seeds. But once they get wet, birds won’t eat out of them, so clean and refill them daily. The bird is a spotted towhee.

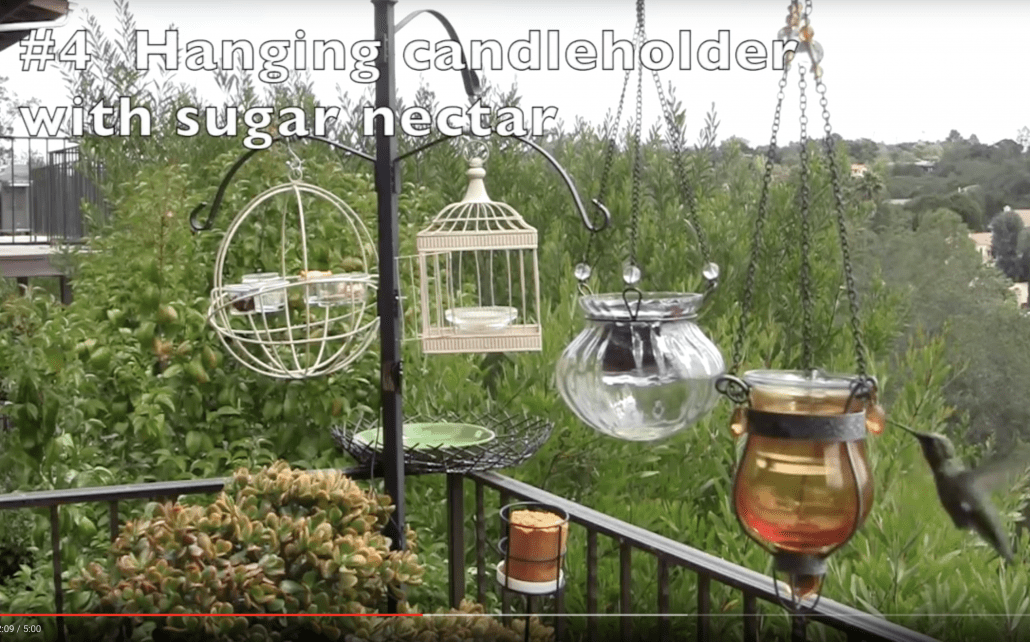
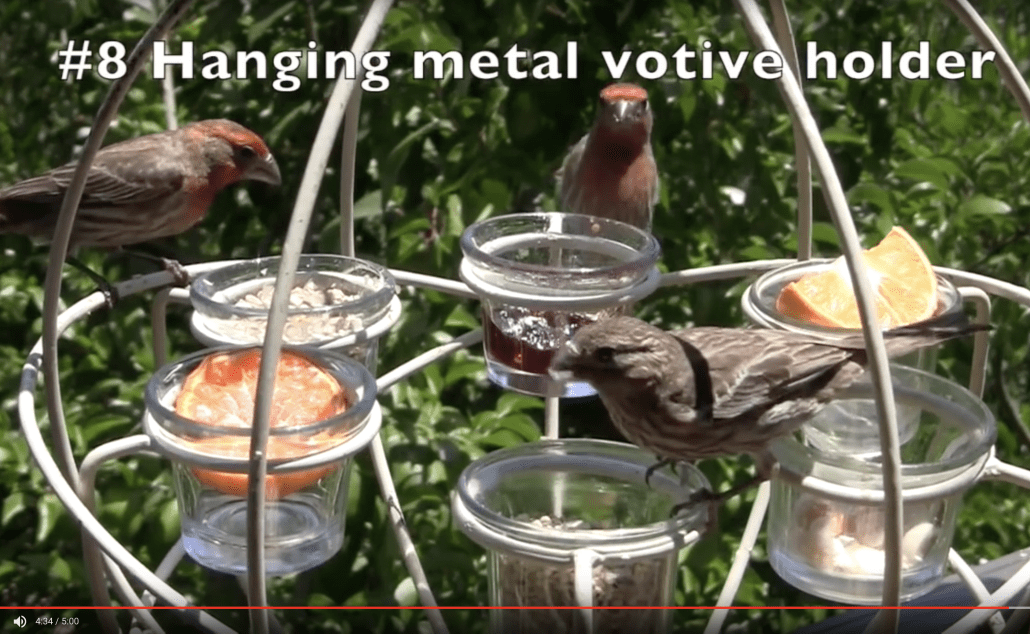
The hanging candleholders (“tea light lanterns”) are available at Cost Plus World Market and Amazon. In them are 2.5-inch-diameter glass tea light holders (“votive holders”) that contain grape jelly and sugar water. You don’t want to fill the entire candleholder with food because it’s too much, will likely get wet or go to waste, and is hard to clean. You also may have to unhook the feeders to bring them inside for cleaning, which means getting out a stepladder. Tea light holders, on the other hand, can easily be removed, washed and dropped back into the candleholders. Even though they’re stable enough their contents won’t splash onto birds, like the Anna’s hummingbird at lower right, it’s best not fill them to the brim.

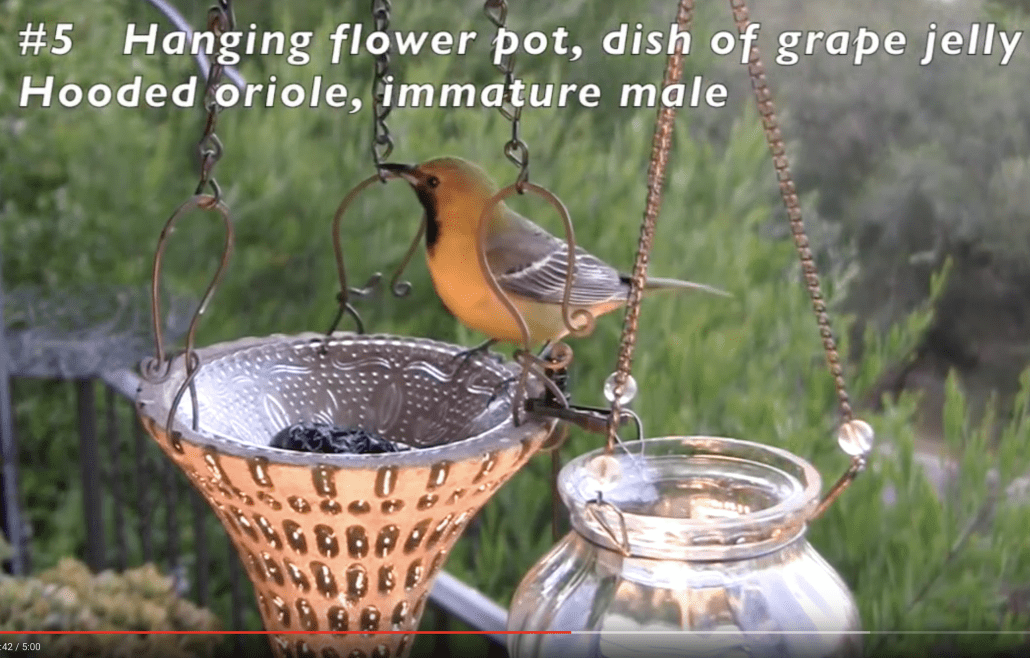
The flower pot that the oriole is sitting on is by Fallbrook, CA artist-potter Alicia Iraclides, who also fashions the lovely copper loops that her pots hang from. The glass dish came from a thrift store or possibly my kitchen cupboard. Regardless, at 5 inches in diameter, it’s a perfect fit. It doesn’t slide around, is shallow enough (1-1/2 inches) for birds to easily access, yet also is deep and wide enough to hold the right amount of food (1/4 cup of grape jelly or 1/2 cup of seed mix).

This 14-inch diameter metal bird cage came from Home Goods—a seasonal item. Here’s a similar one on Amazon. Also this “lantern.” The bars are about an inch apart, which is perfect for letting in small birds (like finches) and keeping out large ones (like jays and doves). If bars in your ornamental bird cage/bird feeder are closer together, prop the door open or bend and spread the wires so that little birds can come and go. I lined the cage with a paper towel and placed a glass saucer atop it, full of seed mix. This also helps elevate the birds for better viewing while they’re eating.

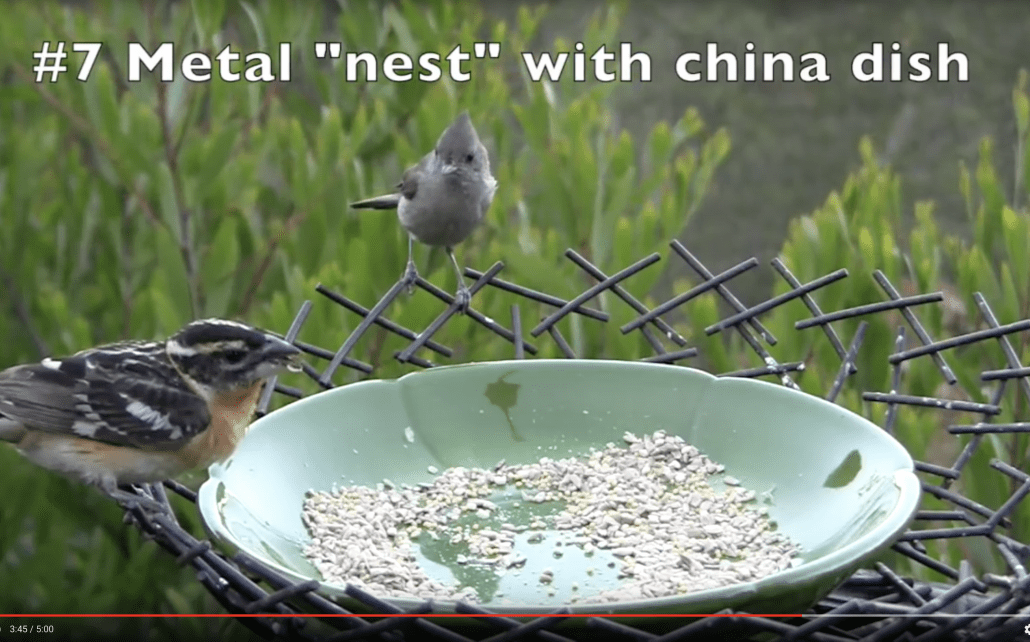
Both this stylized metal “nest” (16 inches in diameter) and bowl-like platter (10 inches) were thrift-store finds. I used coated, rustproof wire to secure the nest to the corner of the metal deck railing. I decided not to spray-paint it beige because it’s fine the same color of the railing. In the dish is Wild Birds Unlimited’s No Mess Blend which includes millet (which doves and quail like) and sunflower and peanut bits that most other birds enjoy. I also buy raw peanuts and sunflower seeds in bulk at Sprouts. Jays and titmice eat peanuts; finches prefer sunflower seeds—and nyger, but that’s too messy, perishable and expensive. There’s a grosbeak at left and oak titmouse at top.

This spherical candleholder came from a second-hand shop that specializes in utilitarian antiques. It originally was black, so I spray-painted it beige. Items like this are fun to hunt for and not difficult to find (hint: they’re often hanging from the ceiling, so look up). The best ones have an open design that lets you easily view birds that visit. Yes, they’ll use feeders made of wood, plastic and other non-transparent materials, but isn’t seeing these flitting, fleeting creatures what birdwatching is all about?

Related info on this site:

On my YouTube channel, check out my playlist: Debra’s Bird Feeders.


The post Creative Bird Feeder Materials & How-To  appeared first on Succulents and Succulent Garden Design | Debra Lee Baldwin.


from Succulents and Succulent Garden Design | Debra Lee Baldwin https://ift.tt/2LDWFr7
via IFTTT
lunes, 30 de julio de 2018

DIY Succulent Windowsill Pots Amazing tips

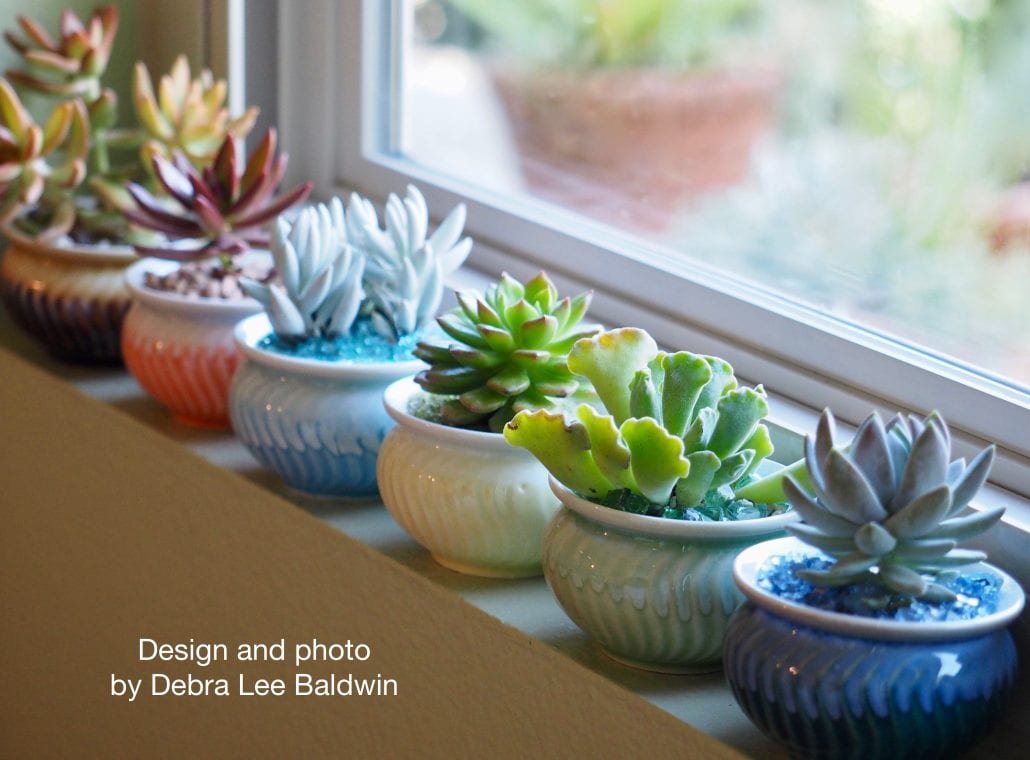
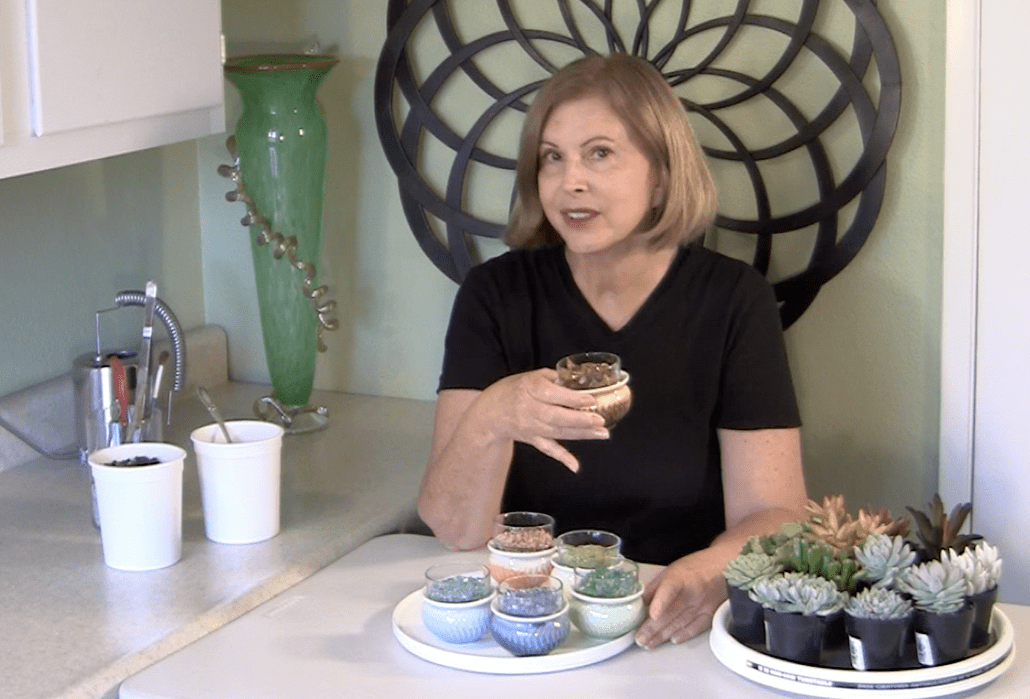
In my DIY Succulent Windowsill Pots (here and in the video), I show you how to make a quick, colorful succulent windowsill garden. Sunbathing helps succulents maintain their symmetry and color, and whenever you look out your window or work at a countertop or sink nearby, you’ll see and enjoy them.

My windowsill succulents

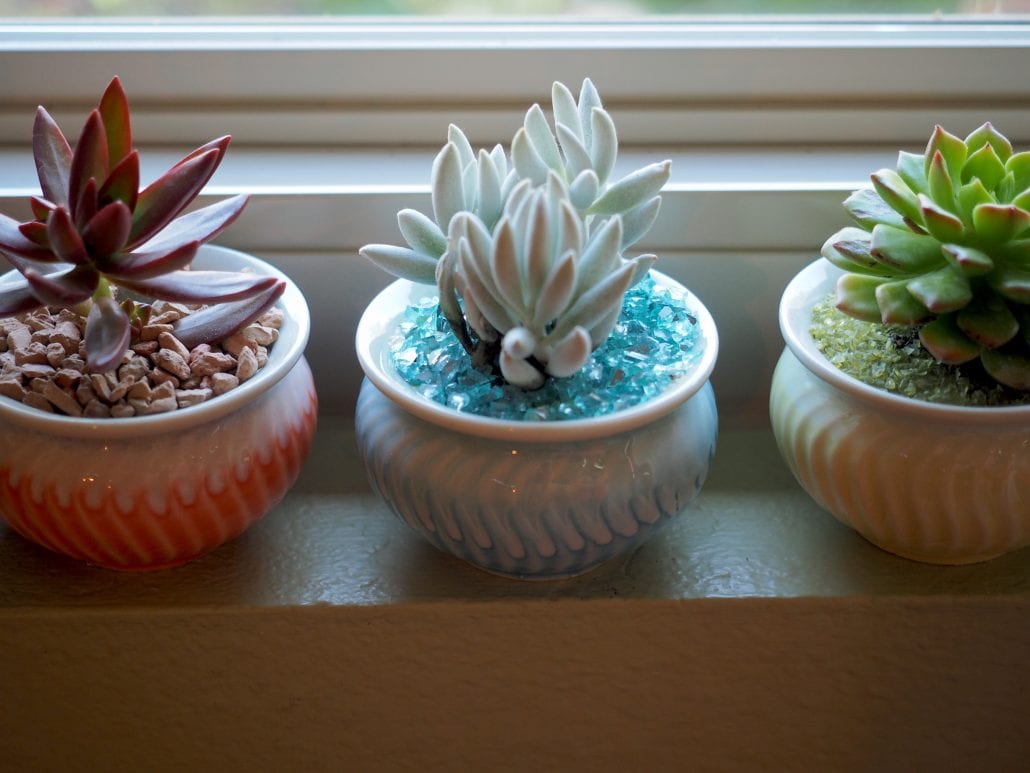
These six pots, each 3-inches in diameter, come as a set on Amazon (about $16). Their rainbow of colors makes them fun and easy to combine with succulents. I included crushed glass topdressings in several colors because glass and sunlight are made for each other…just like sun and succulents.

This set of six 3-inch ceramic pots are suited to any windowsill, but any similarly sized containers will do.

Materials:

Six 3-inch pots
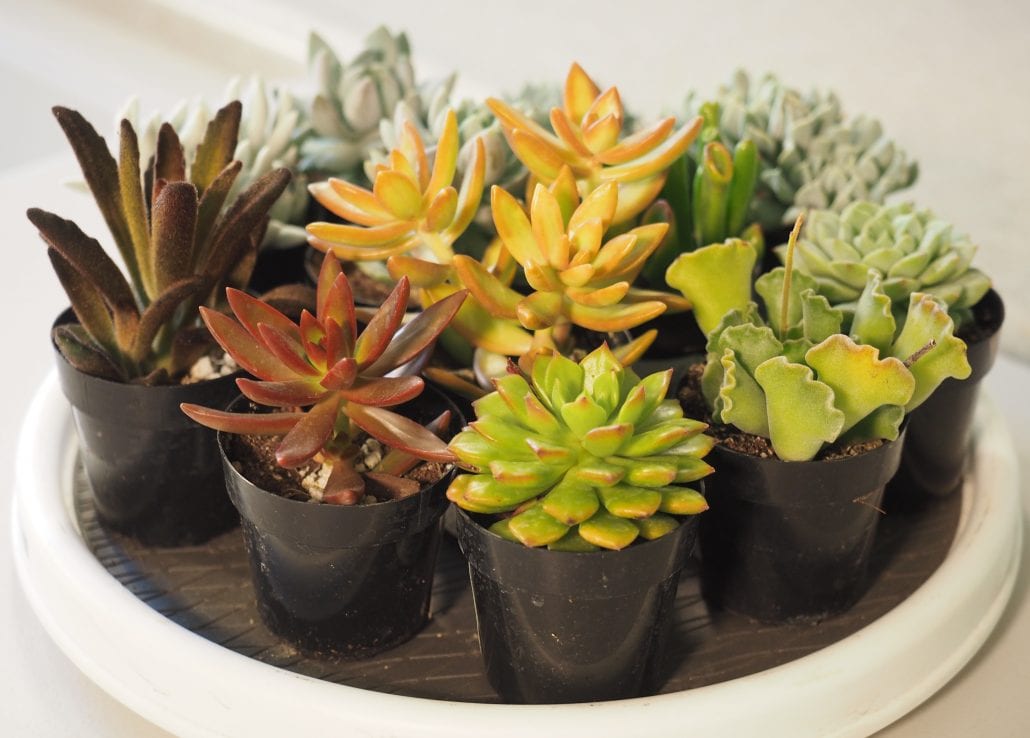
Six succulents in 2-inch nursery pots. I chose Adromischus cristatus, Sedeveria ‘Lilac Mist’, Sedeveria ‘Letizia’, Senecio haworthii, Sedum nussbaumerianum, and Sedum adolphi.

Pumice or potting soil (“cactus mix”) to finish filling the pots
White or neutral-colored sand (but not beach sand—too salty), available at craft stores and online.
Window screen or paper towels cut in six 2-inch squares (optional)
Crushed glass topdressing (optional), available from craft stores, floral suppliers and online.

Method:

Cover drain hole with a bit of window screen or paper towel so soil doesn’t fall out.
Gently slide the plant out of its nursery pot and place in new pot.
Remove 1/4 to 1/2 inch of soil from top or bottom so root ball stays below the rim
Spoon pumice or potting soil between rootball and pot.
Tap the pot with your hand and gently press down on the soil with your fingertips.
Add a layer of sand to cover pumice and soil. The sand also will fill gaps and keep the glass topdressing’s color true.
Add topdressing. I chose colors that echo the glaze on the pots, but fewer or just one color also look good.

Succulent windowsill pots

Care:

Water lightly and infrequently—1/4 to 1/2 cup weekly in summer, less in winter. Aim to keep soil barely moist, never soggy.
If your windowsill might be damaged by moisture, move the pots to the sink when watering.
If succulents stretch or flatten, they probably need more light. However, the sun’s ultraviolet rays, when magnified by untreated window glass, can burn plant leaves. If this is a concern, add a sheer curtain or move the plants farther from the glass.
Keep in mind that south-facing windows typically get the most sun and north-facing the least.
It’s normal for succulents to get leggy over time. After six to eight months or when you tire of looking at stems with growth only on the tips, take cuttings and replant.

Be sure to see my DIY video ~

Watch my short DIY Windowsill Succulents on my YouTube channel

Related info on this site:

Succulent Basics, Must-Do’s and FAQs

Here are the essentials for growing succulents successfully: water, light, soil, fertilizer and more. If all this is new to you… [Continue reading]

On my YouTube channel: 

Create a Colorful Succulent Terrarium

The post DIY Succulent Windowsill Pots appeared first on Succulents and Succulent Garden Design | Debra Lee Baldwin.


from Succulents and Succulent Garden Design | Debra Lee Baldwin https://ift.tt/2O0fBgD
via IFTTT
sábado, 21 de julio de 2018

Jim Gardner’s Succulent Showcase in Palos Verdes Amazing tips

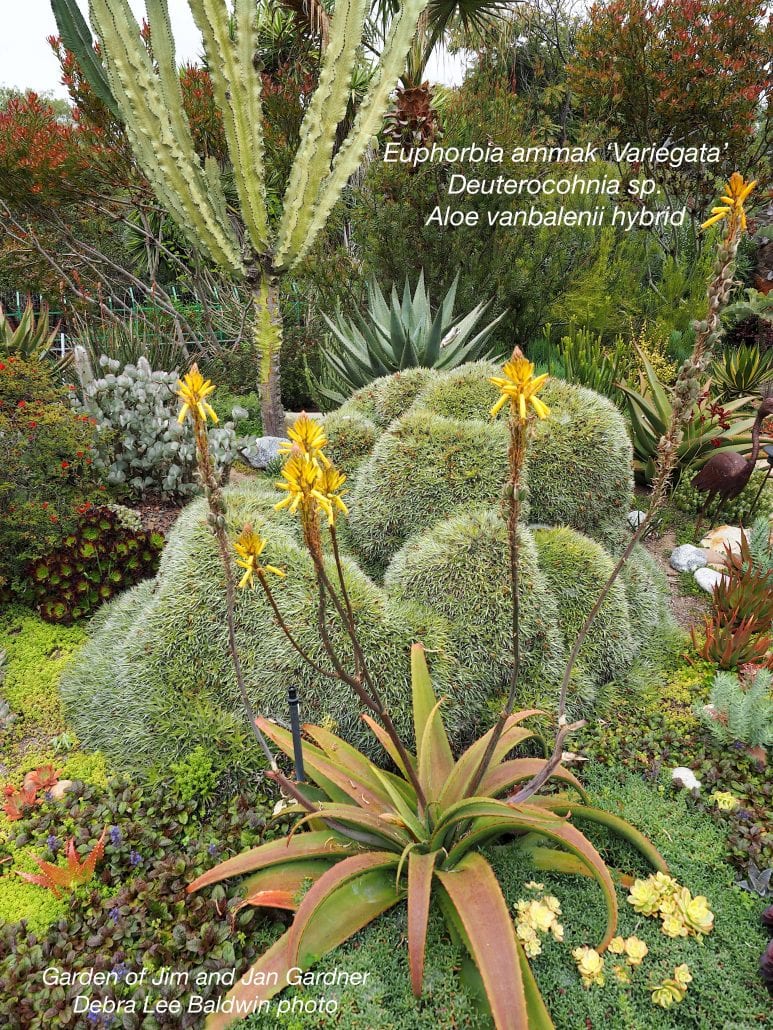
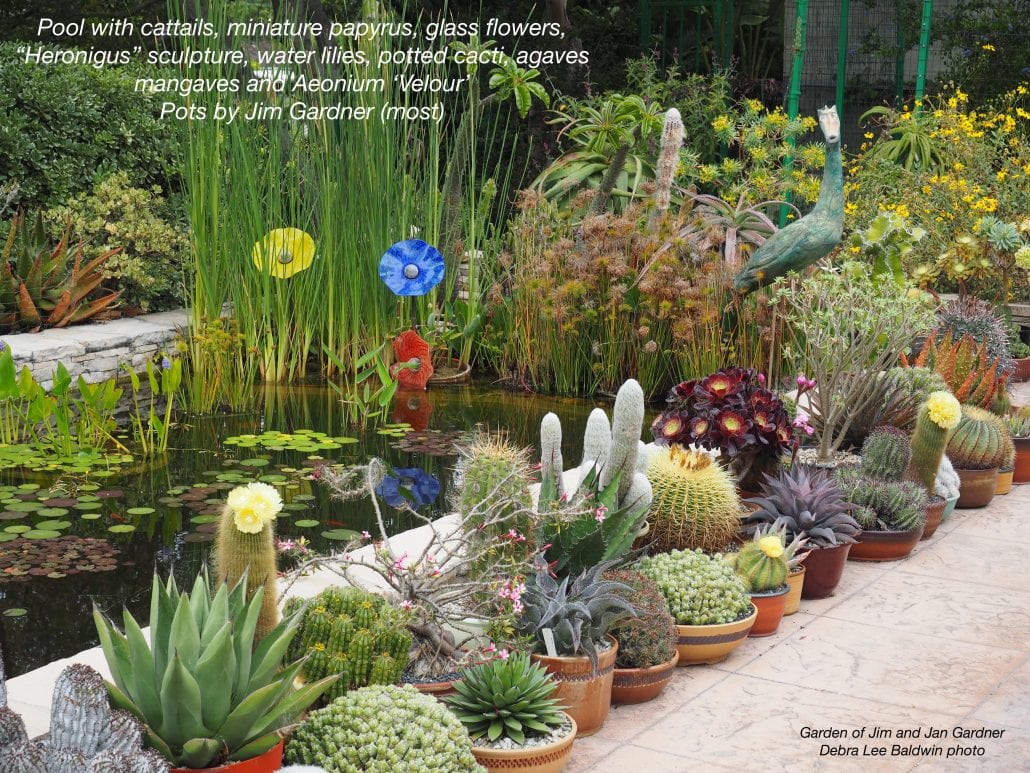
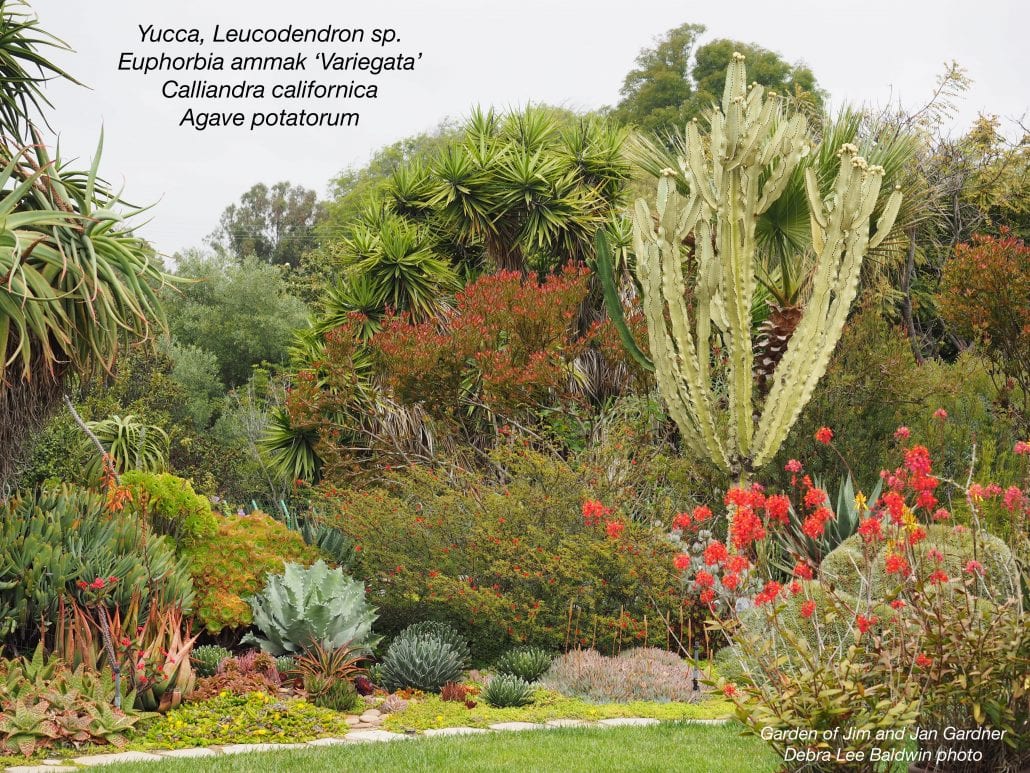
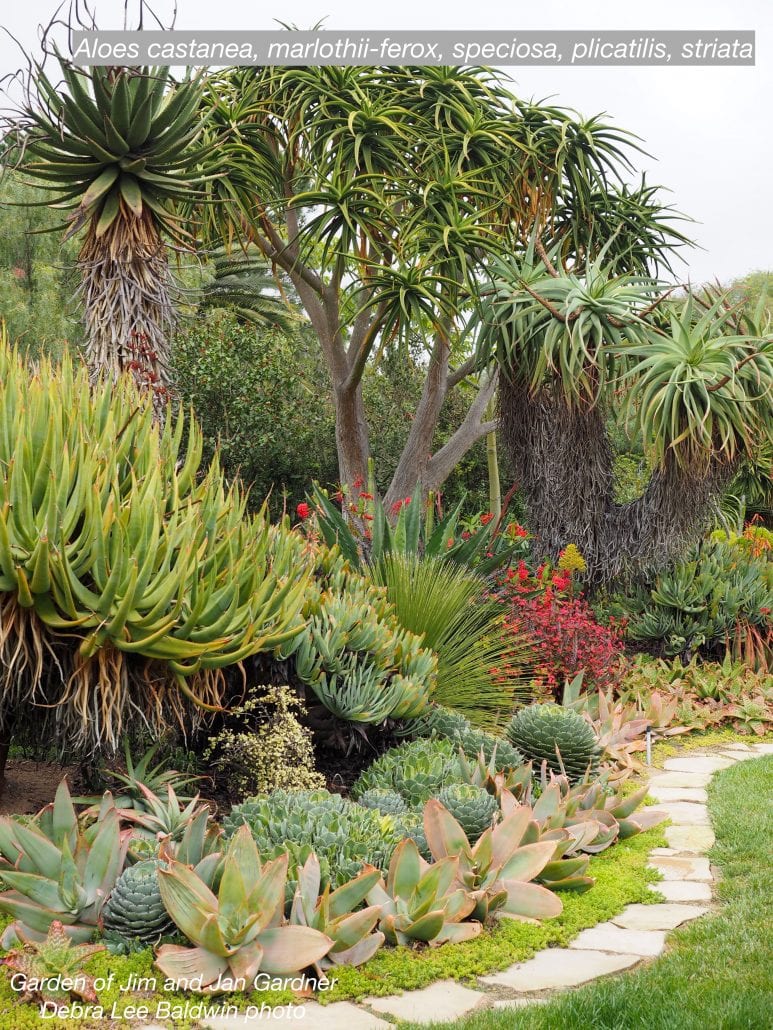
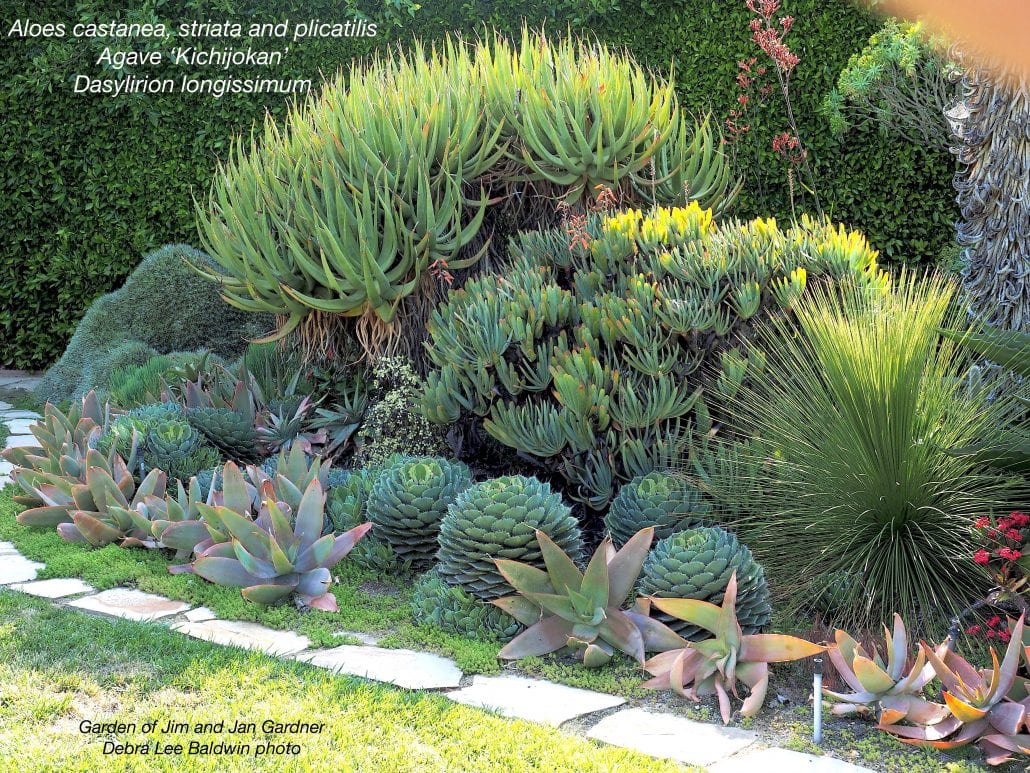
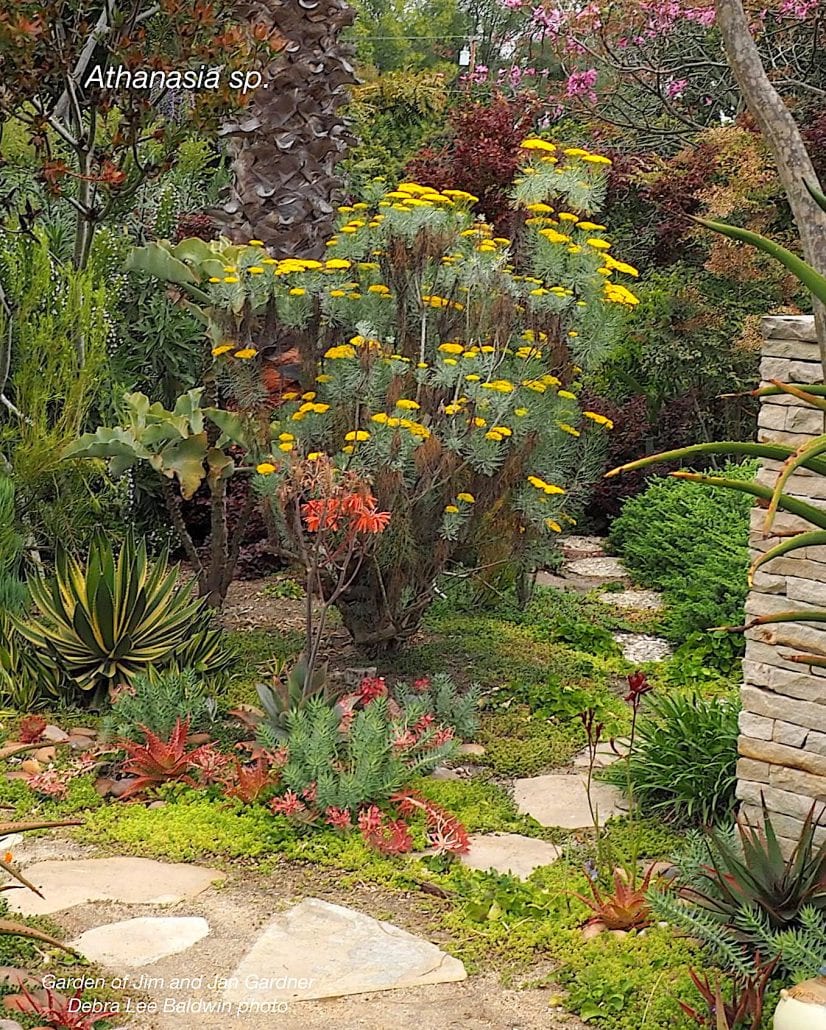
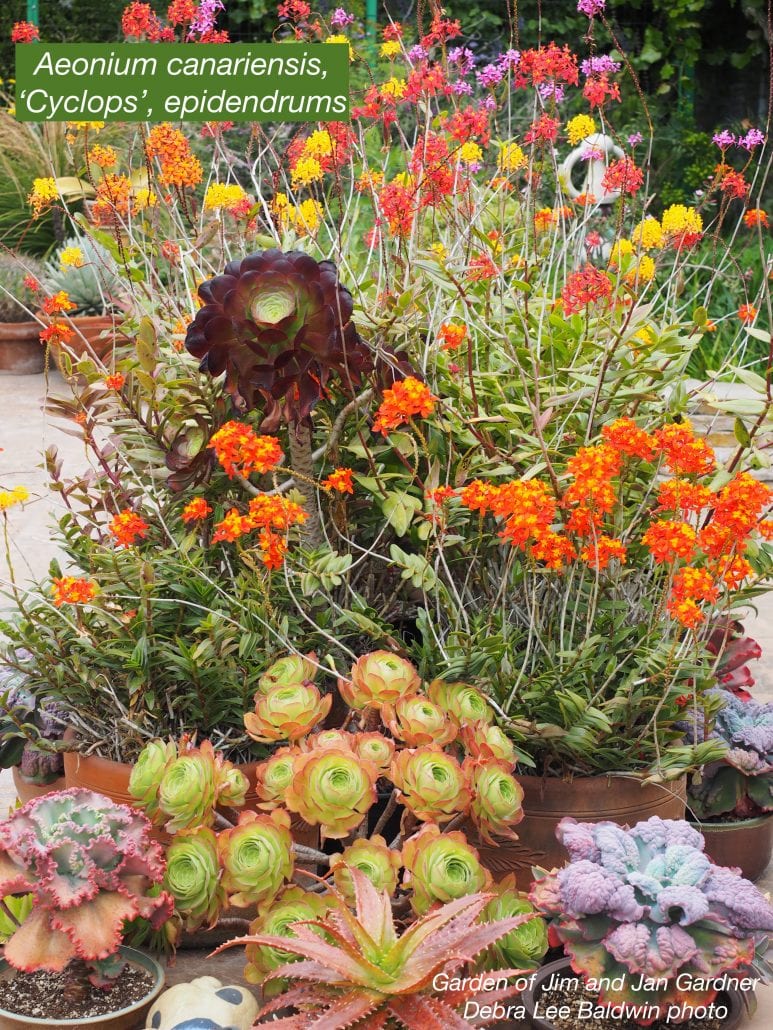
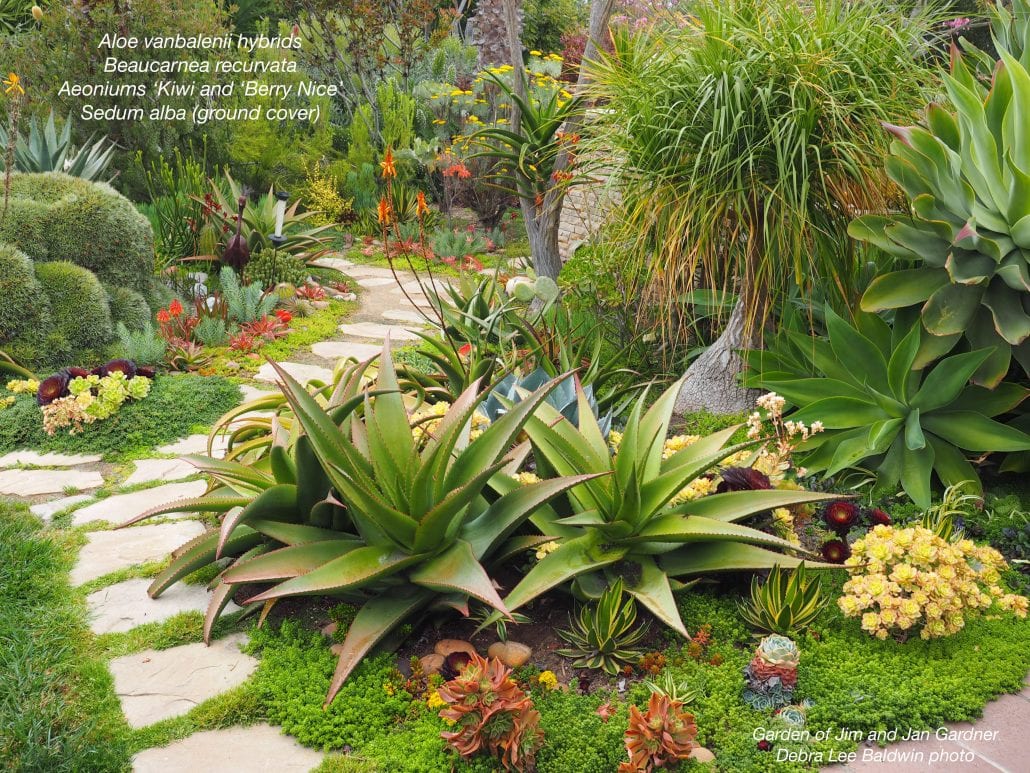
Jim and Jan Gardner’s colorful, textural landscape near Los Angeles showcases hundreds of varieties of mature succulents and waterwise plants.

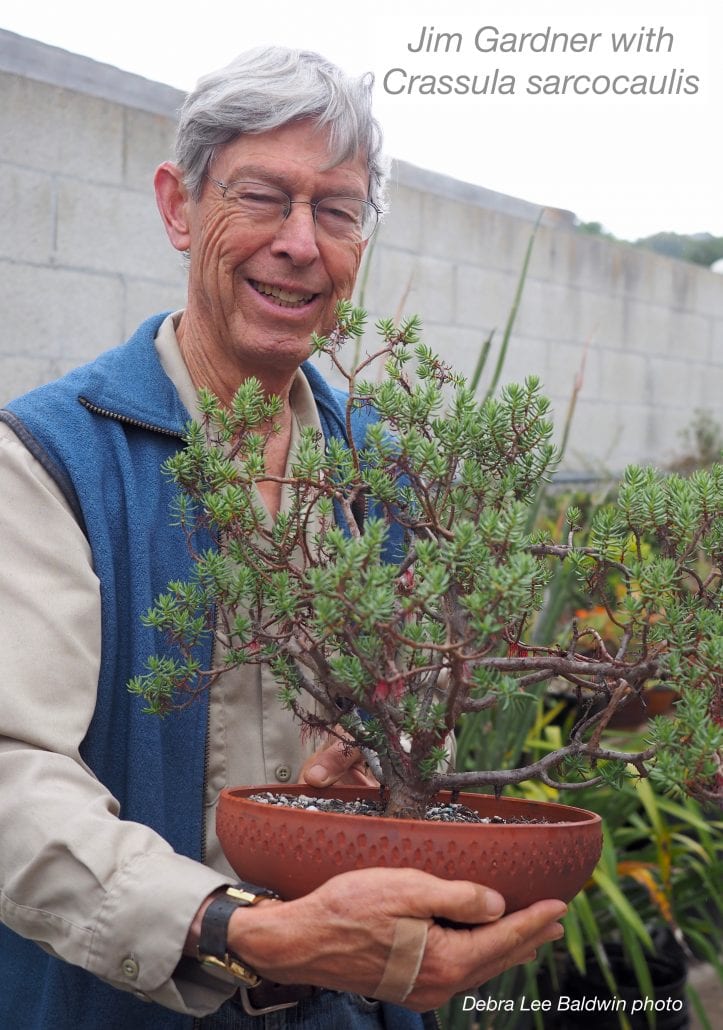
A retired MD, Jim’s the “succulent guy” at nearby South Coast Botanic Garden and an art potter as well.

For over 40 years, the Gardners have lived in the Rolling Hills Estates community of the Palos Verdes peninsula, which juts from the coastline like a burl on an oak. It’s a highly desirable habitat for plants as well as people, and a great place to view large specimens. Tropicals and succulents have thrived in this mild, maritime climate for as long as nurseries have made them available.

Palos Verdes peninsula, southwest of LA. The red dot indicates the botanic garden.

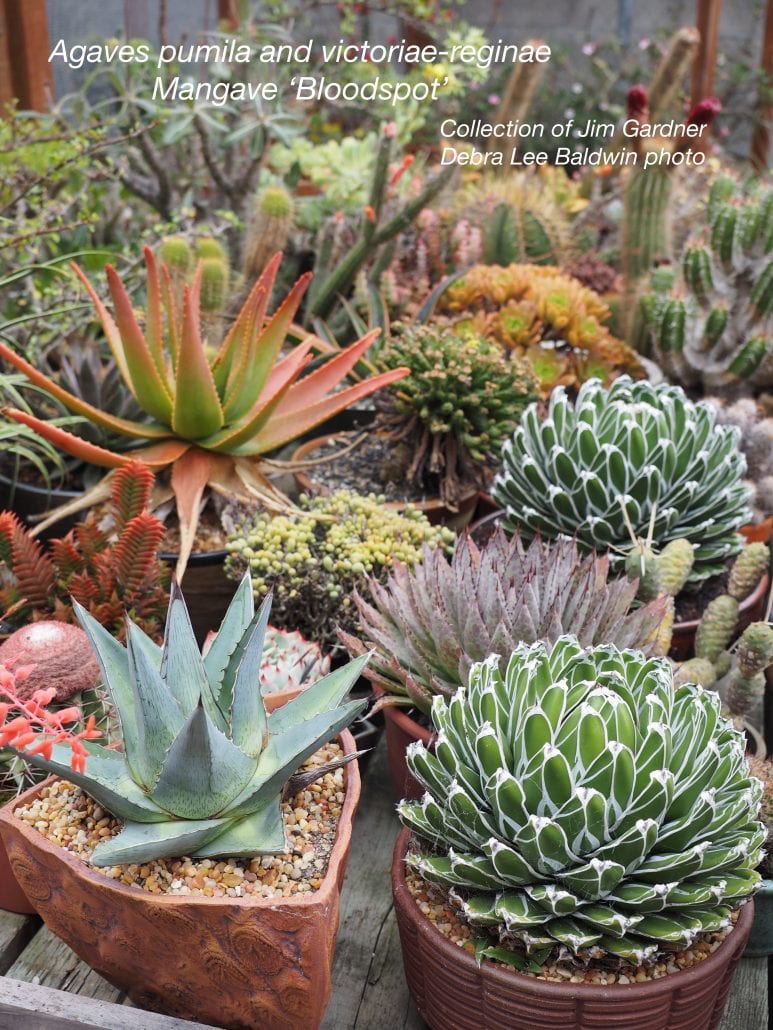
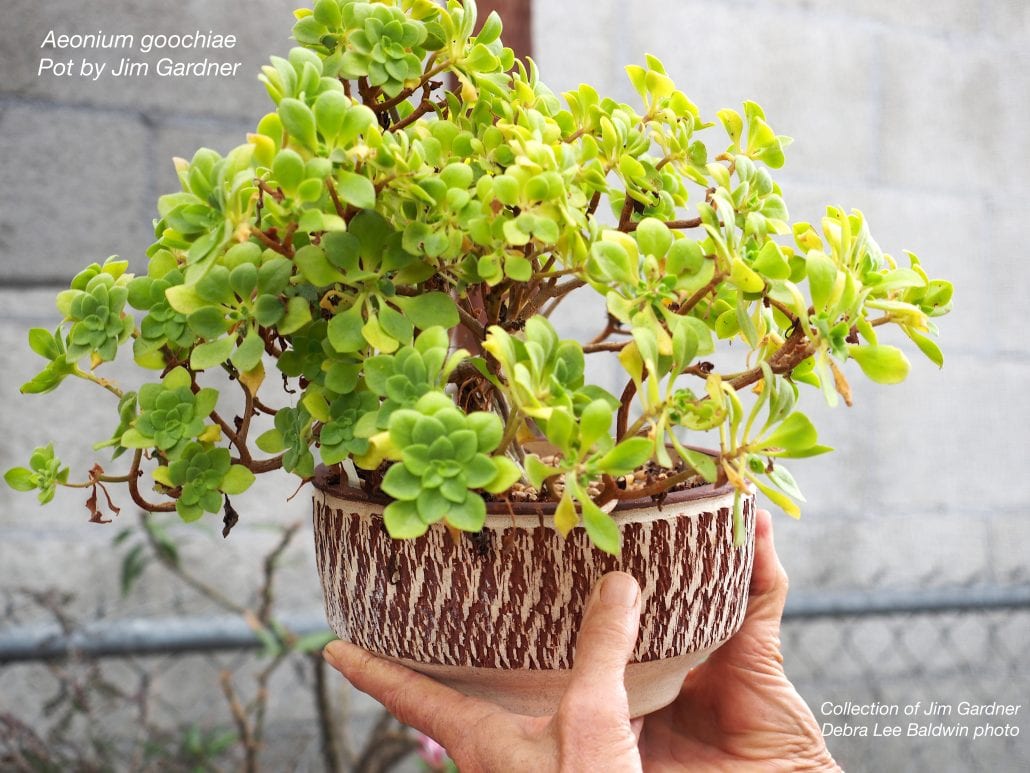
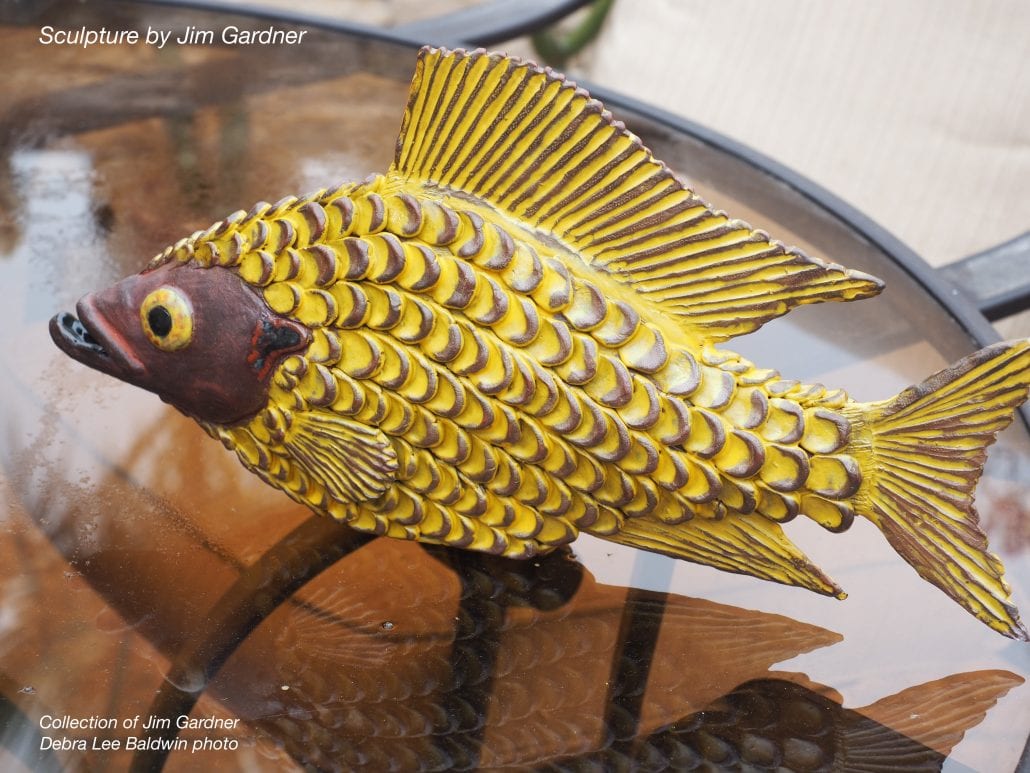
Jim is a self-described “biophile:” a person who enjoys interacting with nature’s life forms. “They stick to me,” Jim says of his collection of 1,300 potted succulents and cacti. Many are in containers made by Jim himself, who after 30 years in internal medicine at Kaiser’s South Bay Medical Center, became an artist-potter. His highly sought-after work is characterized by organic textures derived from items such as pine cones and tree bark. A long-time Cactus and Succulent Society member, Jim is the volunteer “succulent guy” at nearby South Coast Botanic Garden, where his pots are available at the gift shop and annual two-day Cactus & Succulent Show in April.

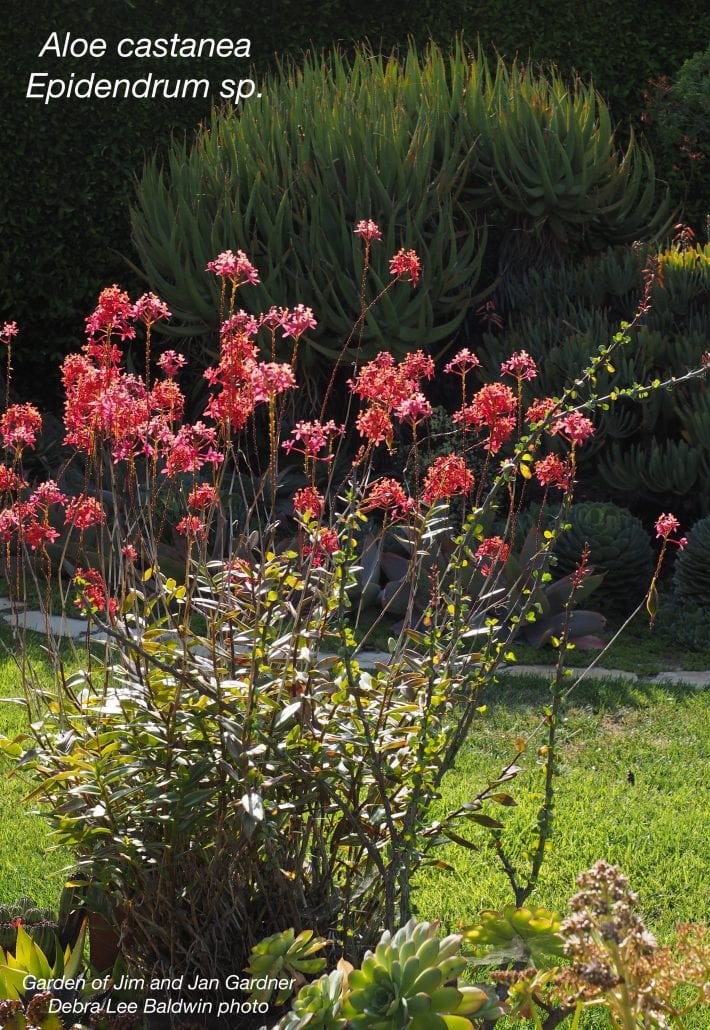
Jim makes it look easy to grow 20-foot tree aloes, airy epidendrums and sofa-sized deuterochonias (a spiky, colony-forming bromeliad). But like any avid biophile, he’s made his share of mistakes. Years ago, for example, when applying herbicide to an invasive grass, Jim sprayed his succulent euphorbias as well. “They turned to mush,” he recalls with a wry smile.

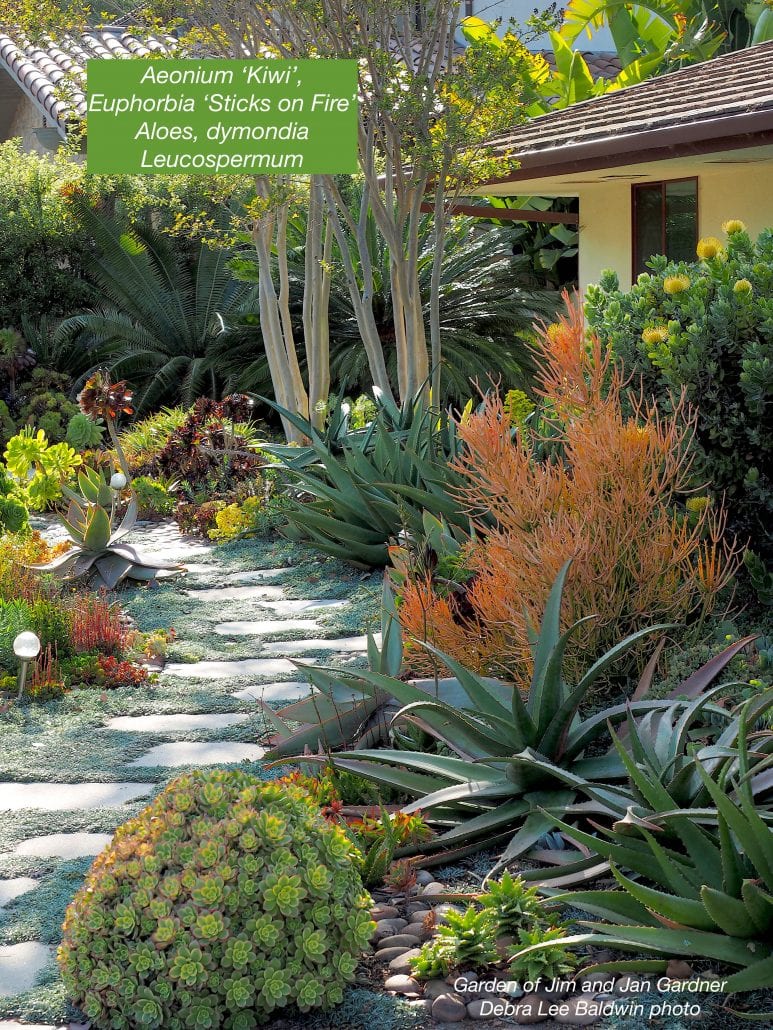
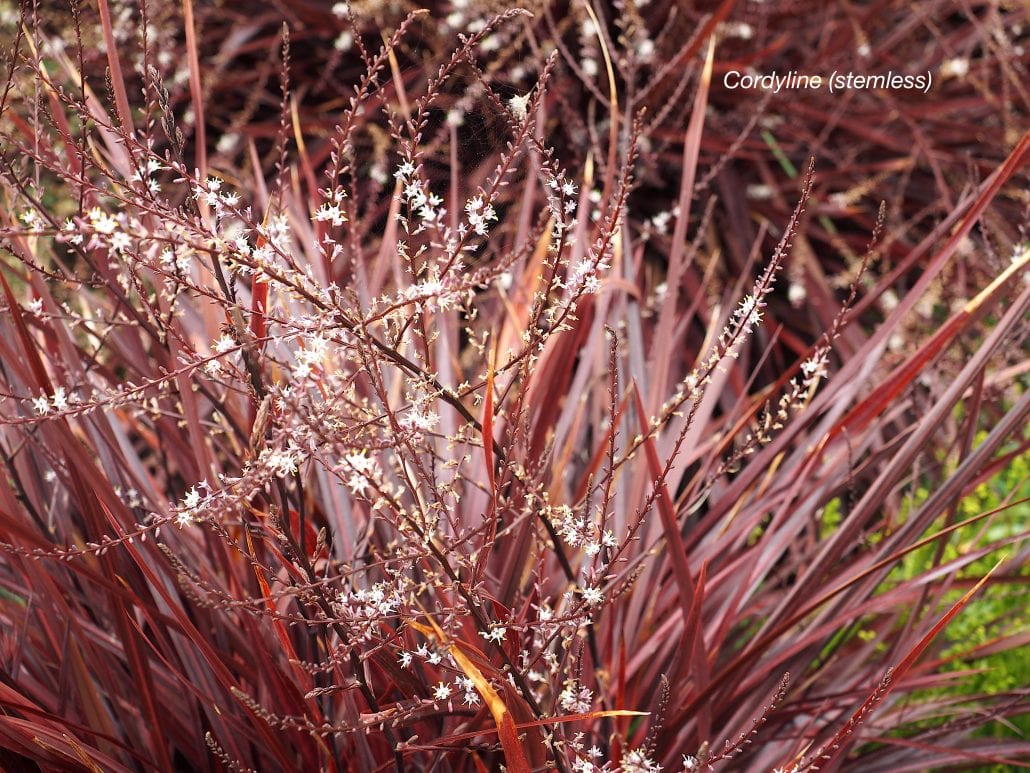
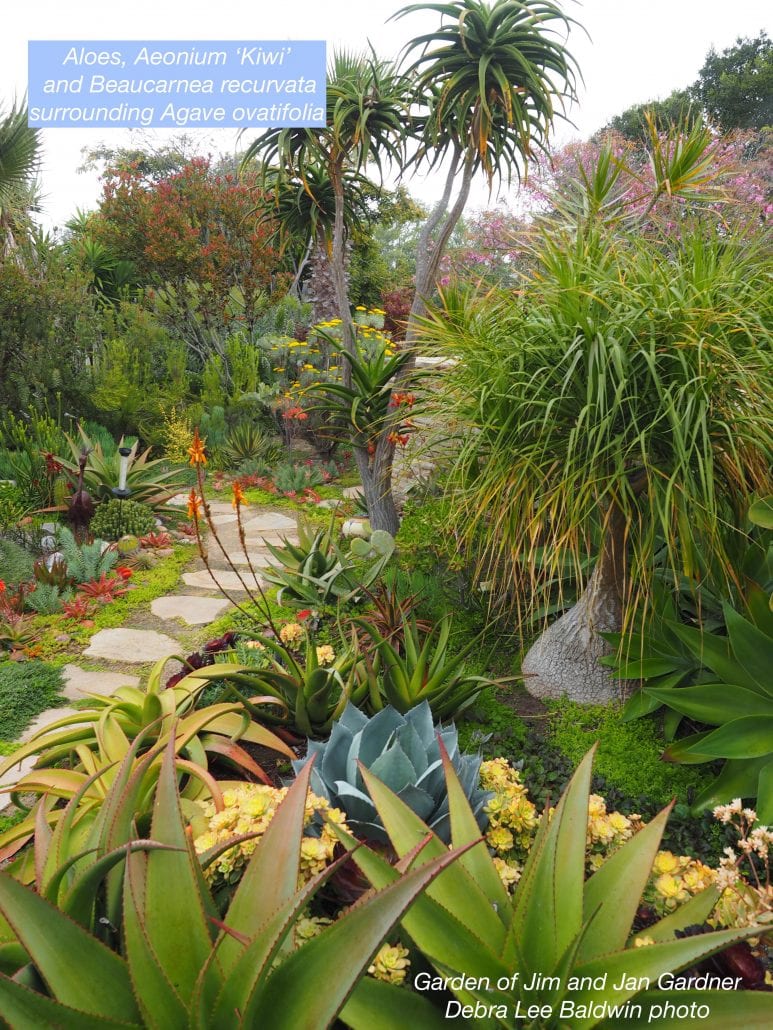
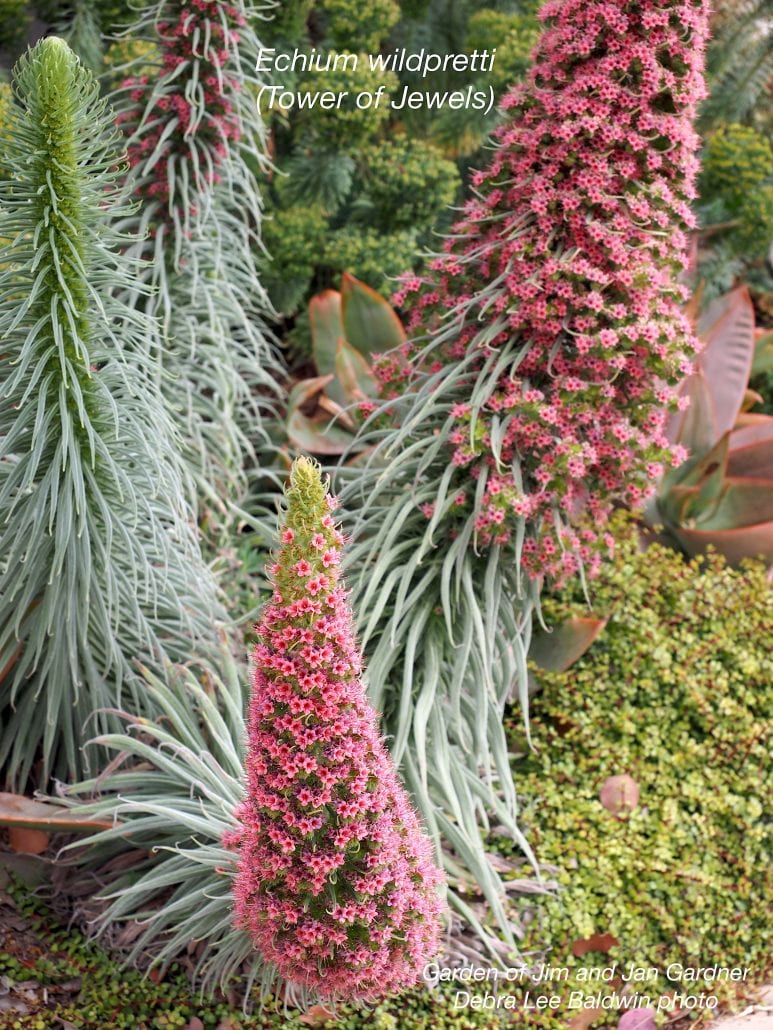
“Out in front,” he adds, “I trimmed the lavenders too vigorously and killed them, so that’s how these plants happened.” He gestures to a streetside garden lush with aeoniums, aloes and shrub euphorbias. Pavers that traverse the area appear grouted with dymondia, a low-water ground cover that withstands foot traffic. Other low-water ornamentals include tower of jewels (Echium wildpretti), with conical, deep pink, 5-foot bloom spikes; and a trunkless burgundy cordyline with white flowers that suggest shooting stars.

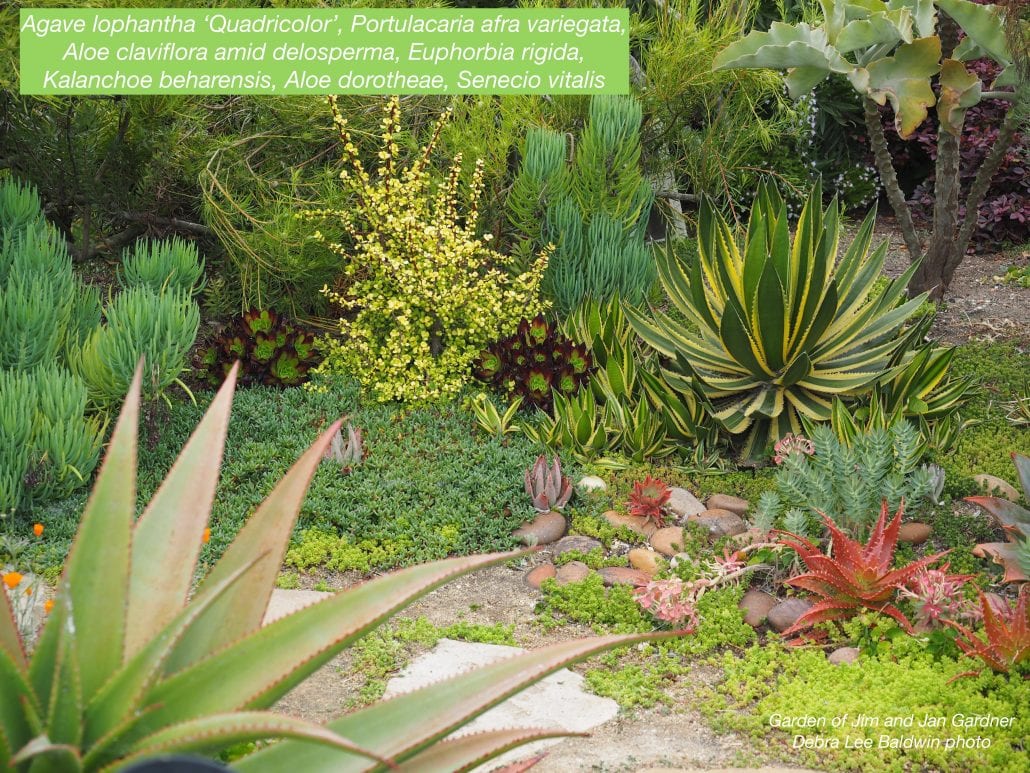
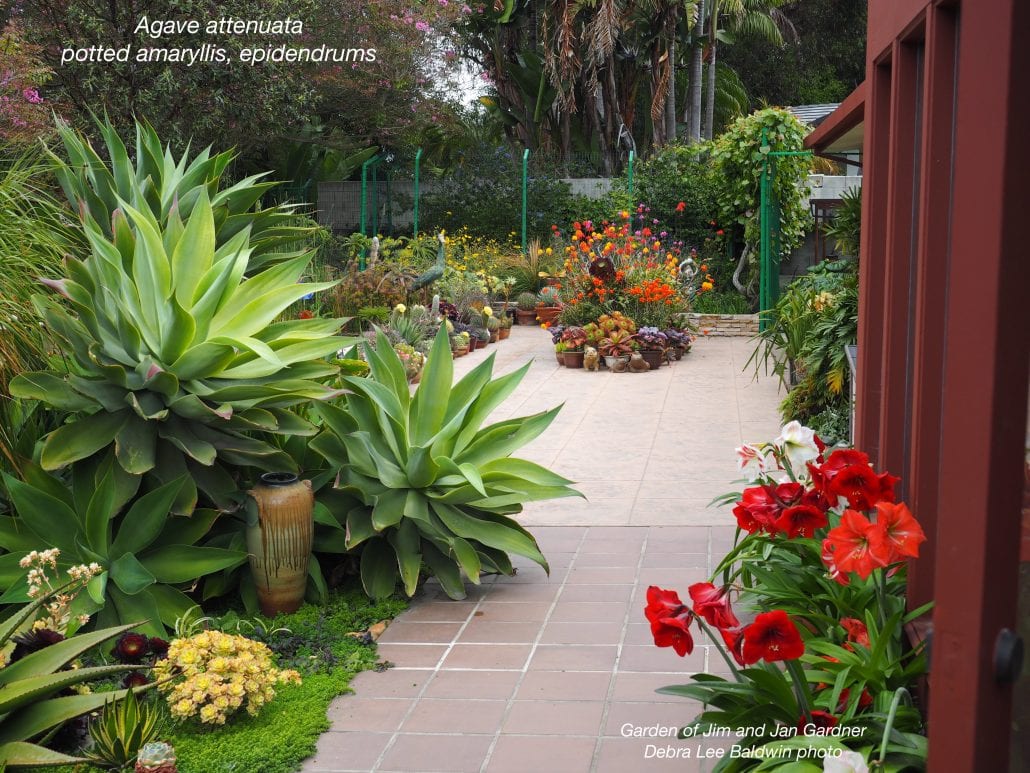
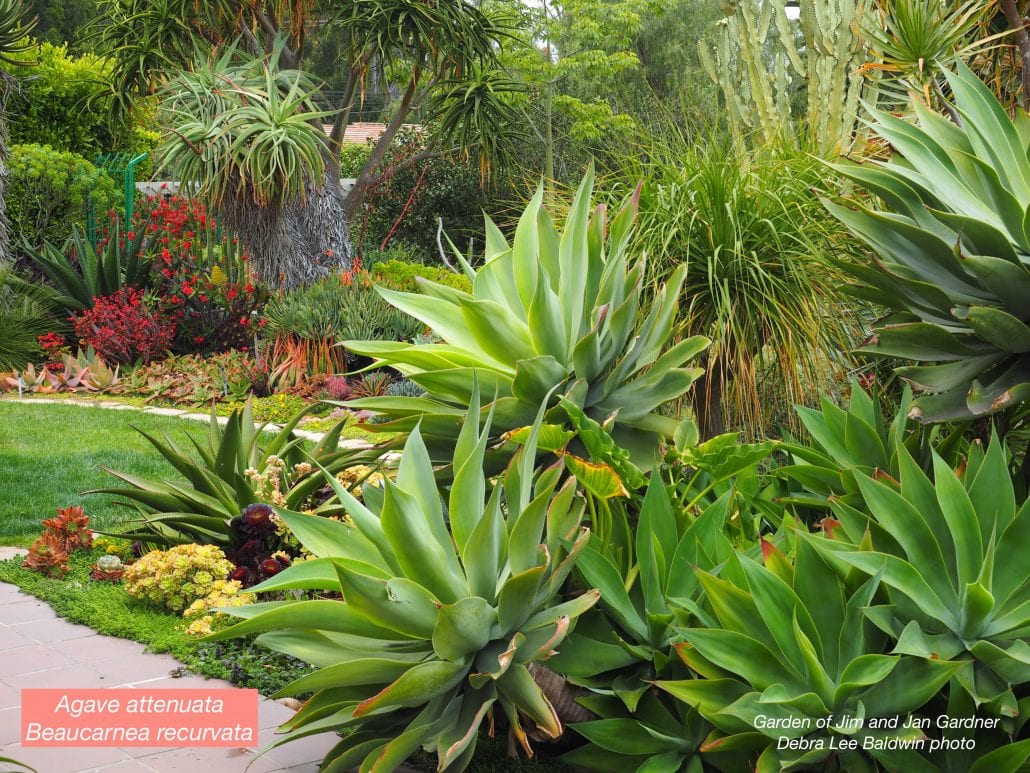
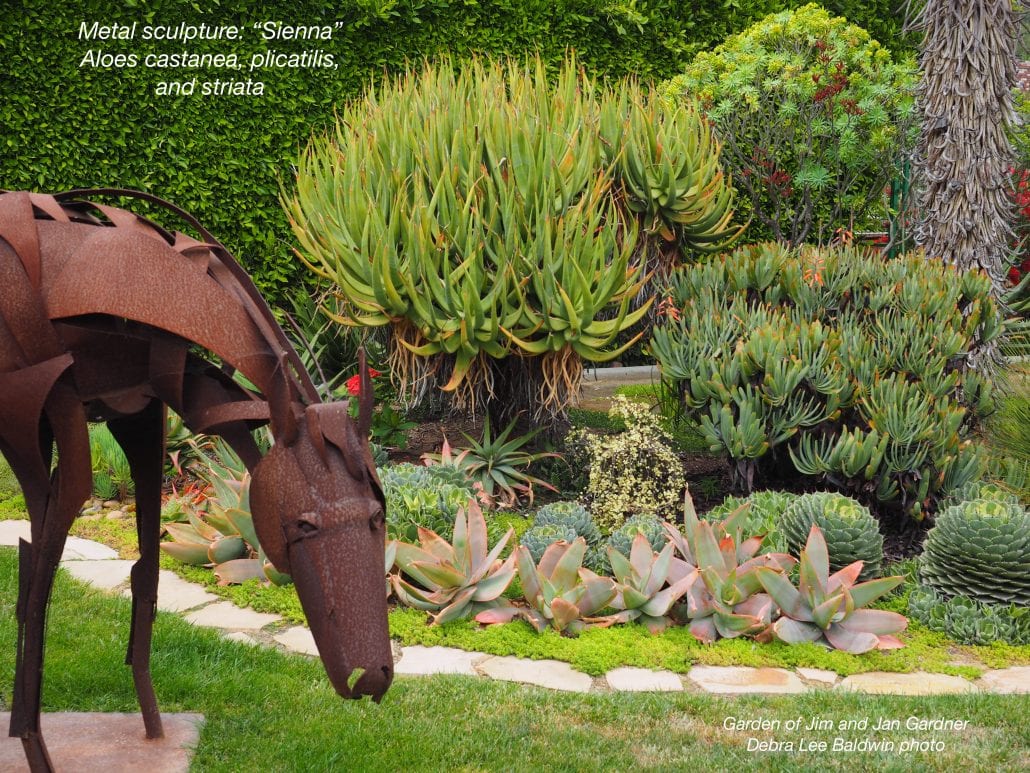
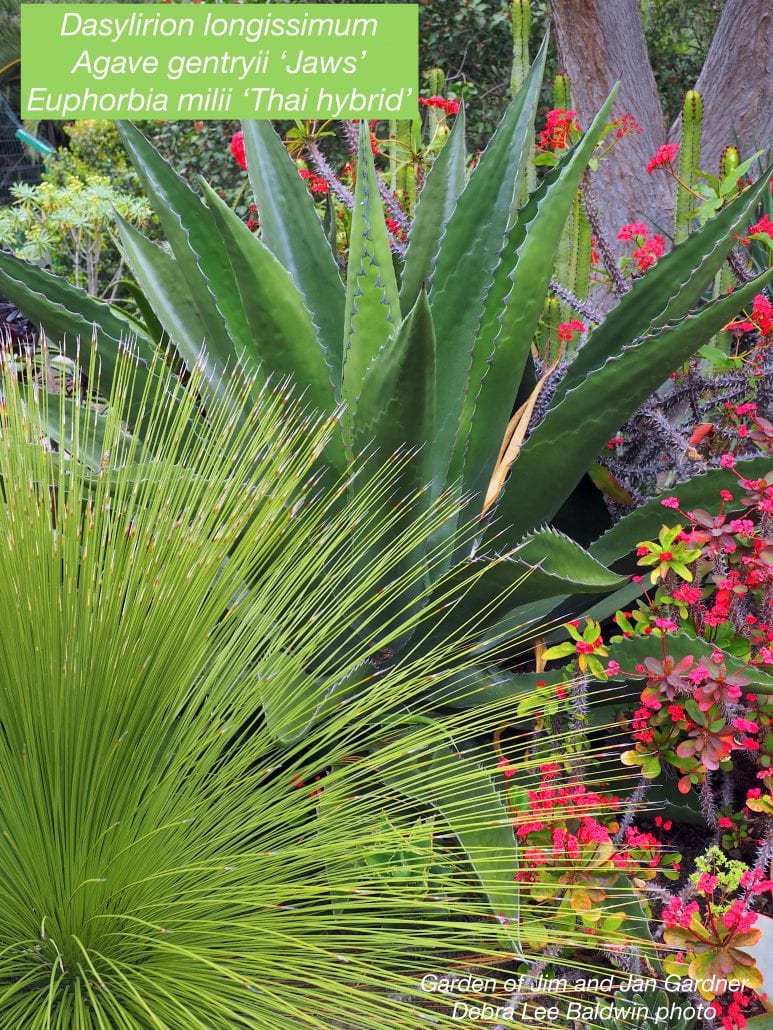
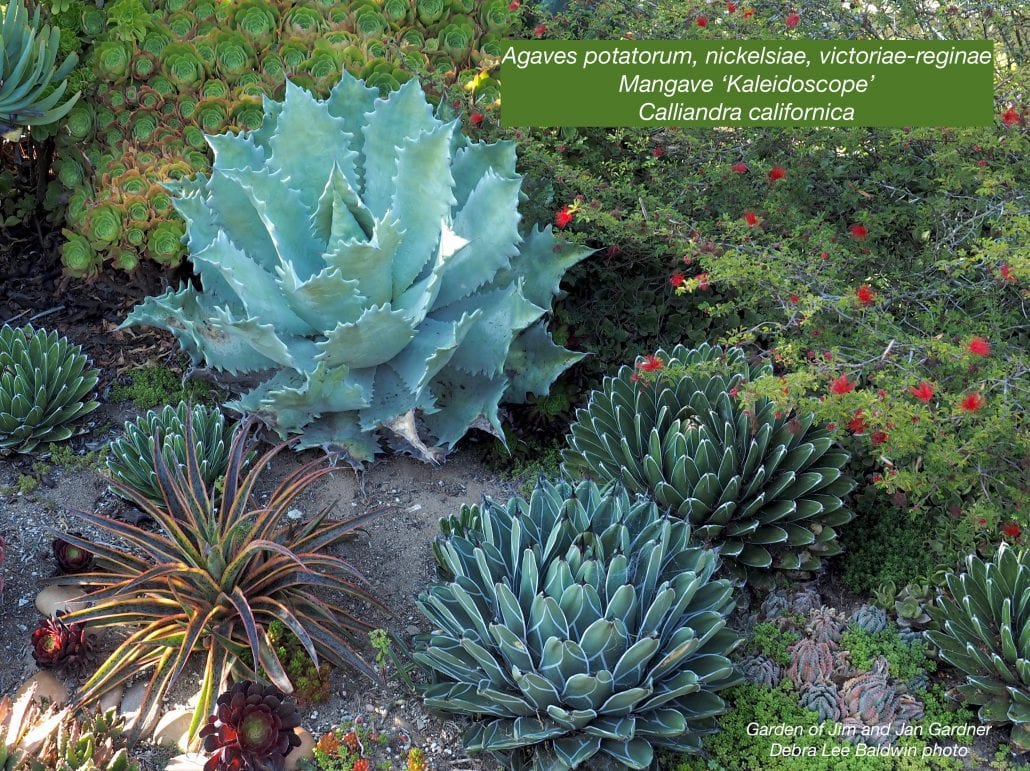
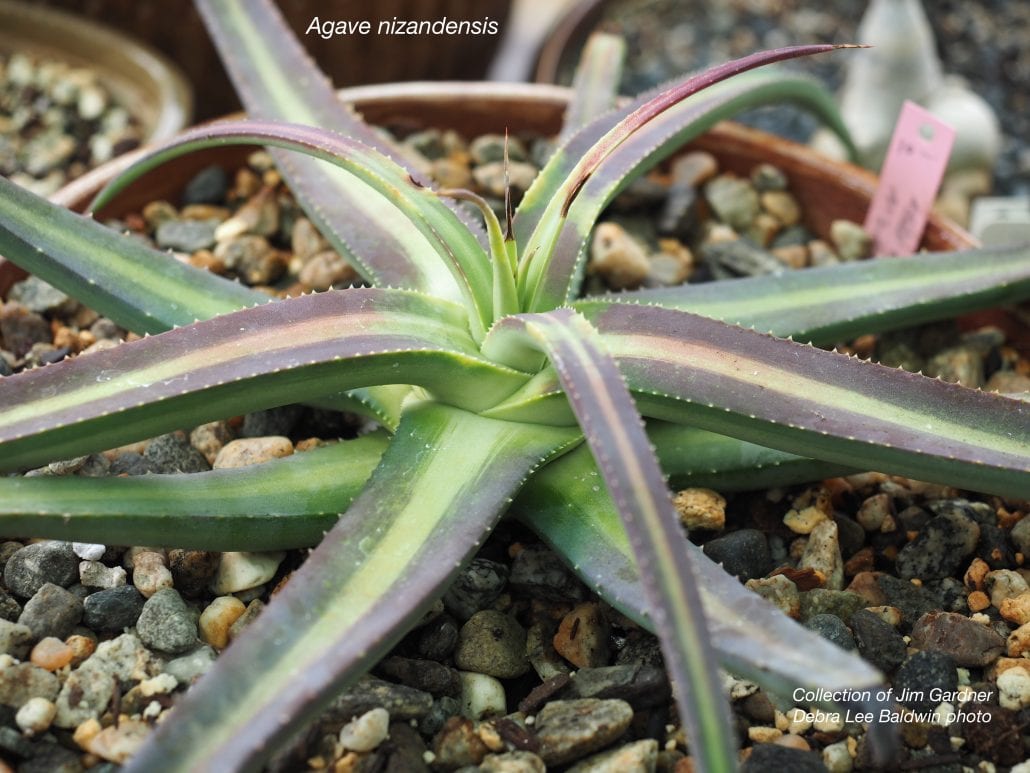
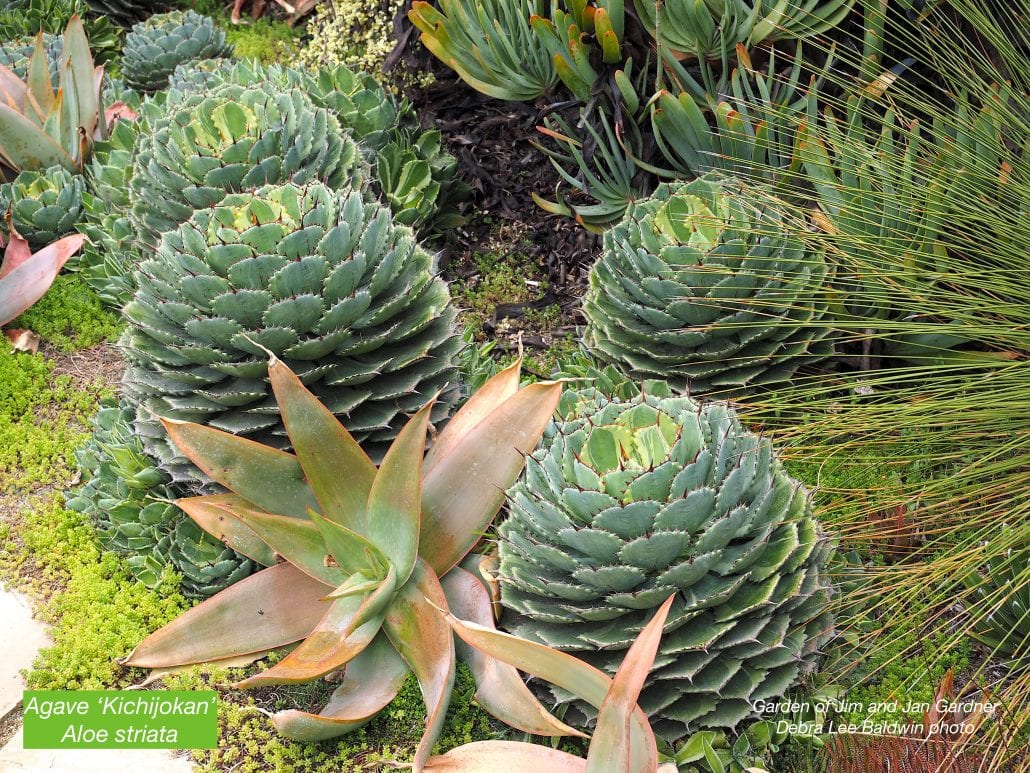
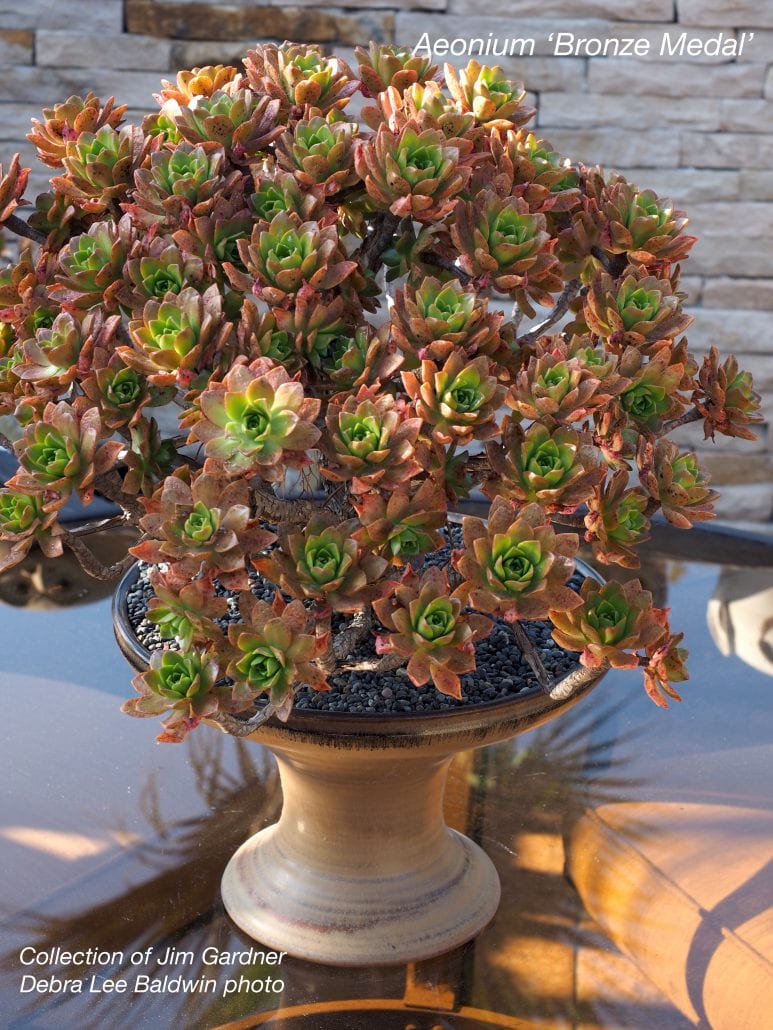
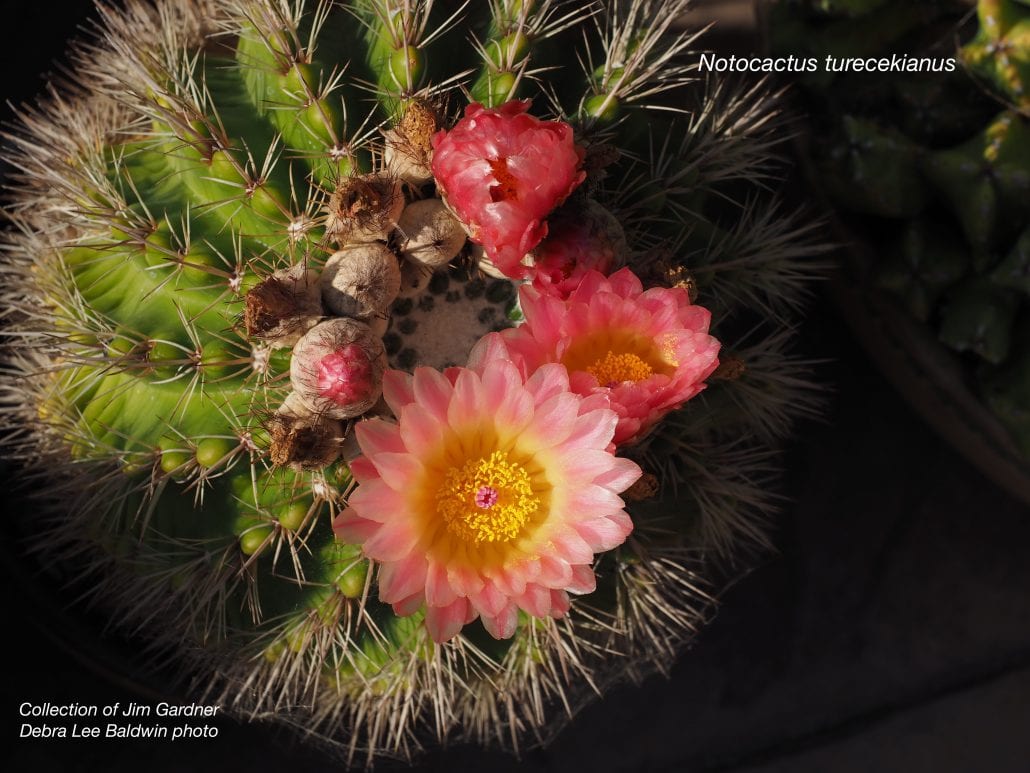
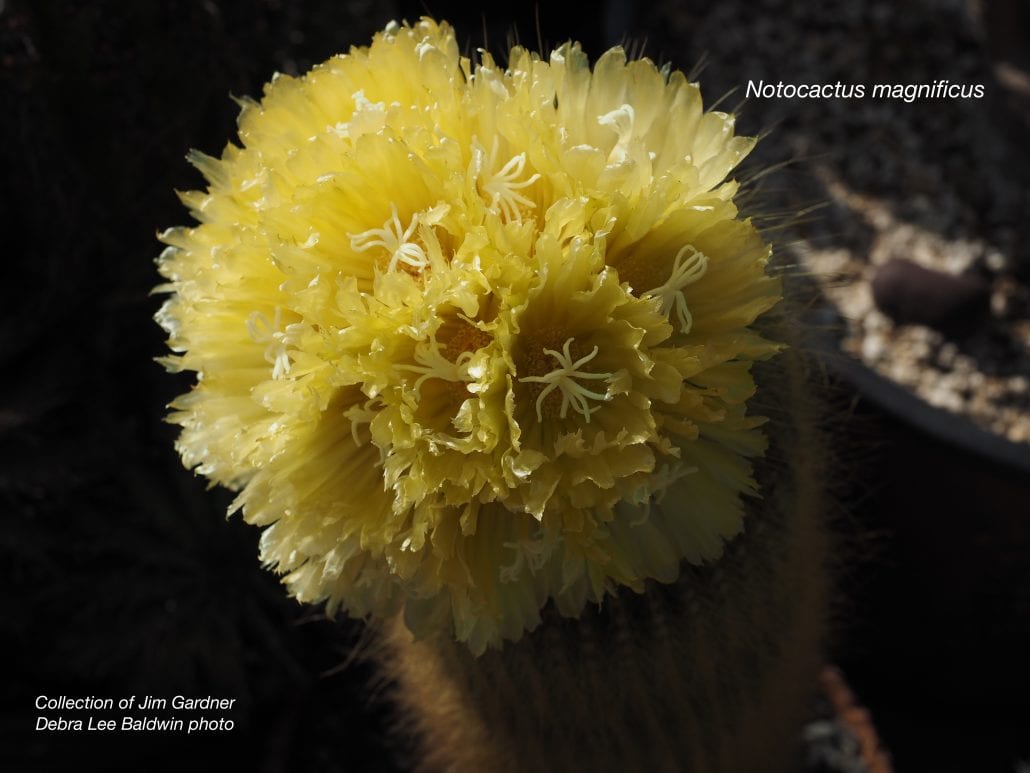
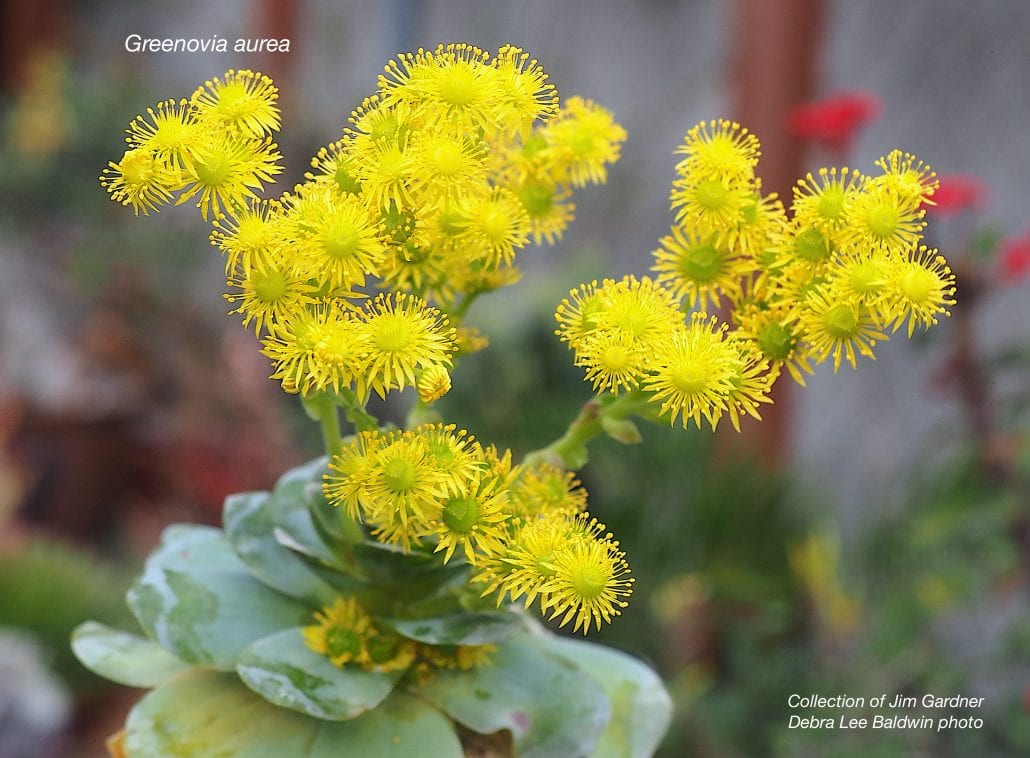
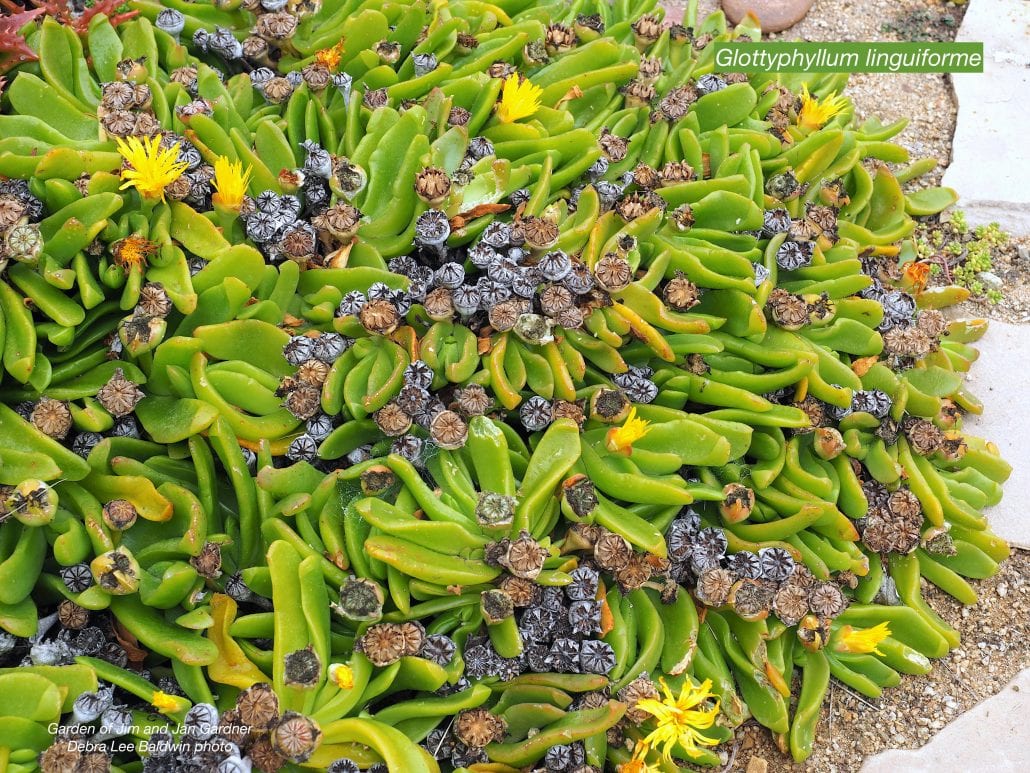
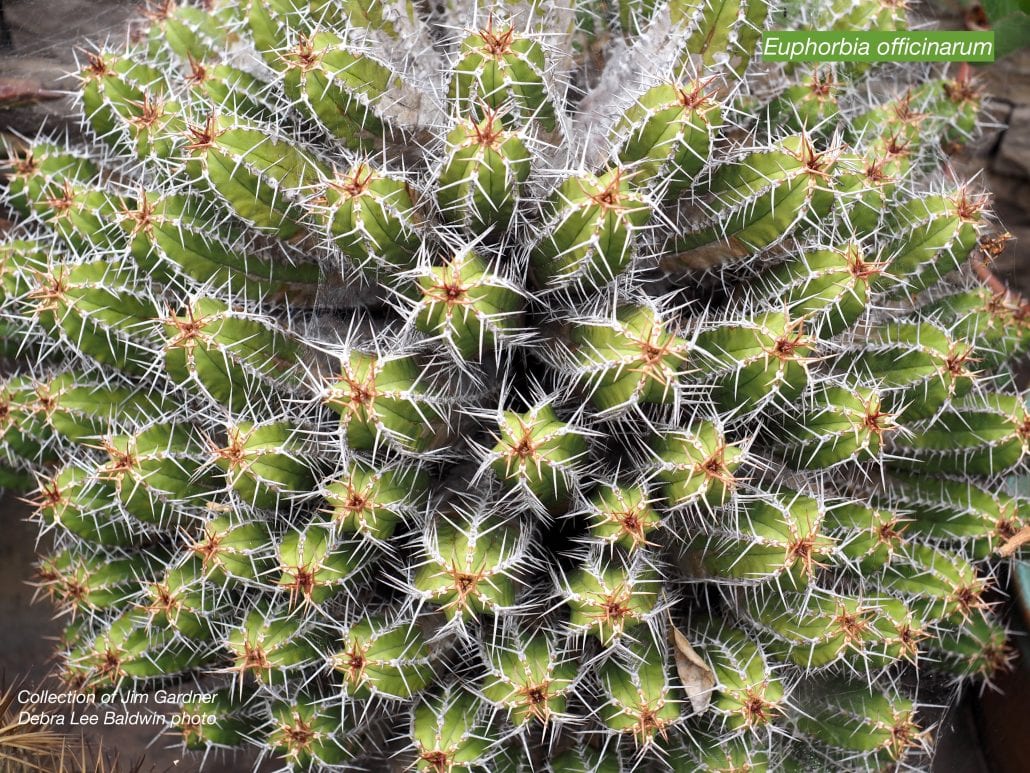
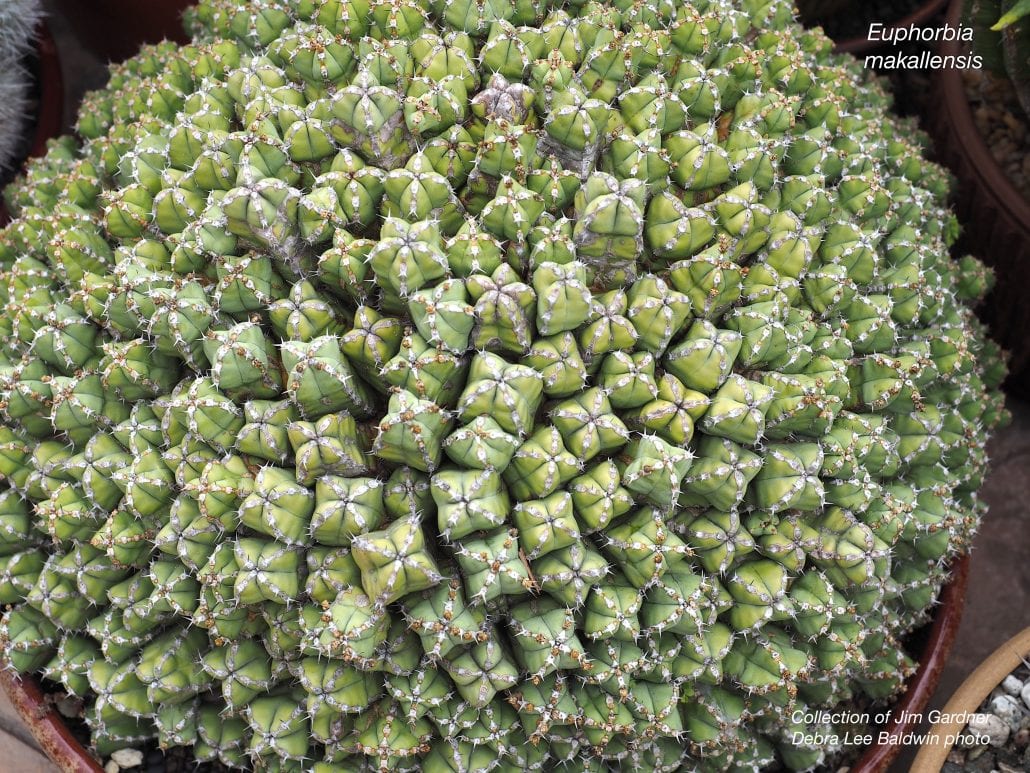
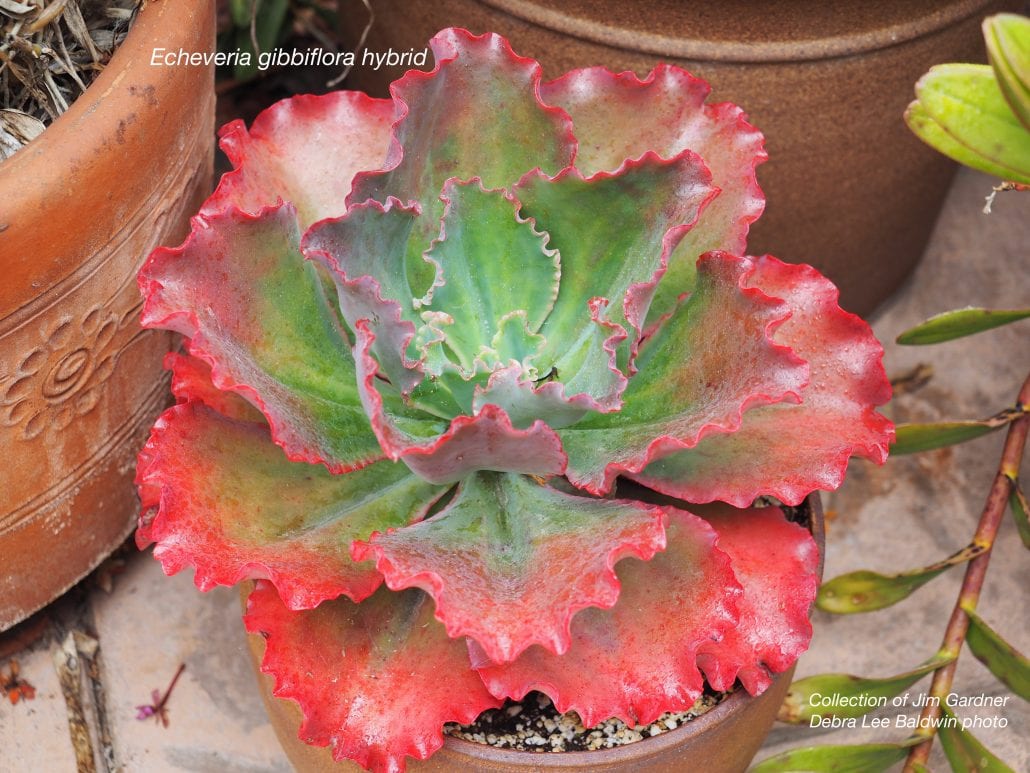
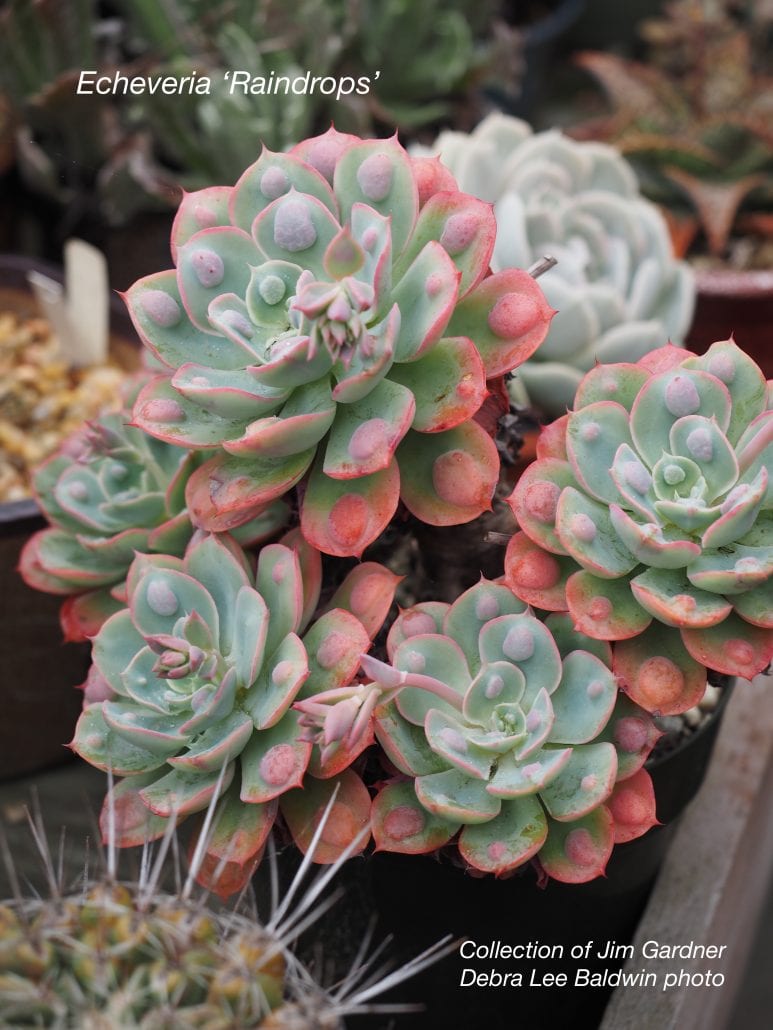
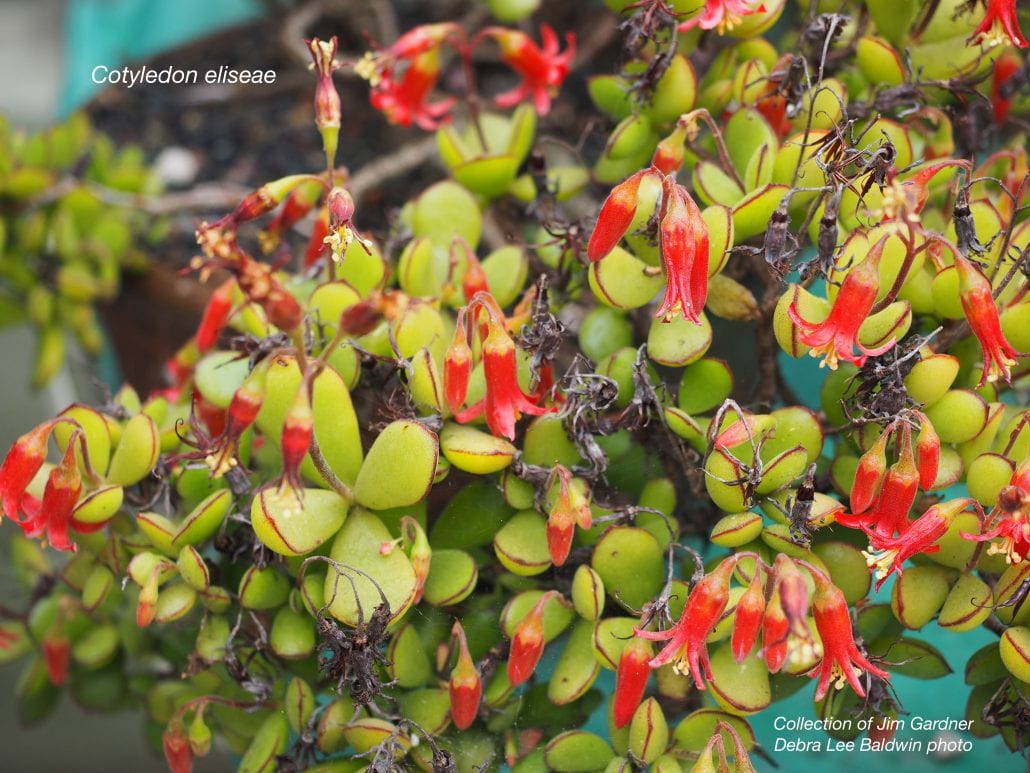
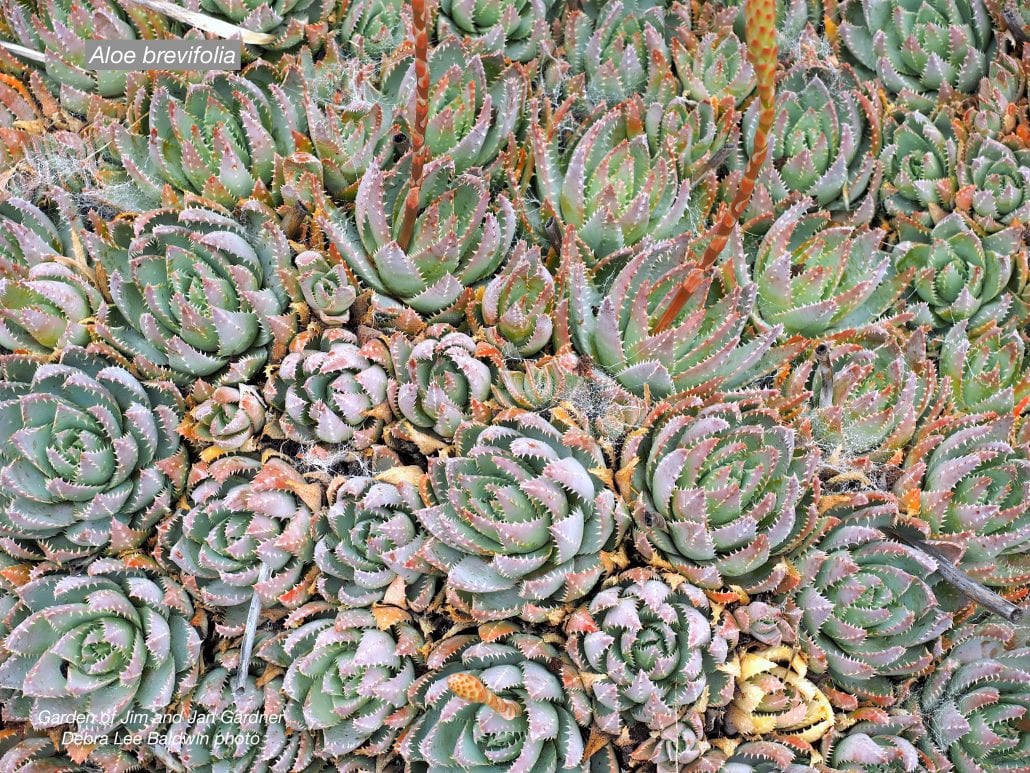
As you might imagine, it was a treat for me to meet Jim and Jan and see their garden, a visit made possible by Jackie Johnson, president of the Peninsula Garden Club, where I gave a presentation on Designing with Succulents. Jim graciously provided IDs for the main plants in my best photos—well, the top 60—40 of which are here for you to enjoy. I’ve posted on Instagram several short videos taken at Jim’s, but THE must-see is my newly released, 5-minute YouTube video: “Jim Gardner’s Succulent Showcase, Palos Verdes.”

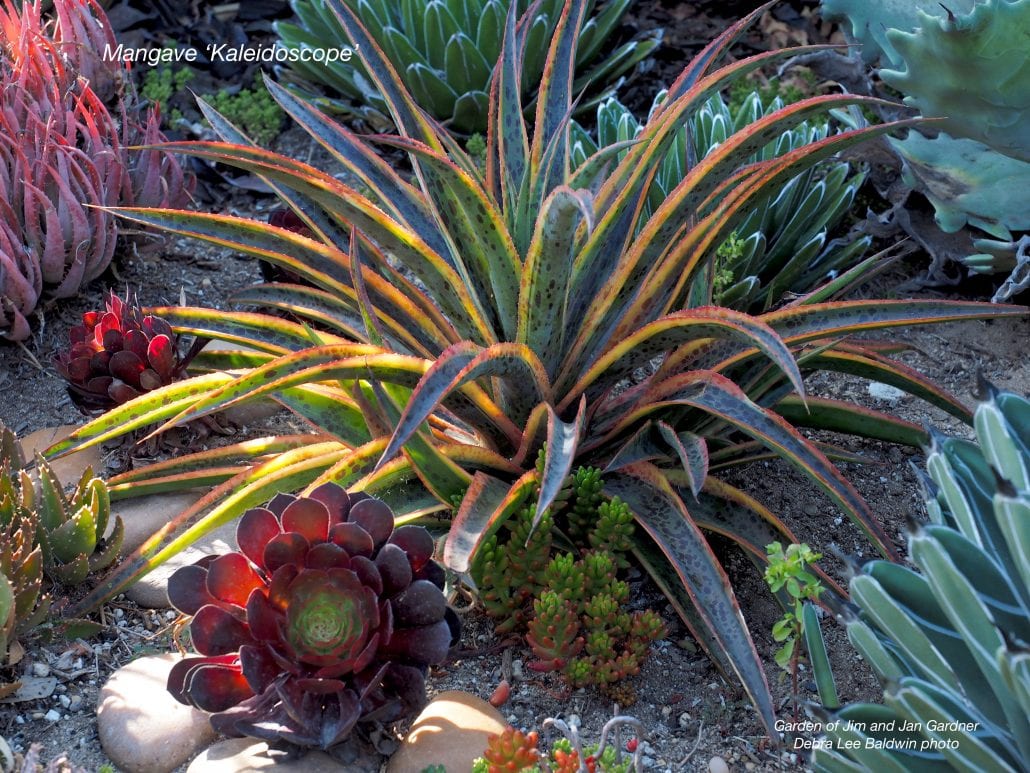
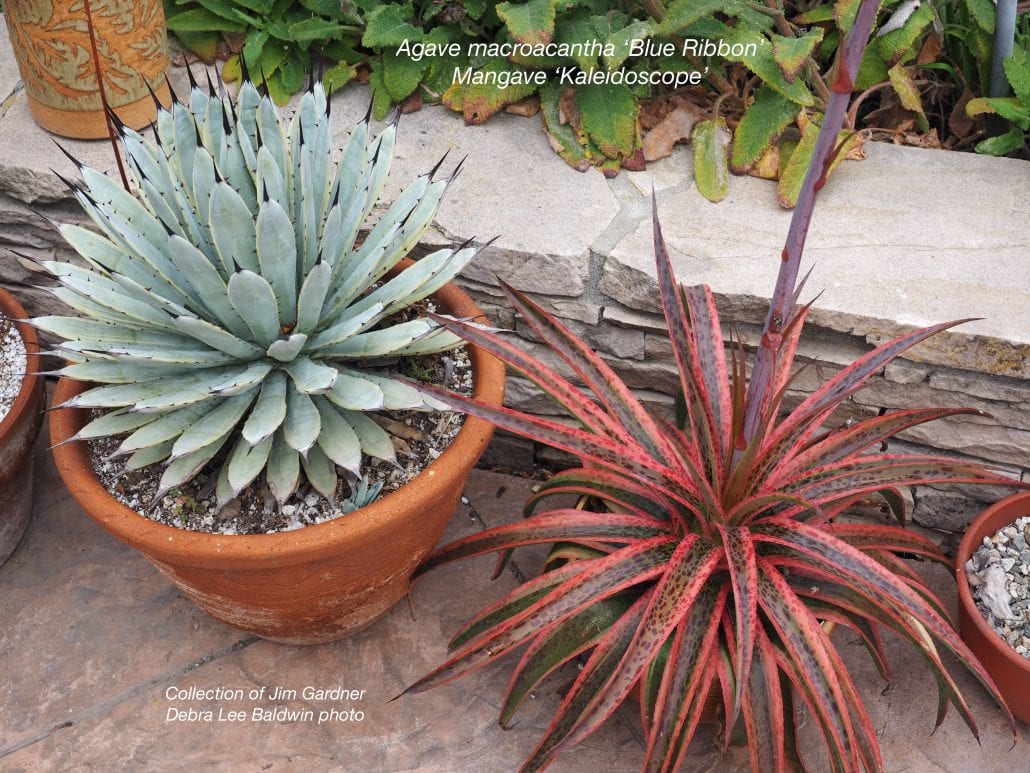
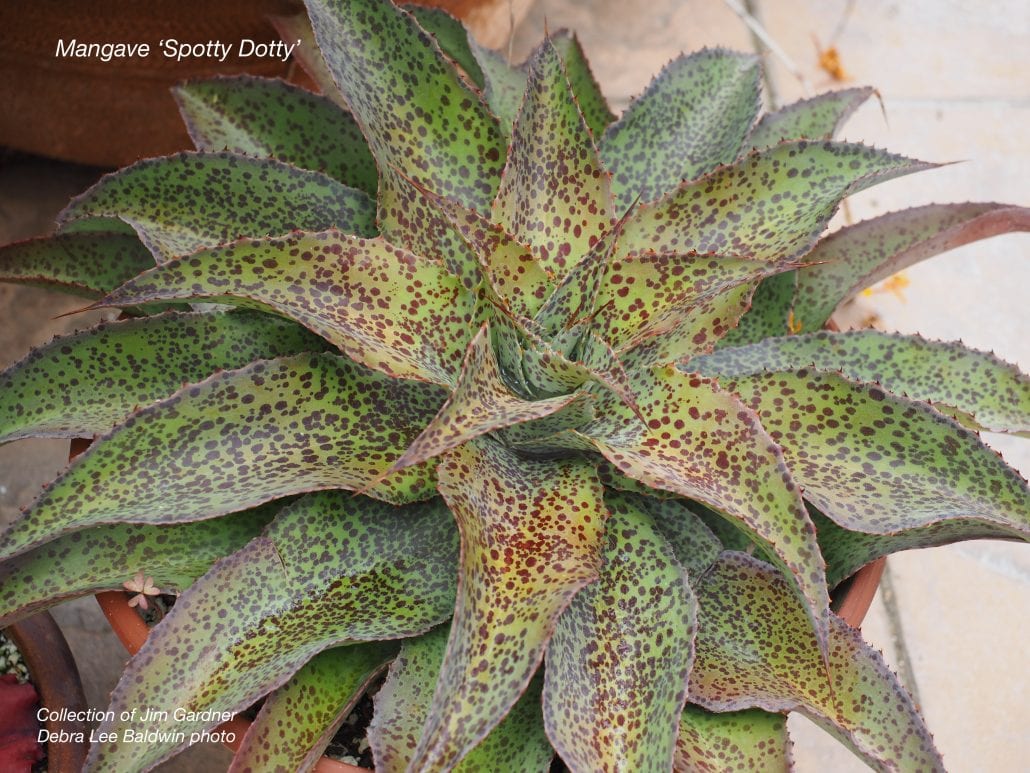
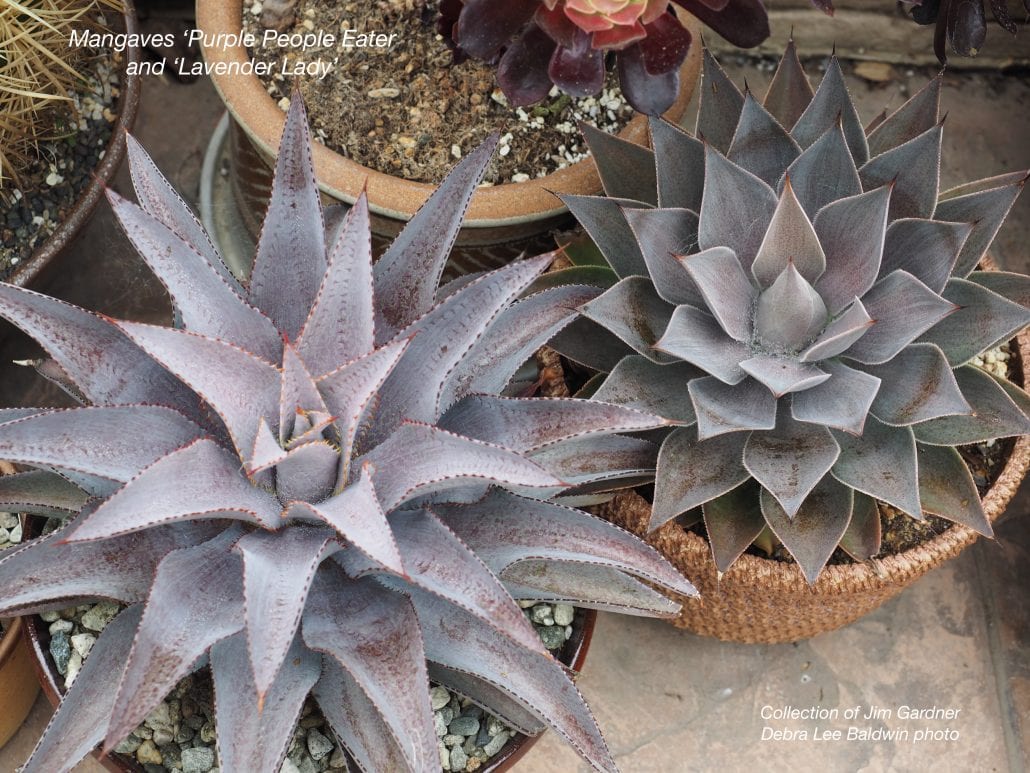
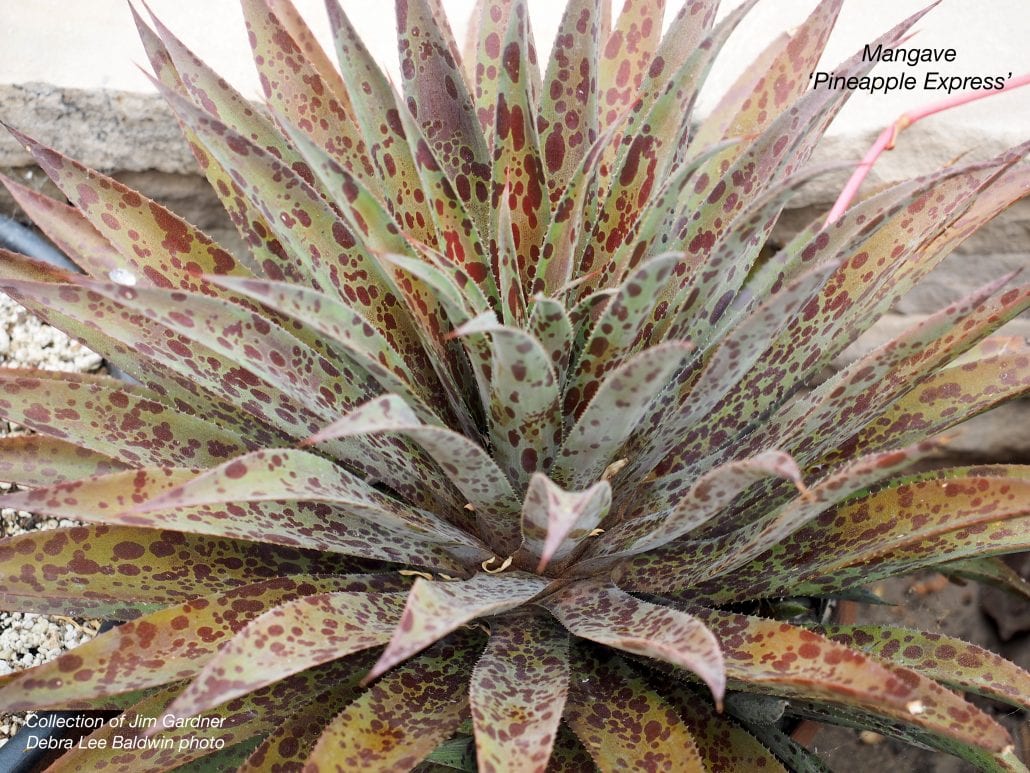
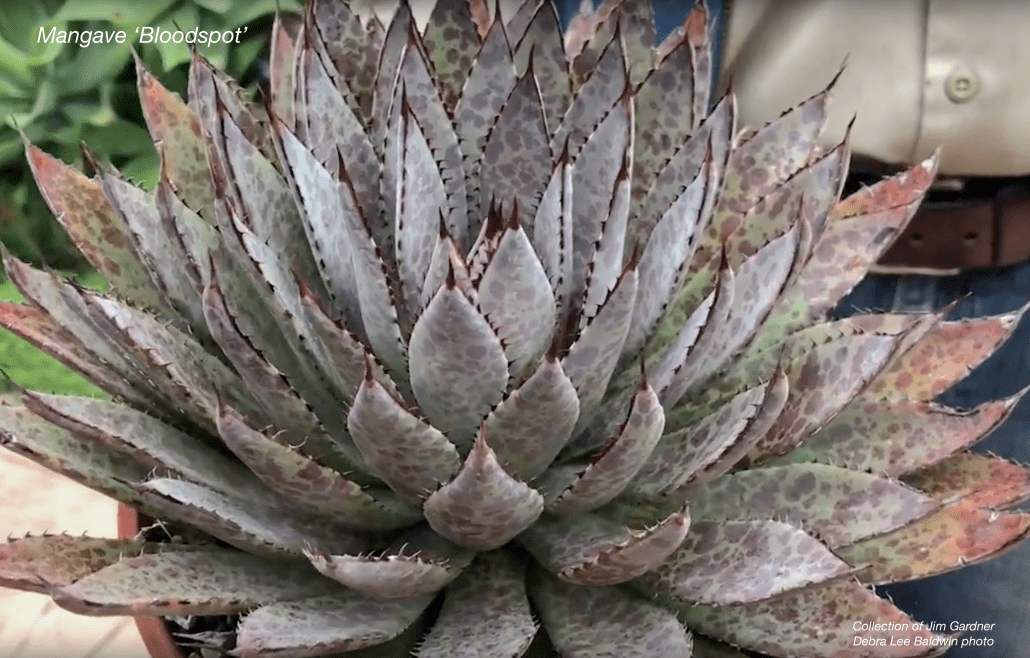
Btw, Jim collects and hybridizes mangaves (Manfreda x Agave hybrids). You’ll notice these intriguing dotted and speckled succulents in some of my photos. Be sure to watch for a future newsletter in which I’ll explain why these increasing popular succulents deserve to be in your own collection.

And now…drum roll…my annotated gallery of the Gardners’ garden ~


Related info on this site:

Patrick Anderson’s Garden: It All Started with Aloes

Fleshy green monsters in Patrick Anderson’s Fallbrook garden look like they might snap him up if he turns his back. They’re giant succulents, and Anderson’s half-acre hillside showcases hundreds of unusual ones. “I like their huge, sculptural forms,” [Continue reading]

Succulent Garden Design Essentials 

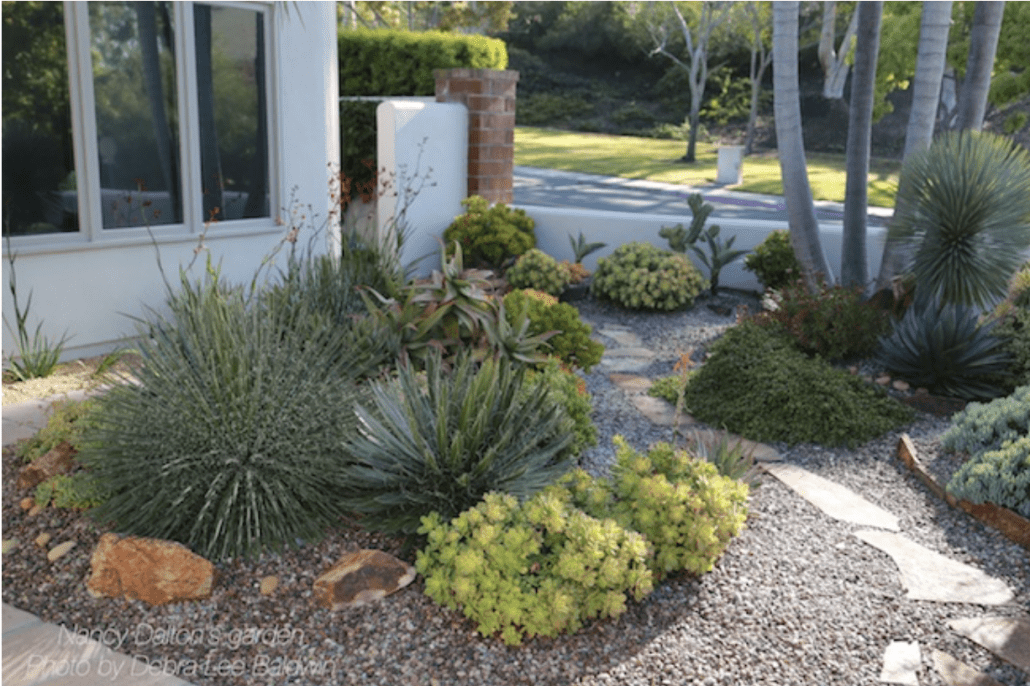
Nancy Dalton’s award-winning succulent garden in San Diego is an outstanding example of smart landscaping for Southern California’s arid climate. Enjoy it’s many pleasing and practical aspects and keep these dozen ideas in mind [Continue reading]


The post Jim Gardner’s Succulent Showcase in Palos Verdes appeared first on Succulents and Succulent Garden Design | Debra Lee Baldwin.


from Succulents and Succulent Garden Design | Debra Lee Baldwin https://ift.tt/2LcSUJ8
via IFTTT